Manage Product Categories in BoxNCase Admin
Product categories provide hierarchical organization for your product catalog, enabling customers to browse products by type or theme while supporting complex organizational structures. This comprehensive guide covers category creation, management, and optimization for enhanced customer browsing and internal organization.Understanding Product Categories
Product categories serve as hierarchical organizational structures that group products by type, theme, or business logic, providing flexible browsing experiences for customers.Category System Features
Hierarchical Organization- Nested Structure: Create multi-level category trees (e.g., Women’s → Shoes → Sneakers)
- Flexible Depth: Support unlimited nesting levels for complex product organizations
- Parent-Child Relationships: Establish logical category relationships and inheritance
- Multiple Category Membership: Products can belong to multiple categories simultaneously
- Cross-Category Organization: Support diverse product categorization strategies
- Dynamic Assignments: Easily reassign products as catalog evolves
- Active/Inactive Status: Control category availability on storefront
- Public/Private Visibility: Manage internal vs customer-facing categories
- Custom Metadata: Store additional category information for integrations
Note: Product category assignment is managed through the product organization settings.
Product Categories List
To view all product categories, go to the Product ’ Categories page. From here, you can see a list, filter, and search through all categories.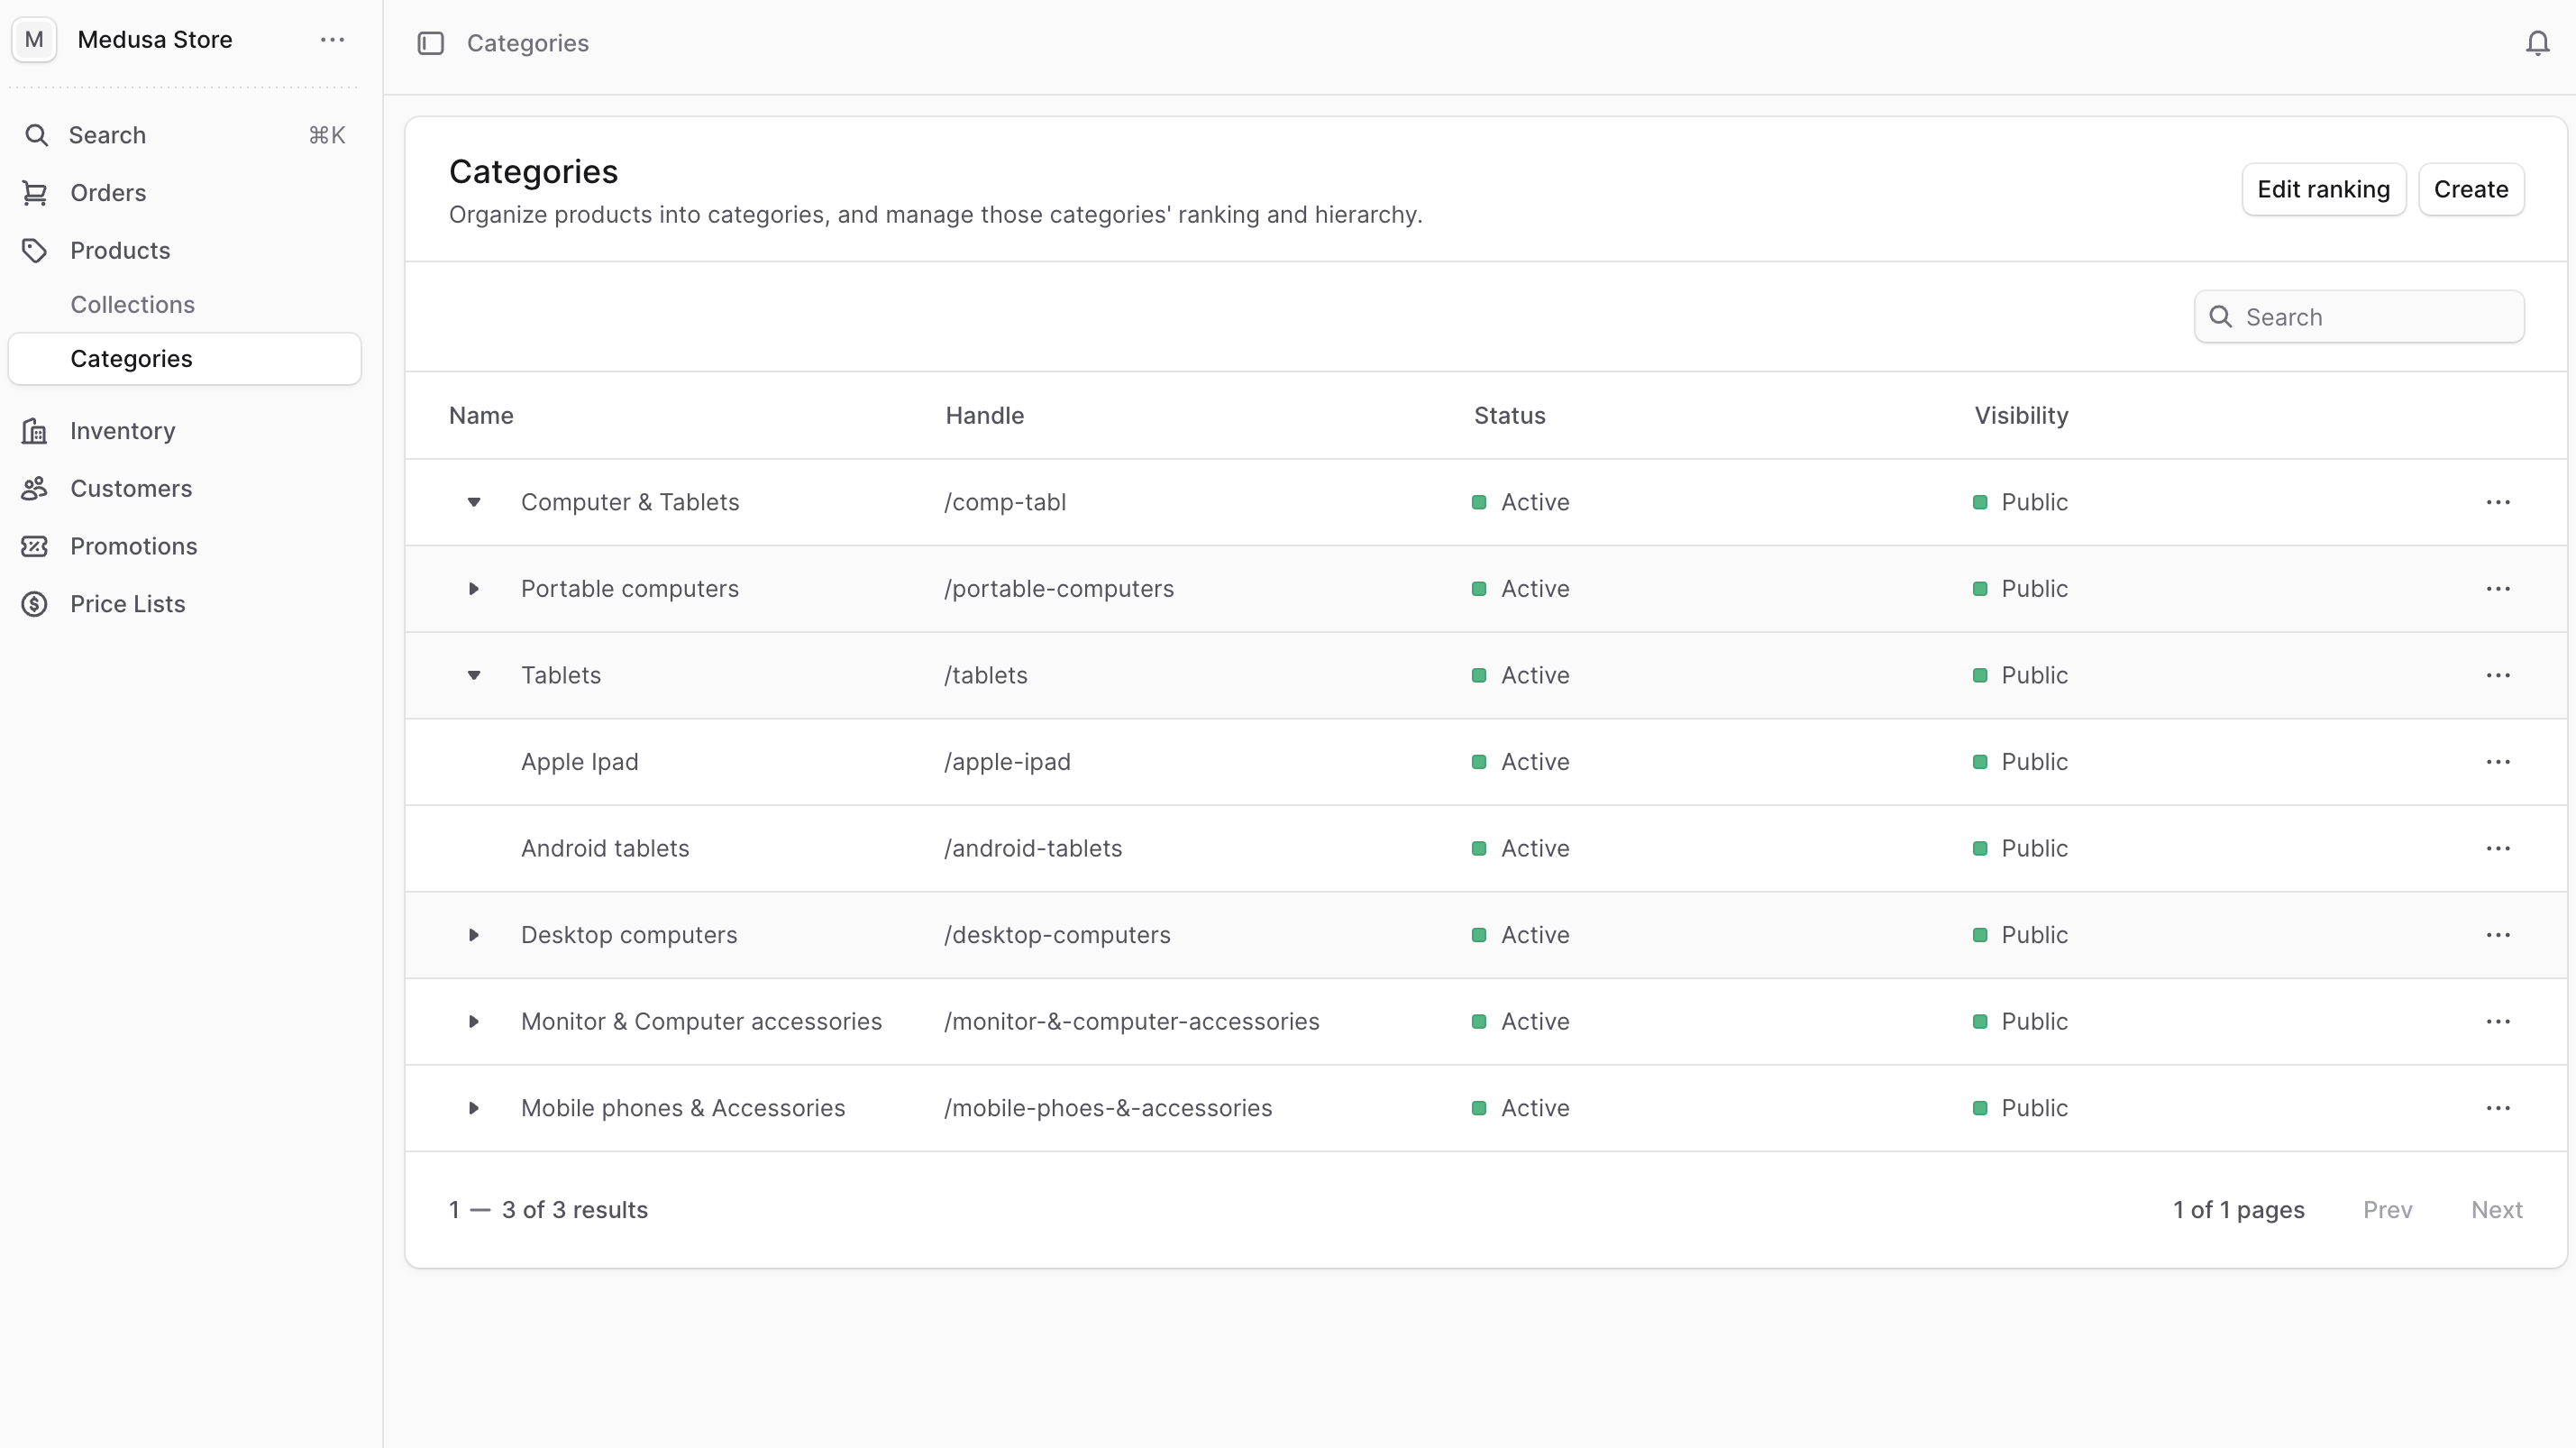
Create a Product Category
To create a product category:- Go to the Product ’ Categories page.
- Click on the “Create” button at the top right.
- In the form that opens, there are two steps:
- Details Step:
- Enter the category’s name in the Title field. This is the only required field.
- The value of the Handle field is used in the category’s URL on the storefront. It allows you to create a human-readable URL for the category. The handle must be unique across all categories, and it must contain lowercase letters, numbers, and hyphens (
-). If not specified, BoxNCase Partners will generate a handle from the title. - Optionally set the category’s description in the Description field.
- In the Status field, you can change the status to “Inactive” if you don’t want the category to be shown on the storefront.
- In the Visibility field, you can change the visibility to “Private” if you’re creating an internal category that shouldn’t be shown to the customer.
- Once you’re done, click the “Continue” button.
- In the second step, you can organize the category’s ranking among other categories:
- To move the category around, use the ⋮⋮ icon to drag categories to their correct position.
- To nest the category, drag it under another category and move it slightly to the right.
- Once you’re done, click the Save button.
View Product Category Details
To view a category’s details:- Go to the Product ’ Categories page.
- From the list, choose the category you want to view.
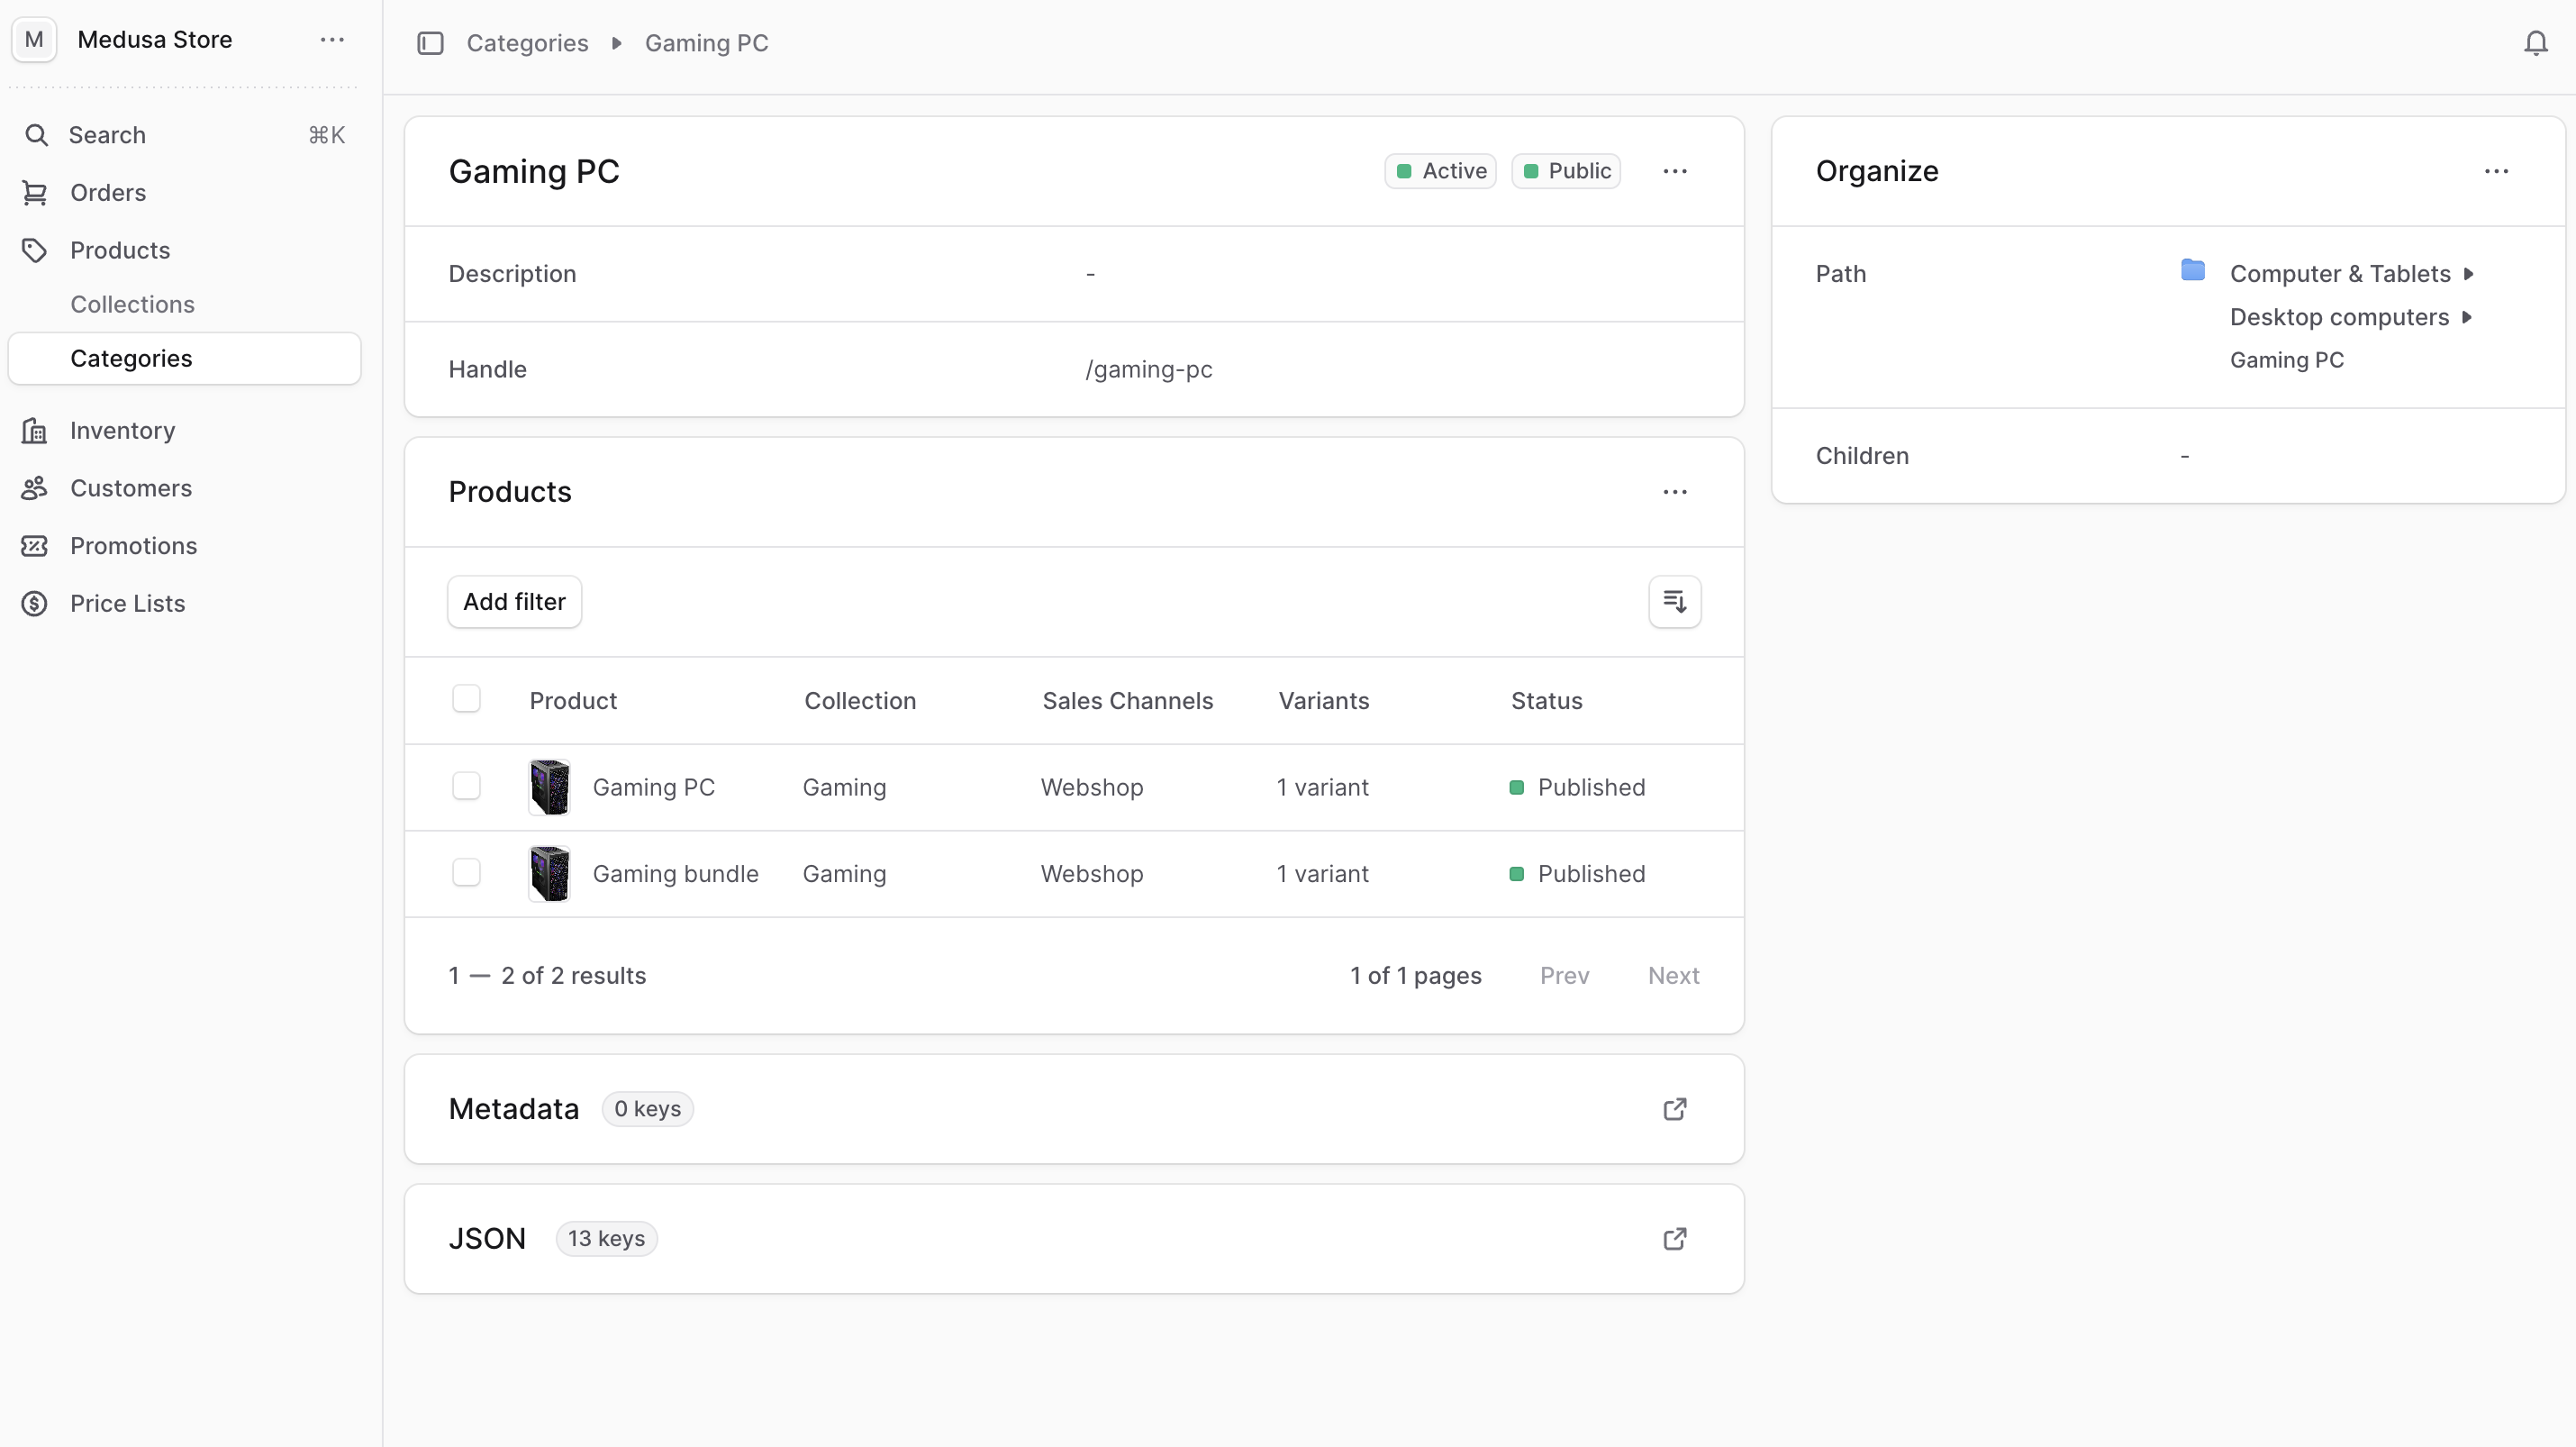
Product Category Status and Visibility
At the top right of the first section, you’ll find two badges:- The first from the left is the category’s status:
- Active: The category is active and shown on the storefront.
- Inactive: The category is inactive and not shown on the storefront.
- The second from the left is the category’s visibility:
- Public: The category is visible to customers on the storefront.
- Private: The category is not visible to customers on the storefront. It’s only used by admin users.
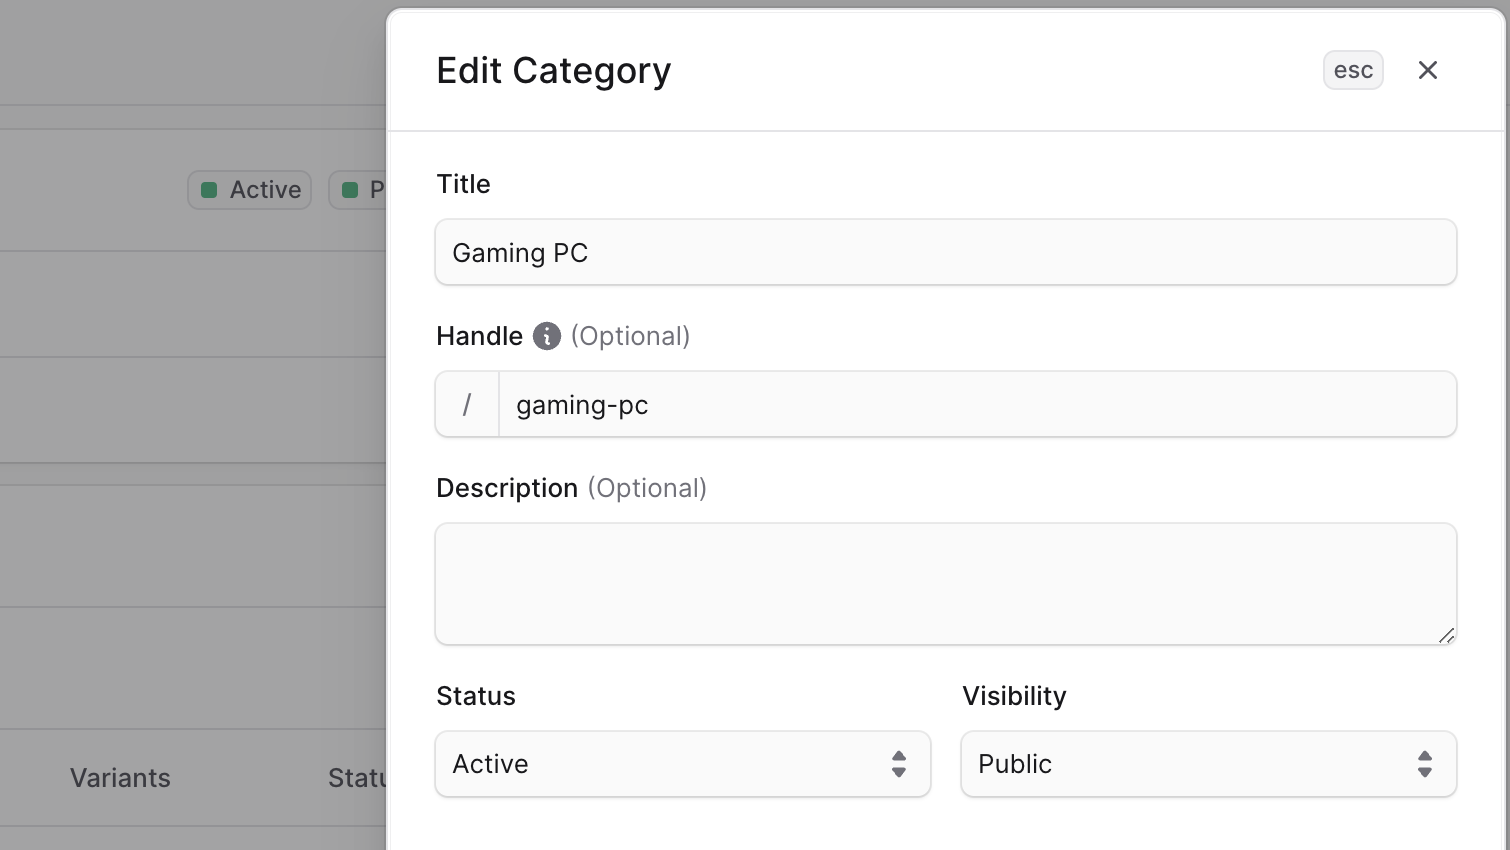
Edit Product Category’s Details
To edit a product category:- Go to the Product ’ Categories page.
- Click on the category to edit. If the category is nested in another, you may need to expand the parent category by clicking the ▶ icon.
- Click the ⋯ icon in the first section of the category page.
- Choose Edit from the dropdown.
- In the side window that opens, you can edit the category’s title, handle, description, status, and visibility.
- Once you’re done, click the Save button.
Edit Product Category Metadata
Metadata is custom data that can be associated with the product category in key-value pairs. This is usually used by developers for custom integrations or to store additional information about the product category. To edit the product category’s metadata:- Go to the product category’s details page.
- Click the ↗ icon at the right of the “Metadata” section.
- In the side window that opens:
- Manage the key-value pairs in the table.
- To add a new row of key-value pairs before or after a row:
- Hover over the row and click the ⋮ icon at its right.
- Choose “Insert row above” or “Insert row below” from the dropdown.
- To delete a row of key-value pairs:
- Hover over the row and click the ⋮ icon at its right.
- Choose “Delete row” from the dropdown.
- Once you’re done, click the Save button.
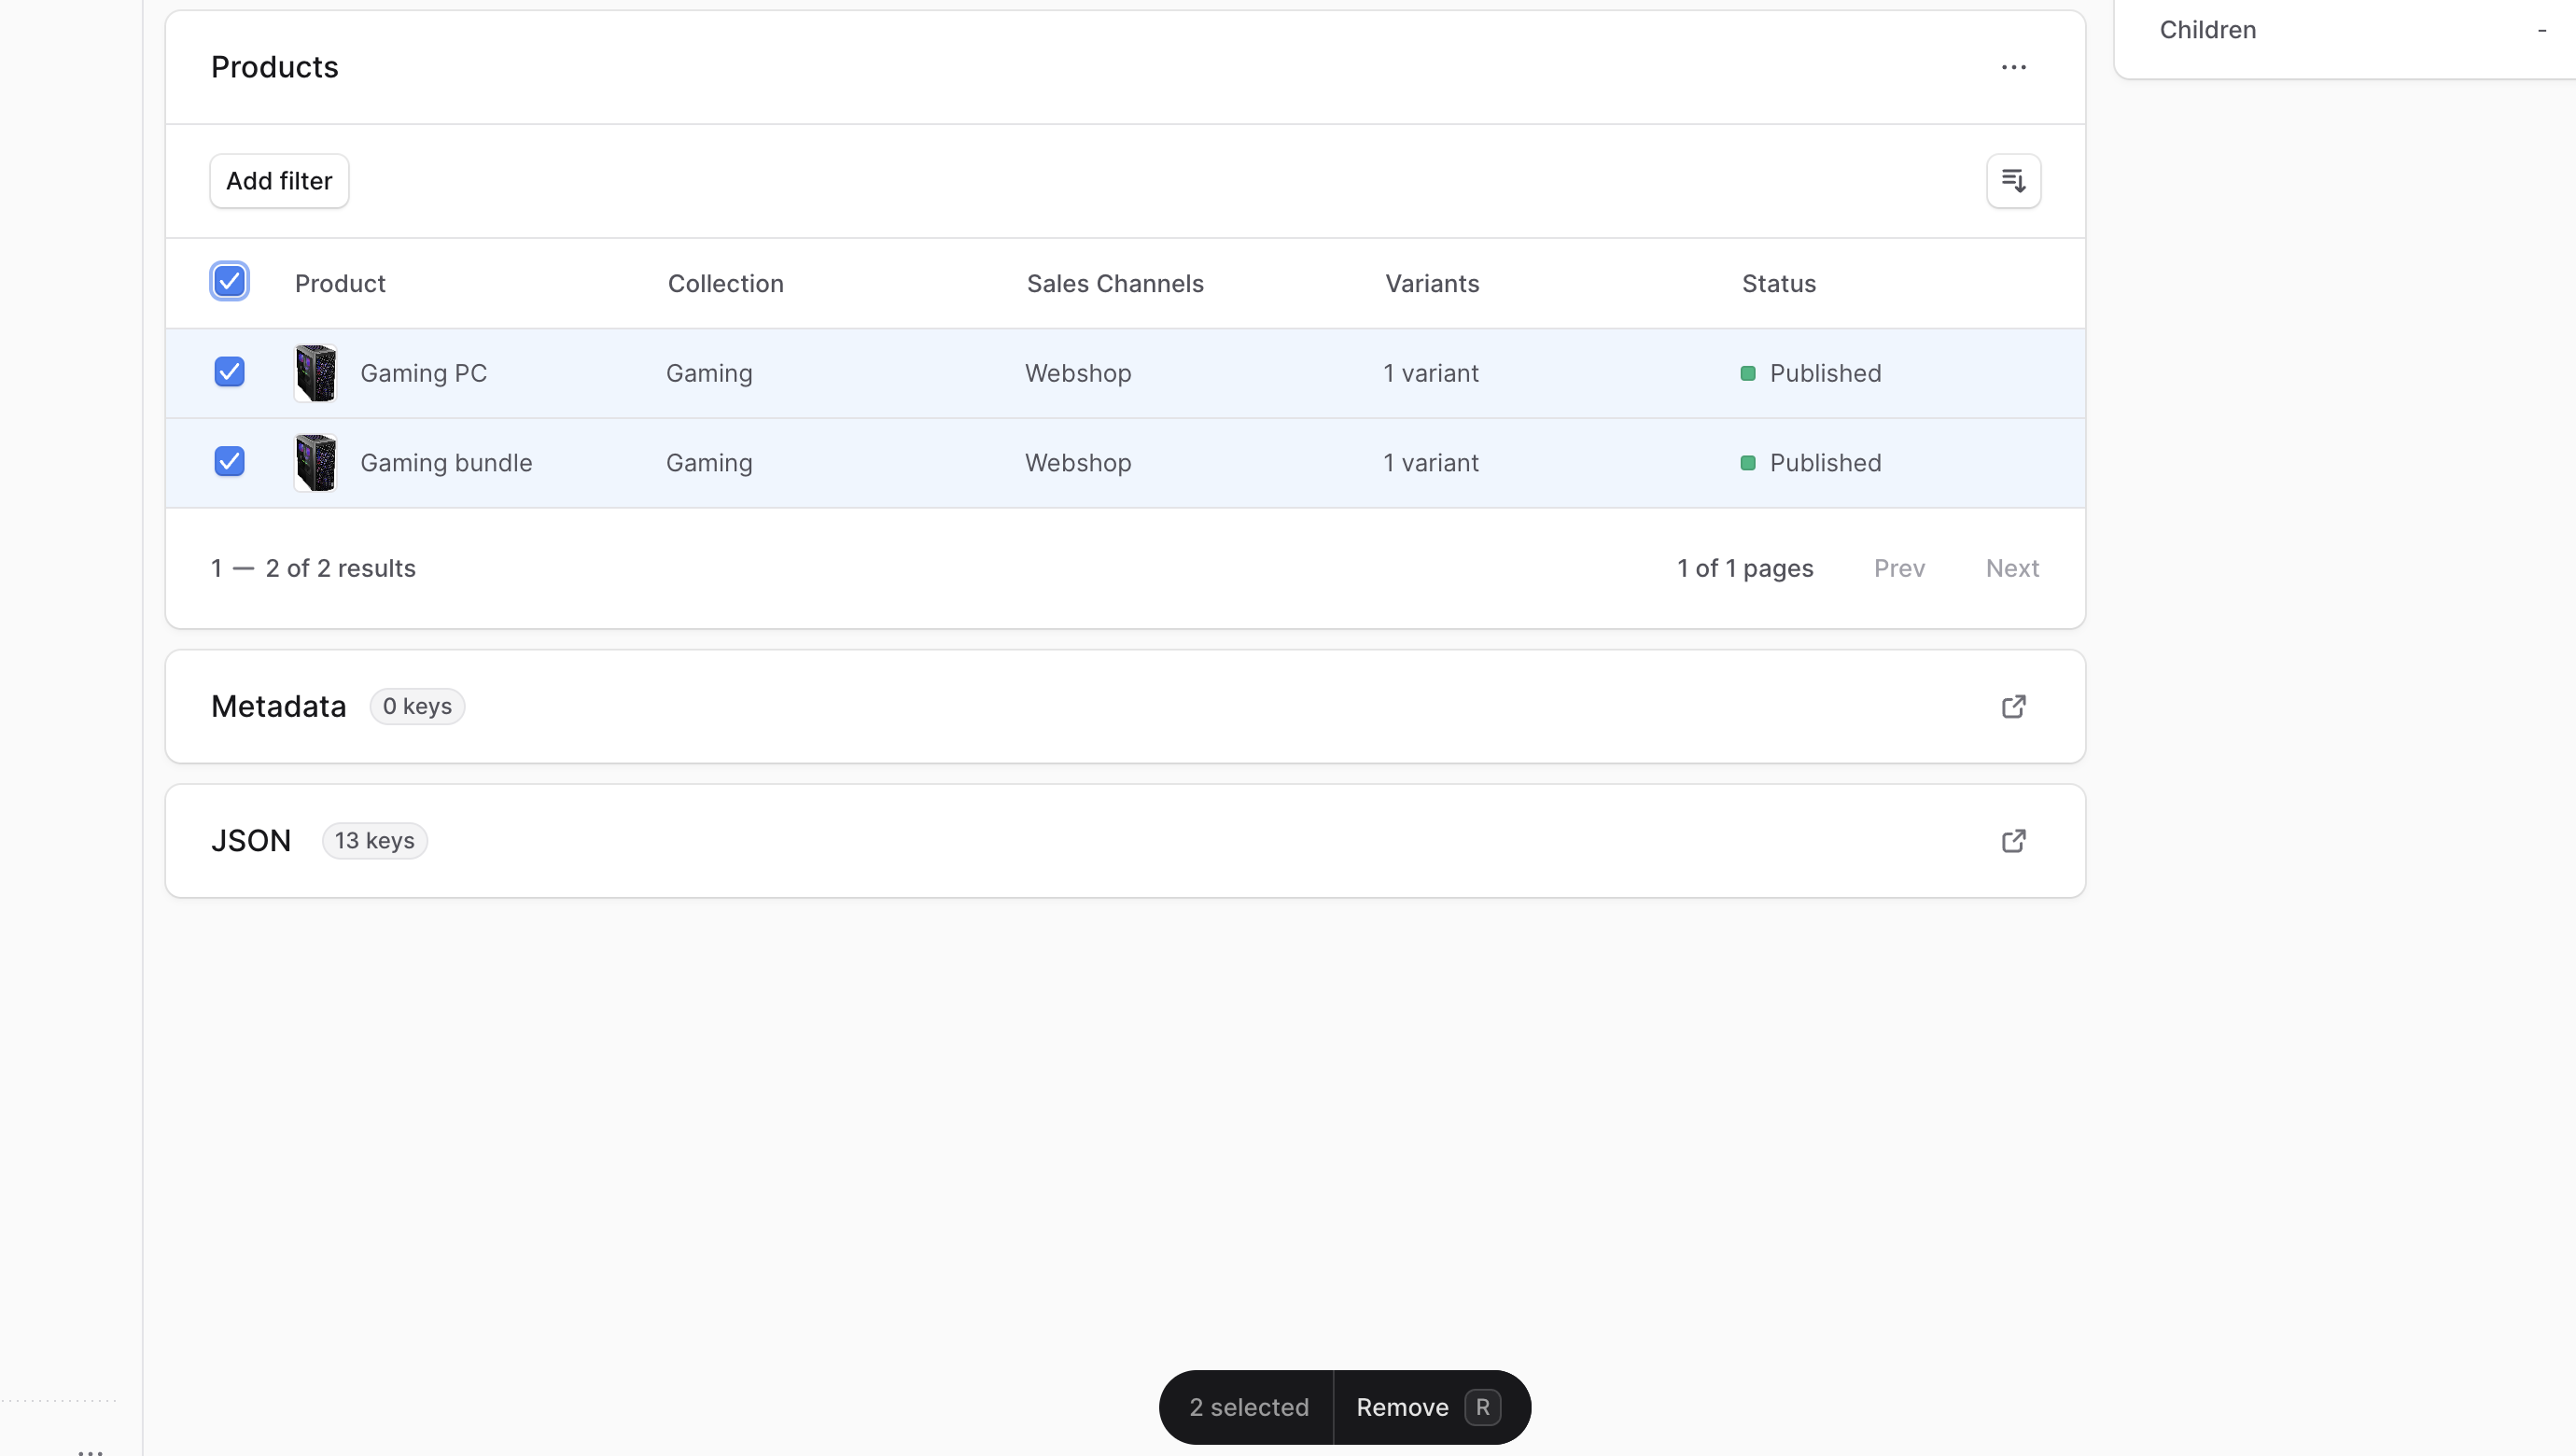
Manage Category’s Products
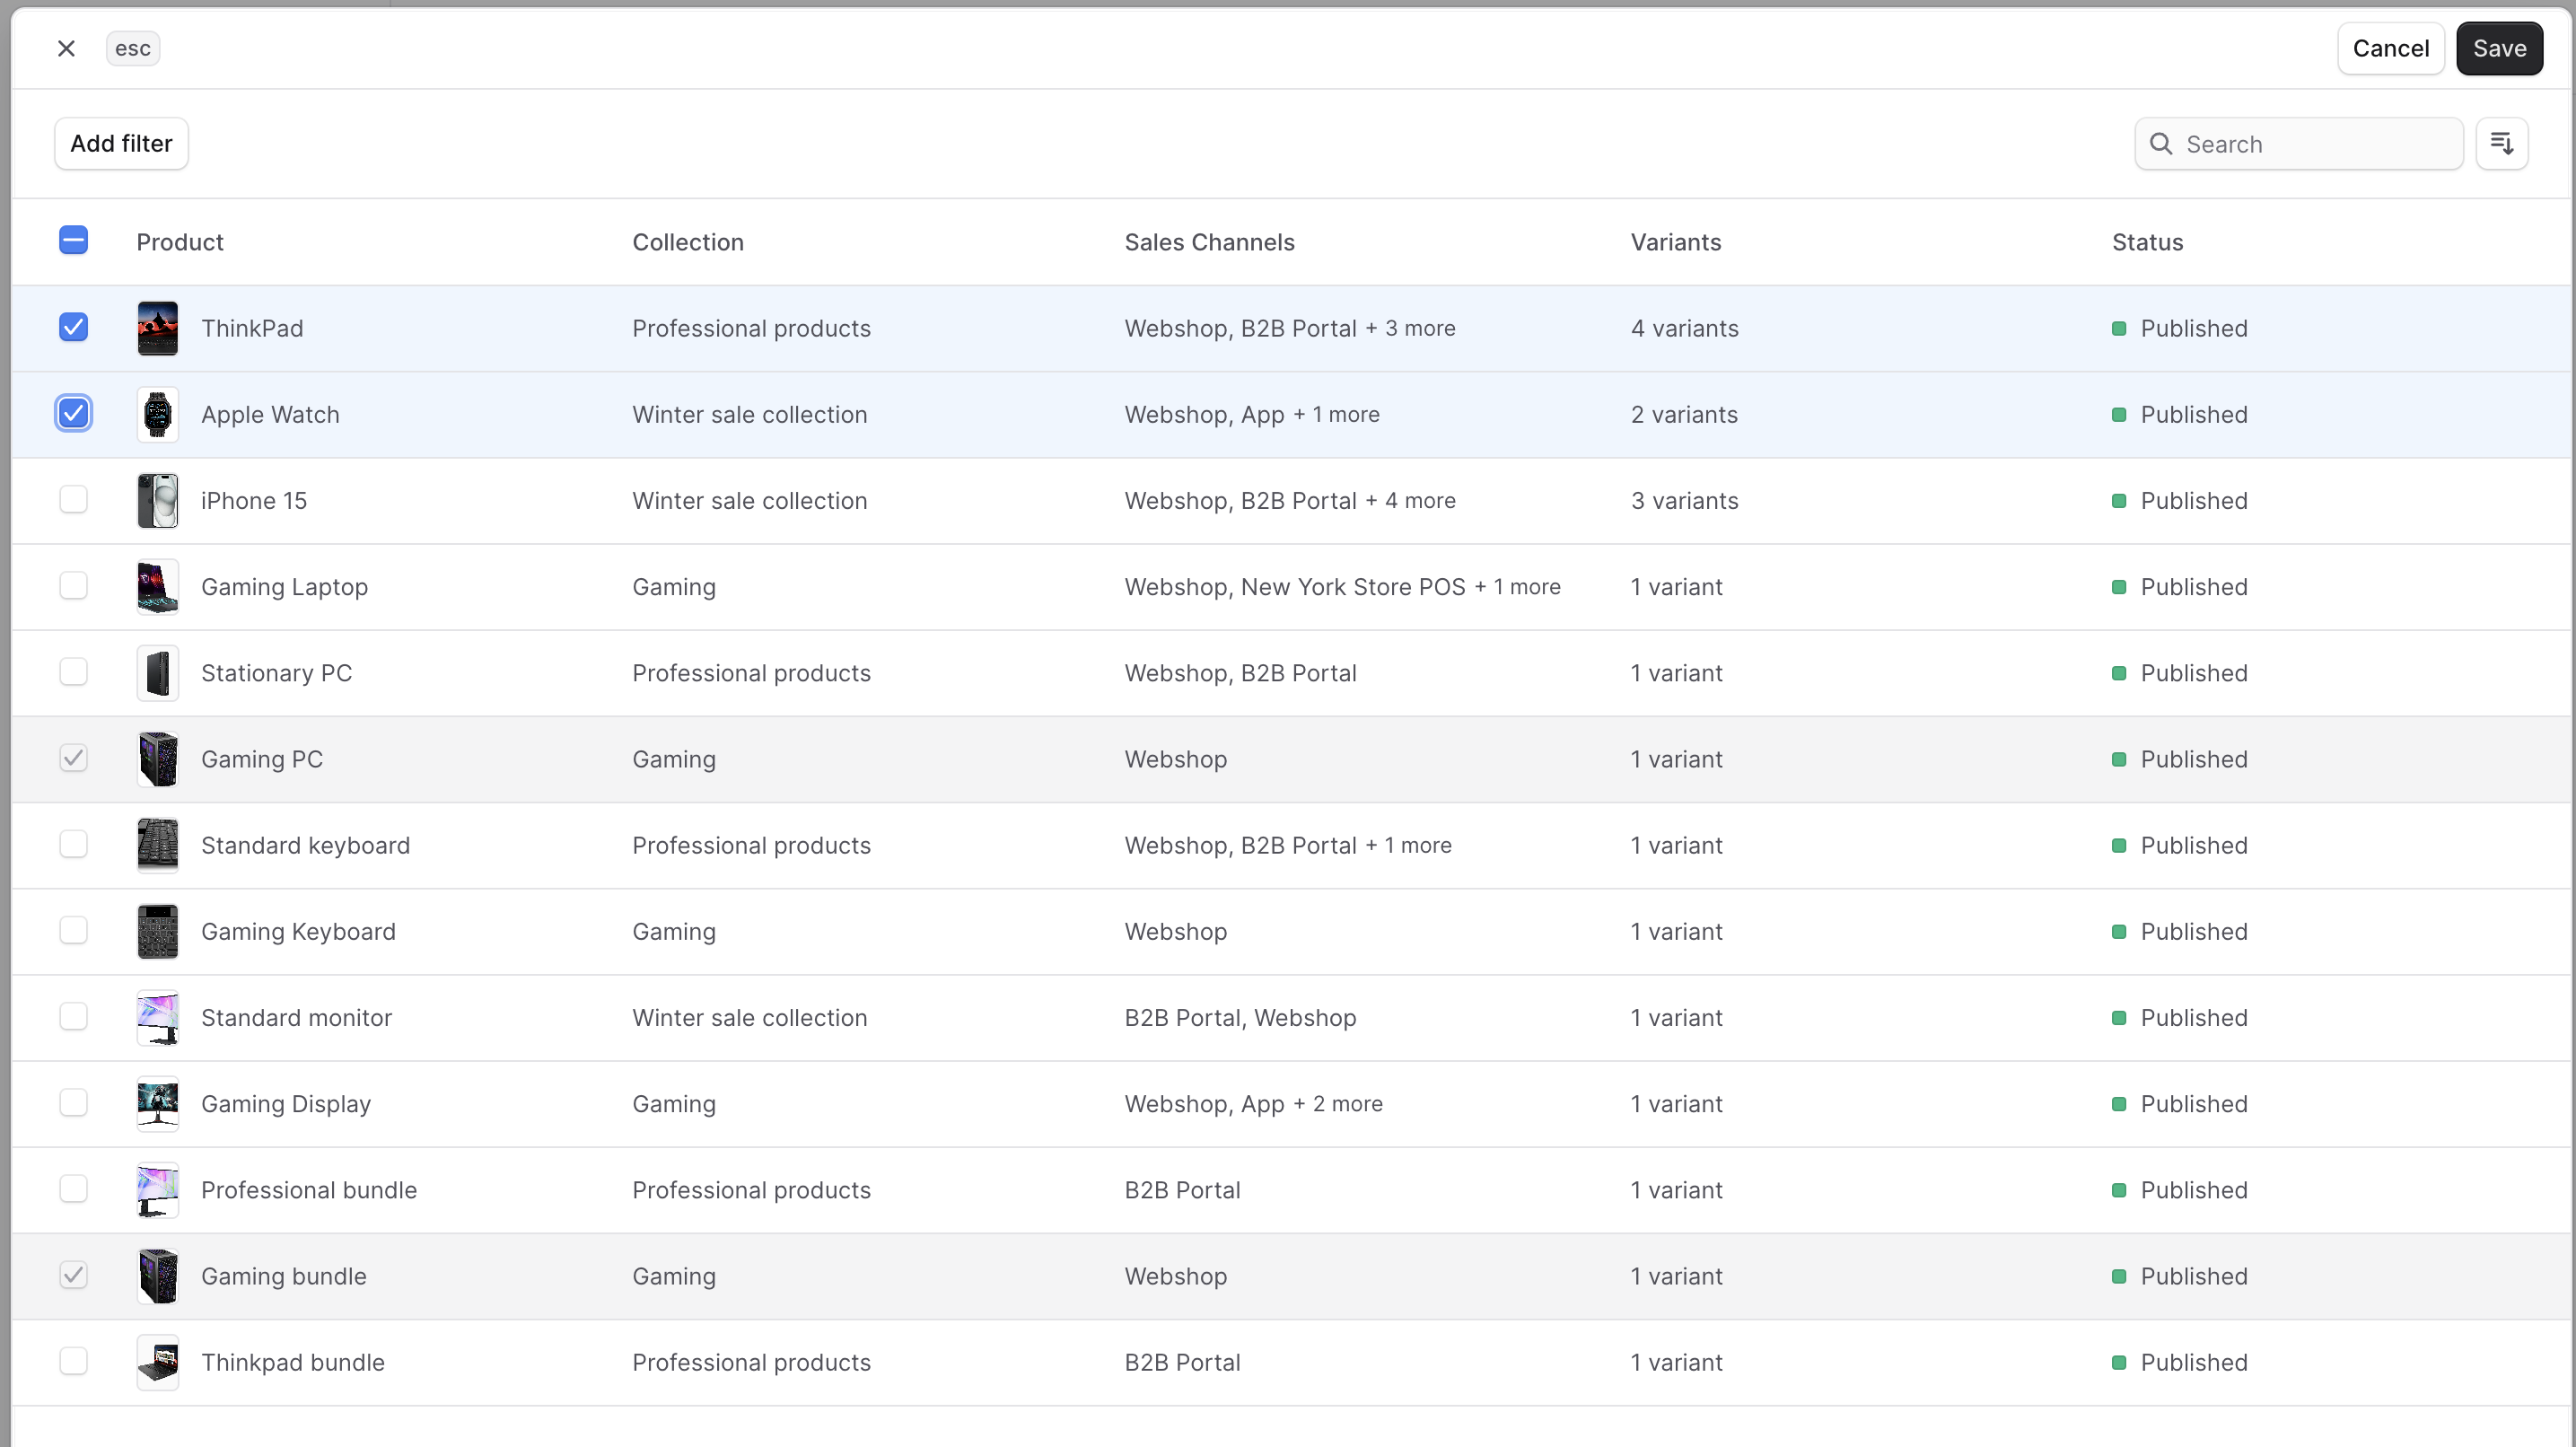
From the product category’s details page, you can manage the products in the category.Add Products to a Category
To add products to a category:- Go to the category’s details page.
- In the Products section, click the ⋯ icon.
- Choose “Add” from the dropdown.
- In the list that opens, check the products you want to add to the category.
- Once you’re done, click the Save button.
Remove Products from a Category
To remove products from a category:- Go to the category’s details page.
- In the Products section, check the products you want to remove from the category.
- Once you’re done, either press
Ror click “Remove” at the bottom center of the page. - Confirm removing the products by clicking the “Remove” button in the pop-up.
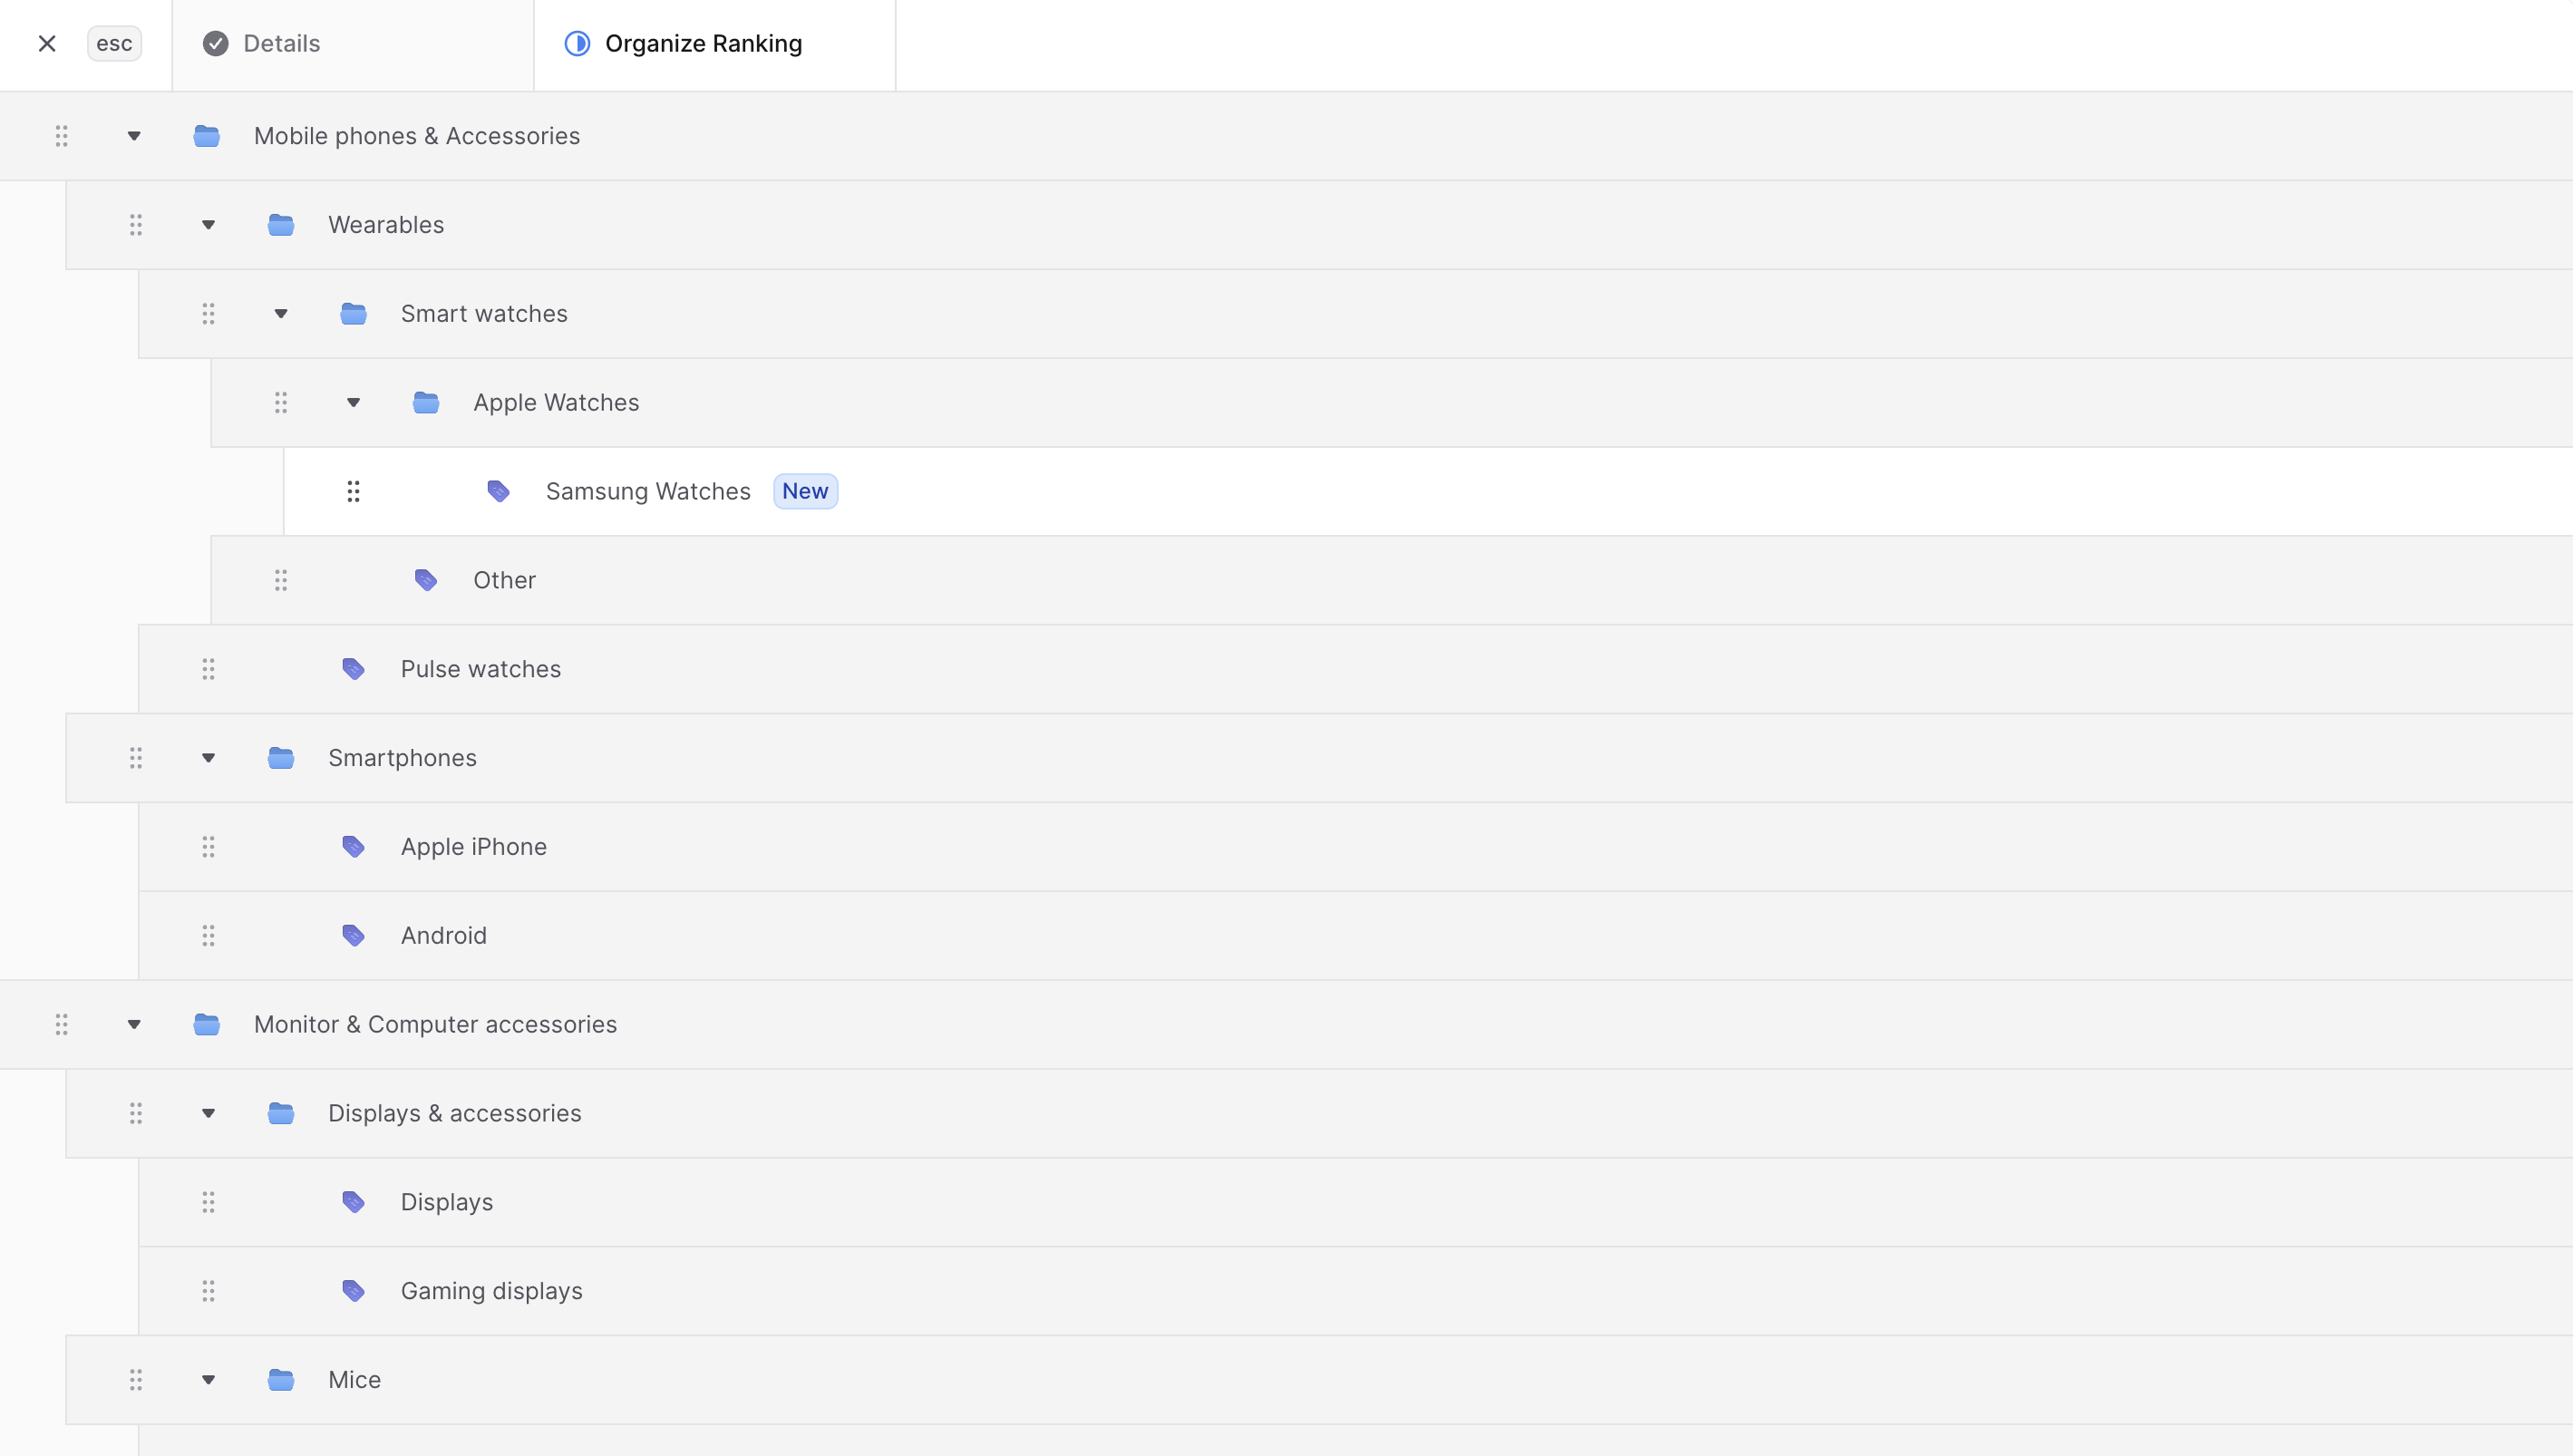
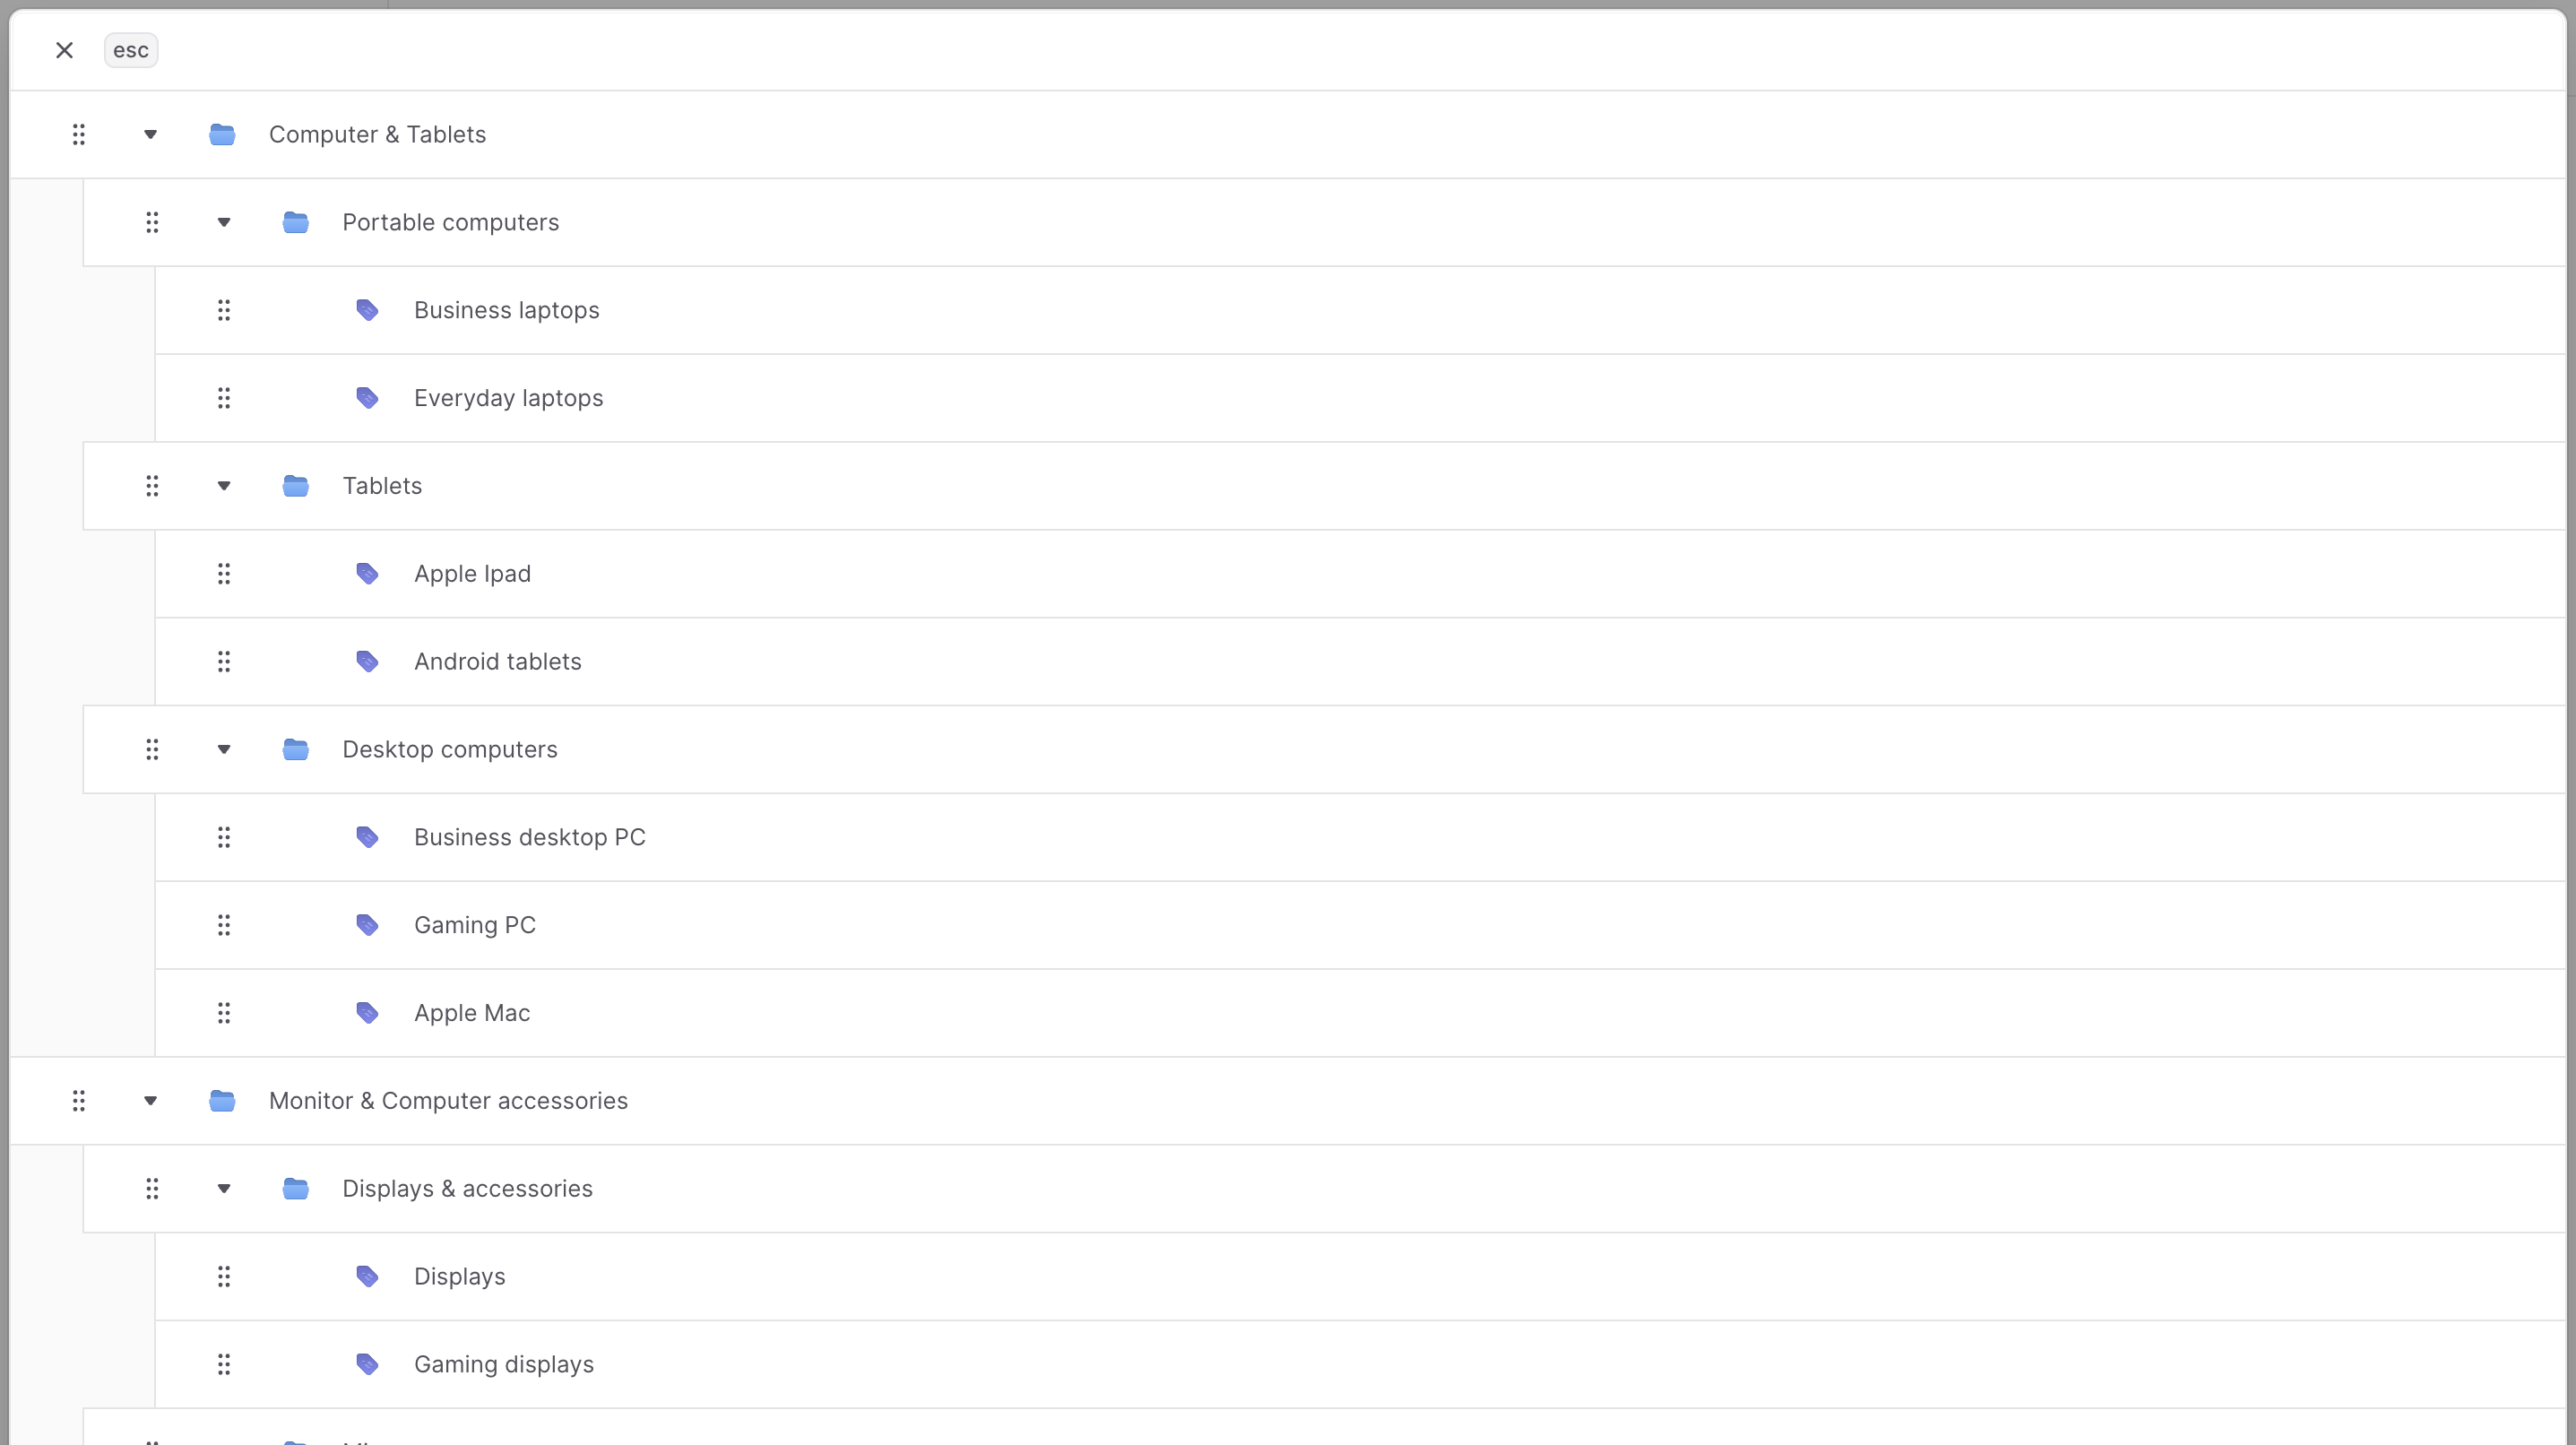
Edit Categories Ranking
To change the categories’ ranking and hierarchy:- Go to the Product ’ Categories page.
- Click on the “Edit ranking” button.
- In the form that opens, you can change the ranking and hierarchy of the categories:
- Changes are saved every time you move a category.
- To move categories around, use the ⋮⋮ icon to drag categories to their new position.
- To nest a category in another, drag it under the other category and move it slightly to the right.
- Once done, you can close the form as the changes have been saved.
Delete a Category
Category deletion requires careful consideration due to its impact on product organization and customer navigation.Warning: Category deletion is irreversible and permanently removes the category and all its hierarchical relationships.
Prerequisites for Deletion
- Ensure category and its children are not referenced in navigation or marketing
- Consider reassigning products to other appropriate categories
- Verify impact on storefront browsing and customer bookmarks
- Go to the Product → Categories page
- Click the ⋯ icon at the right of the category to delete
- Choose Delete from the dropdown
- Confirm deletion by clicking the “Delete” button in the pop-up
- Review the warning about irreversible action
- Ensure you have selected the correct category
- Consider the impact on associated products and navigation
Best Practices
Category Hierarchy Design
- Logical Structure: Create intuitive category hierarchies that match customer expectations
- Appropriate Depth: Limit nesting levels to 3-4 for optimal customer navigation
- Clear Relationships: Ensure parent-child relationships make logical sense
- Consistent Naming: Use consistent naming conventions across category levels
Status and Visibility Management
- Active Status Control: Use Inactive status for seasonal or temporary category management
- Visibility Strategy: Leverage Private visibility for internal organization categories
- Launch Coordination: Plan category status changes around product launches and marketing campaigns
Product Assignment Strategy
- Multiple Categories: Take advantage of multiple category assignment for cross-selling opportunities
- Category Balance: Distribute products appropriately across categories
- Regular Audits: Periodically review category assignments for accuracy and relevance
Performance Optimization
- Category Ranking: Use ranking features to prioritize important categories
- Metadata Utilization: Store relevant metadata for enhanced functionality and integrations
- Customer Feedback: Monitor category usage and adjust structure based on customer behavior
SEO and Marketing
- SEO-Friendly Handles: Create descriptive, keyword-rich category handles
- Marketing Alignment: Coordinate categories with marketing campaigns and seasonal promotions
- Navigation Support: Design categories to support intuitive site navigation and user experience
Important: Categories are fundamental to your product organization and customer navigation experience. Changes to category structure can significantly impact SEO, customer browsing patterns, and marketing effectiveness. Plan category changes carefully and test thoroughly before implementation.