Store Settings in BoxNCase Admin
Configure your BoxNCase store’s fundamental settings including basic information, supported currencies, and store metadata. These settings form the foundation of your e-commerce operations and affect how your store operates across all channels.Overview
Store settings control:- Basic store information (name, URL, description)
- Default currency and supported currencies
- Store metadata and branding elements
- Default region and sales channel preferences
View Store Details
To view your store’s details, go to Settings → Store. There, you can view and manage the store’s details and its available currencies.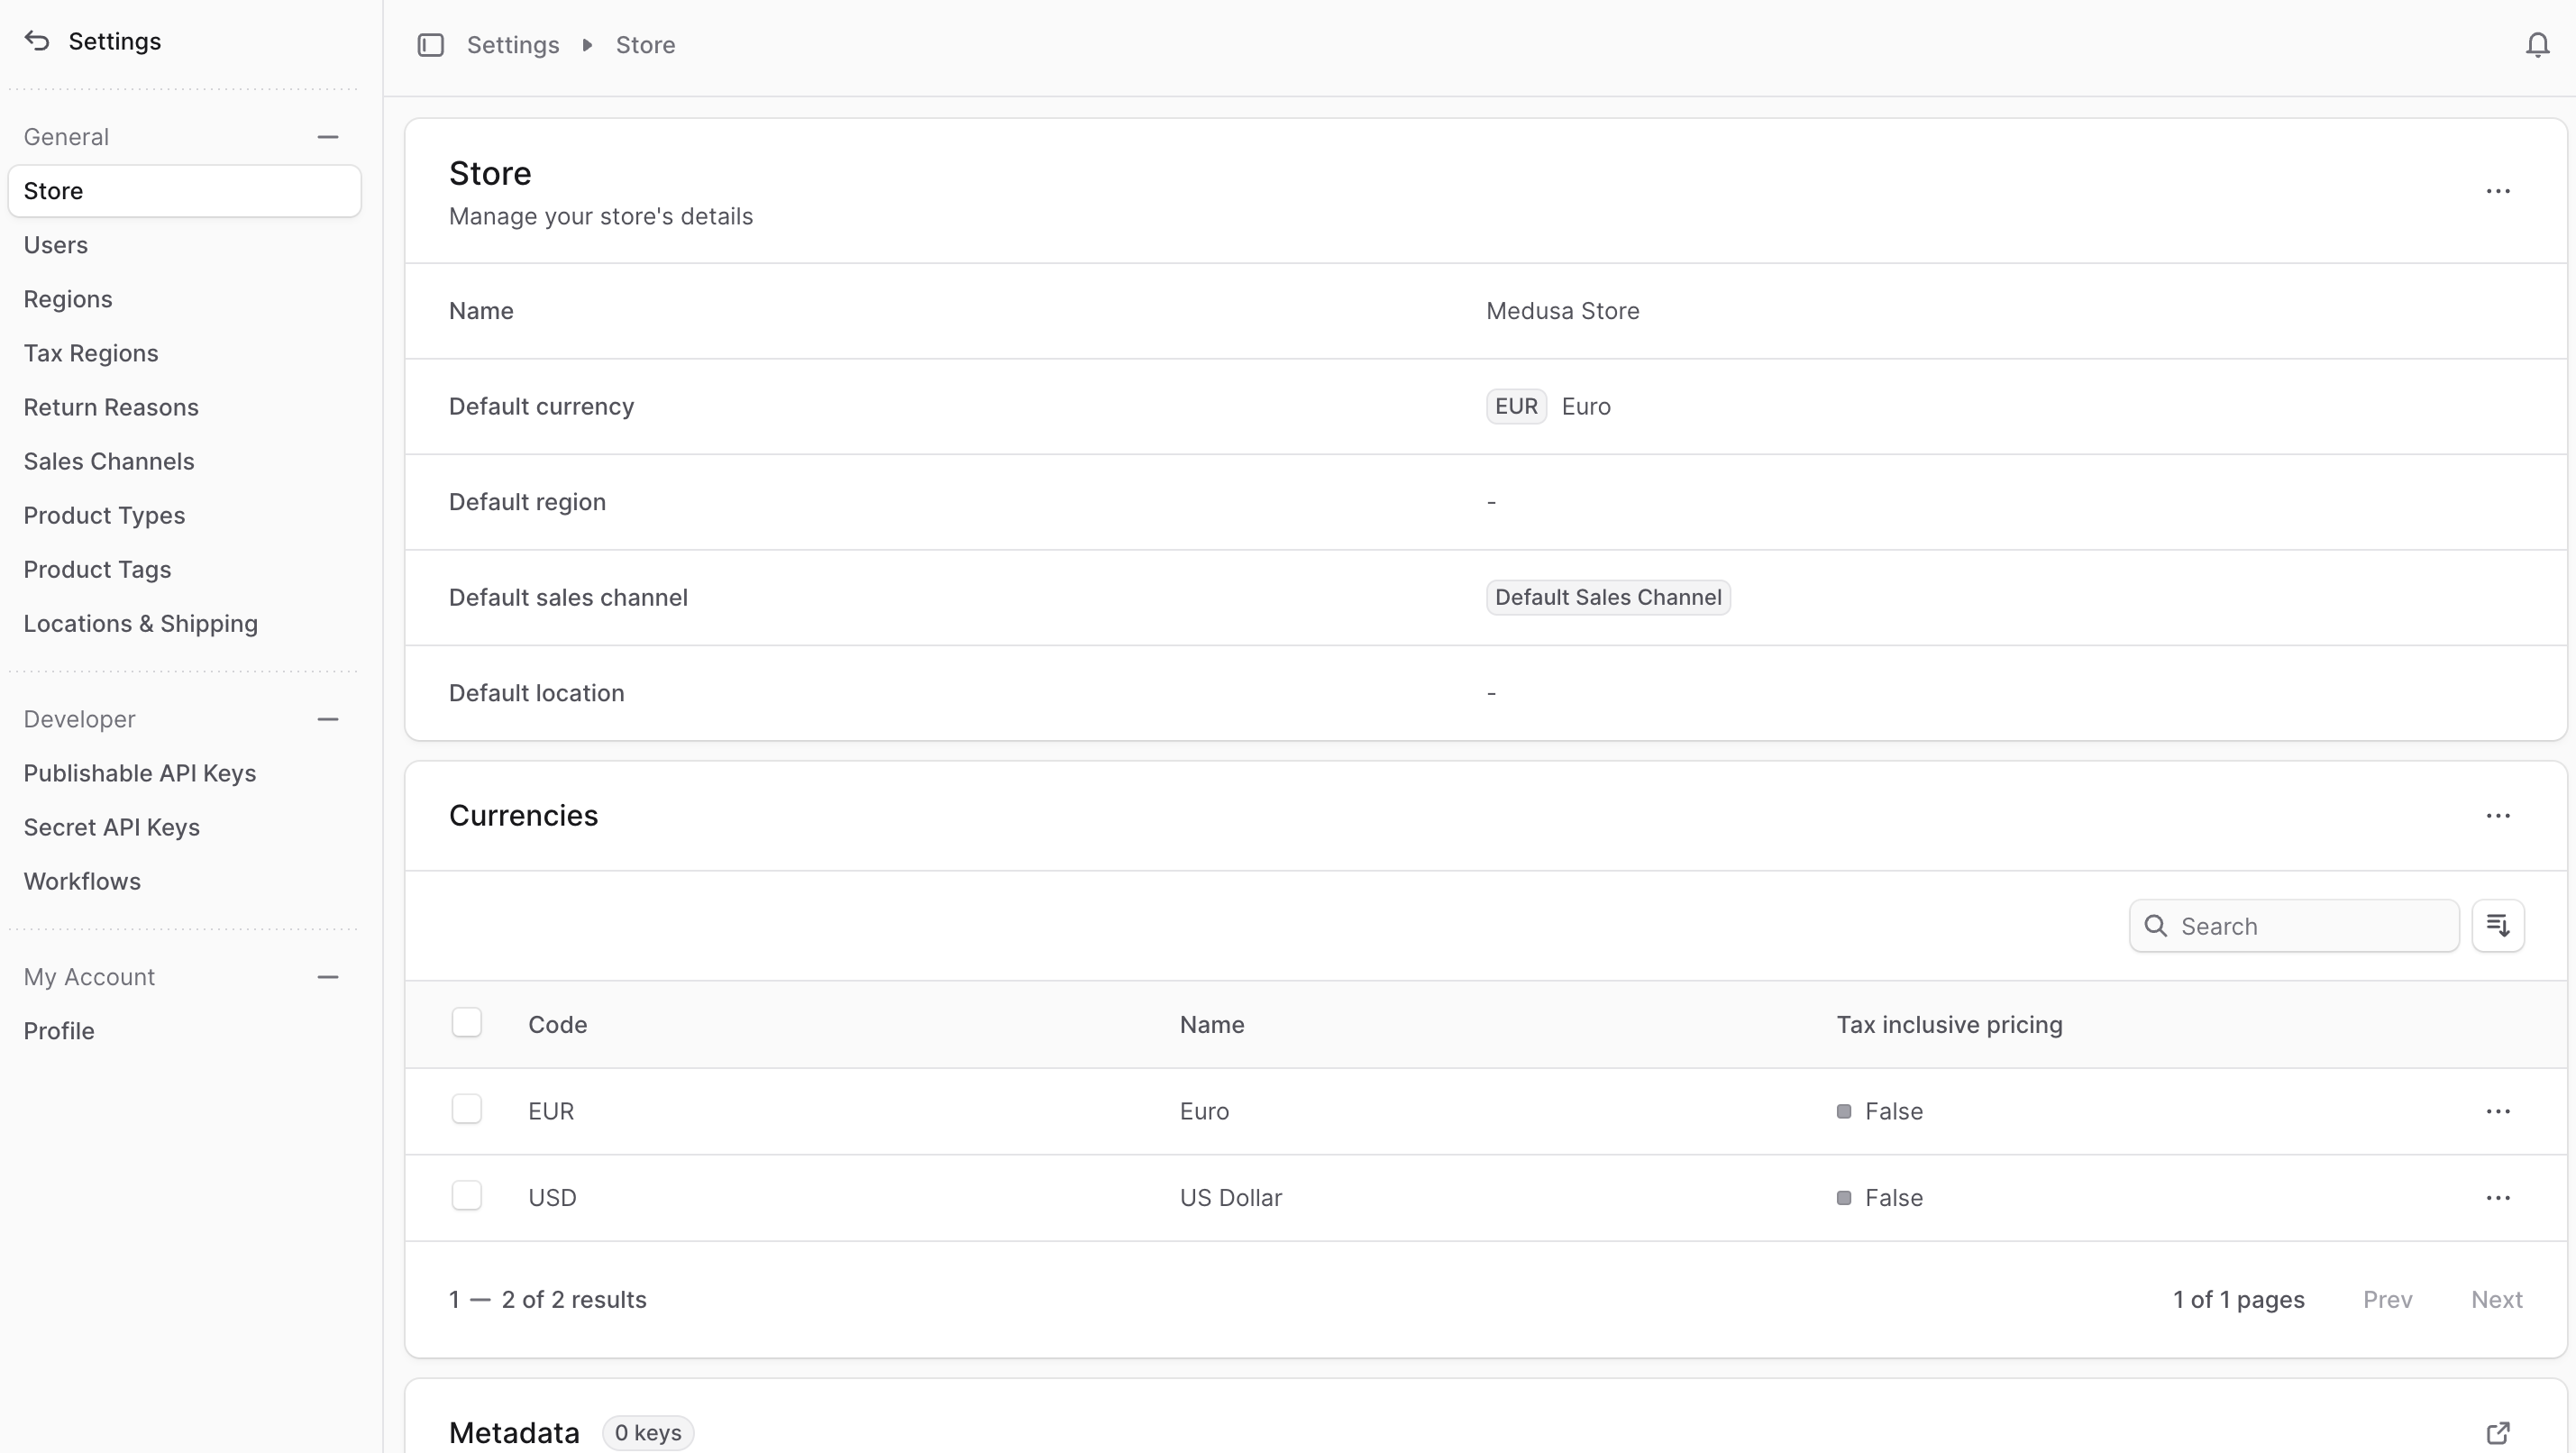
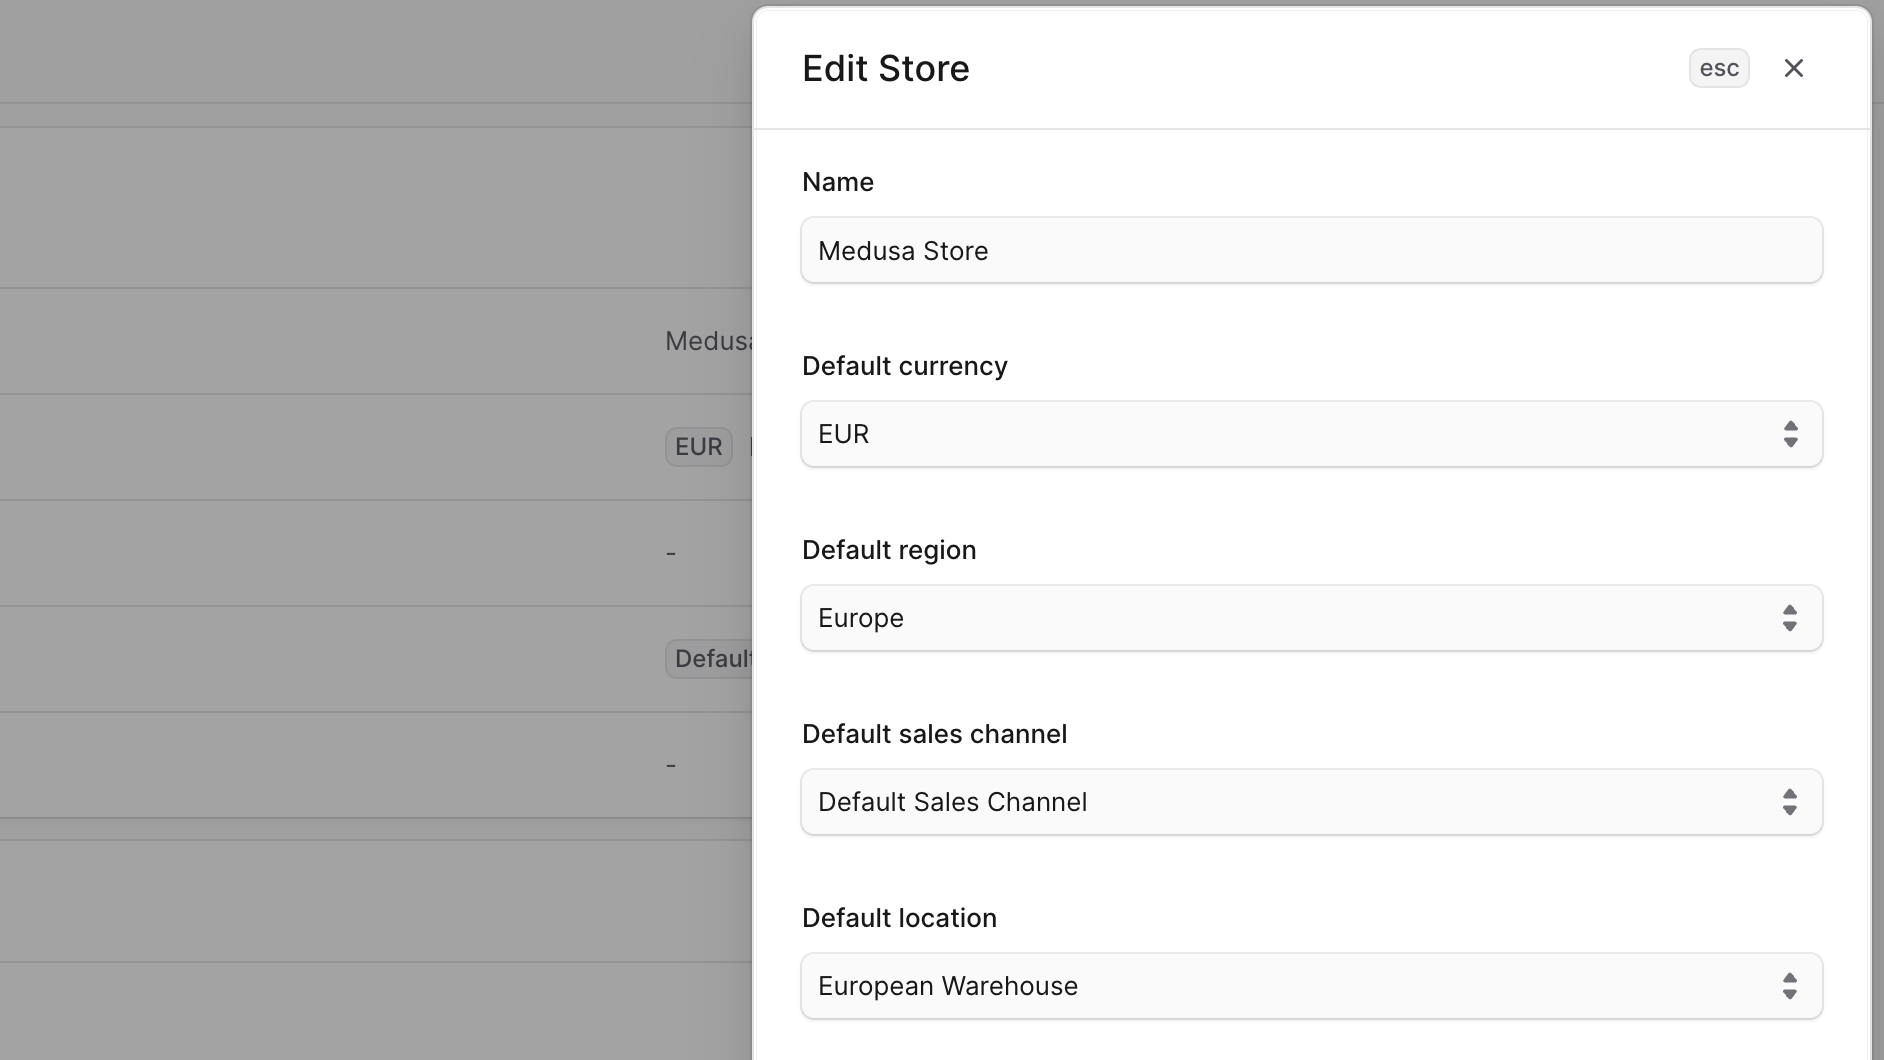
Edit Store Details
To edit the stores details:- Go to Settings → Store.
- Click the ⋯ icon at the top right of the “Store” section.
- Choose Edit from the dropdown.
- In the side window that opens, you can edit the store’s name, default currency, default region, default sales channel, and default location. These defaults are used in the storefront if no other values are provided.
- Once you’re done, click the Save button.
Manage Currencies
BoxNCase supports multi-currency operations, enabling customers to view and purchase in their preferred currency. This enhances the shopping experience for international customers and can significantly improve conversion rates. Key Benefits:- Improved customer experience for international shoppers
- Reduced cart abandonment due to currency confusion
- Automatic currency conversion and display
- Region-specific currency preferences
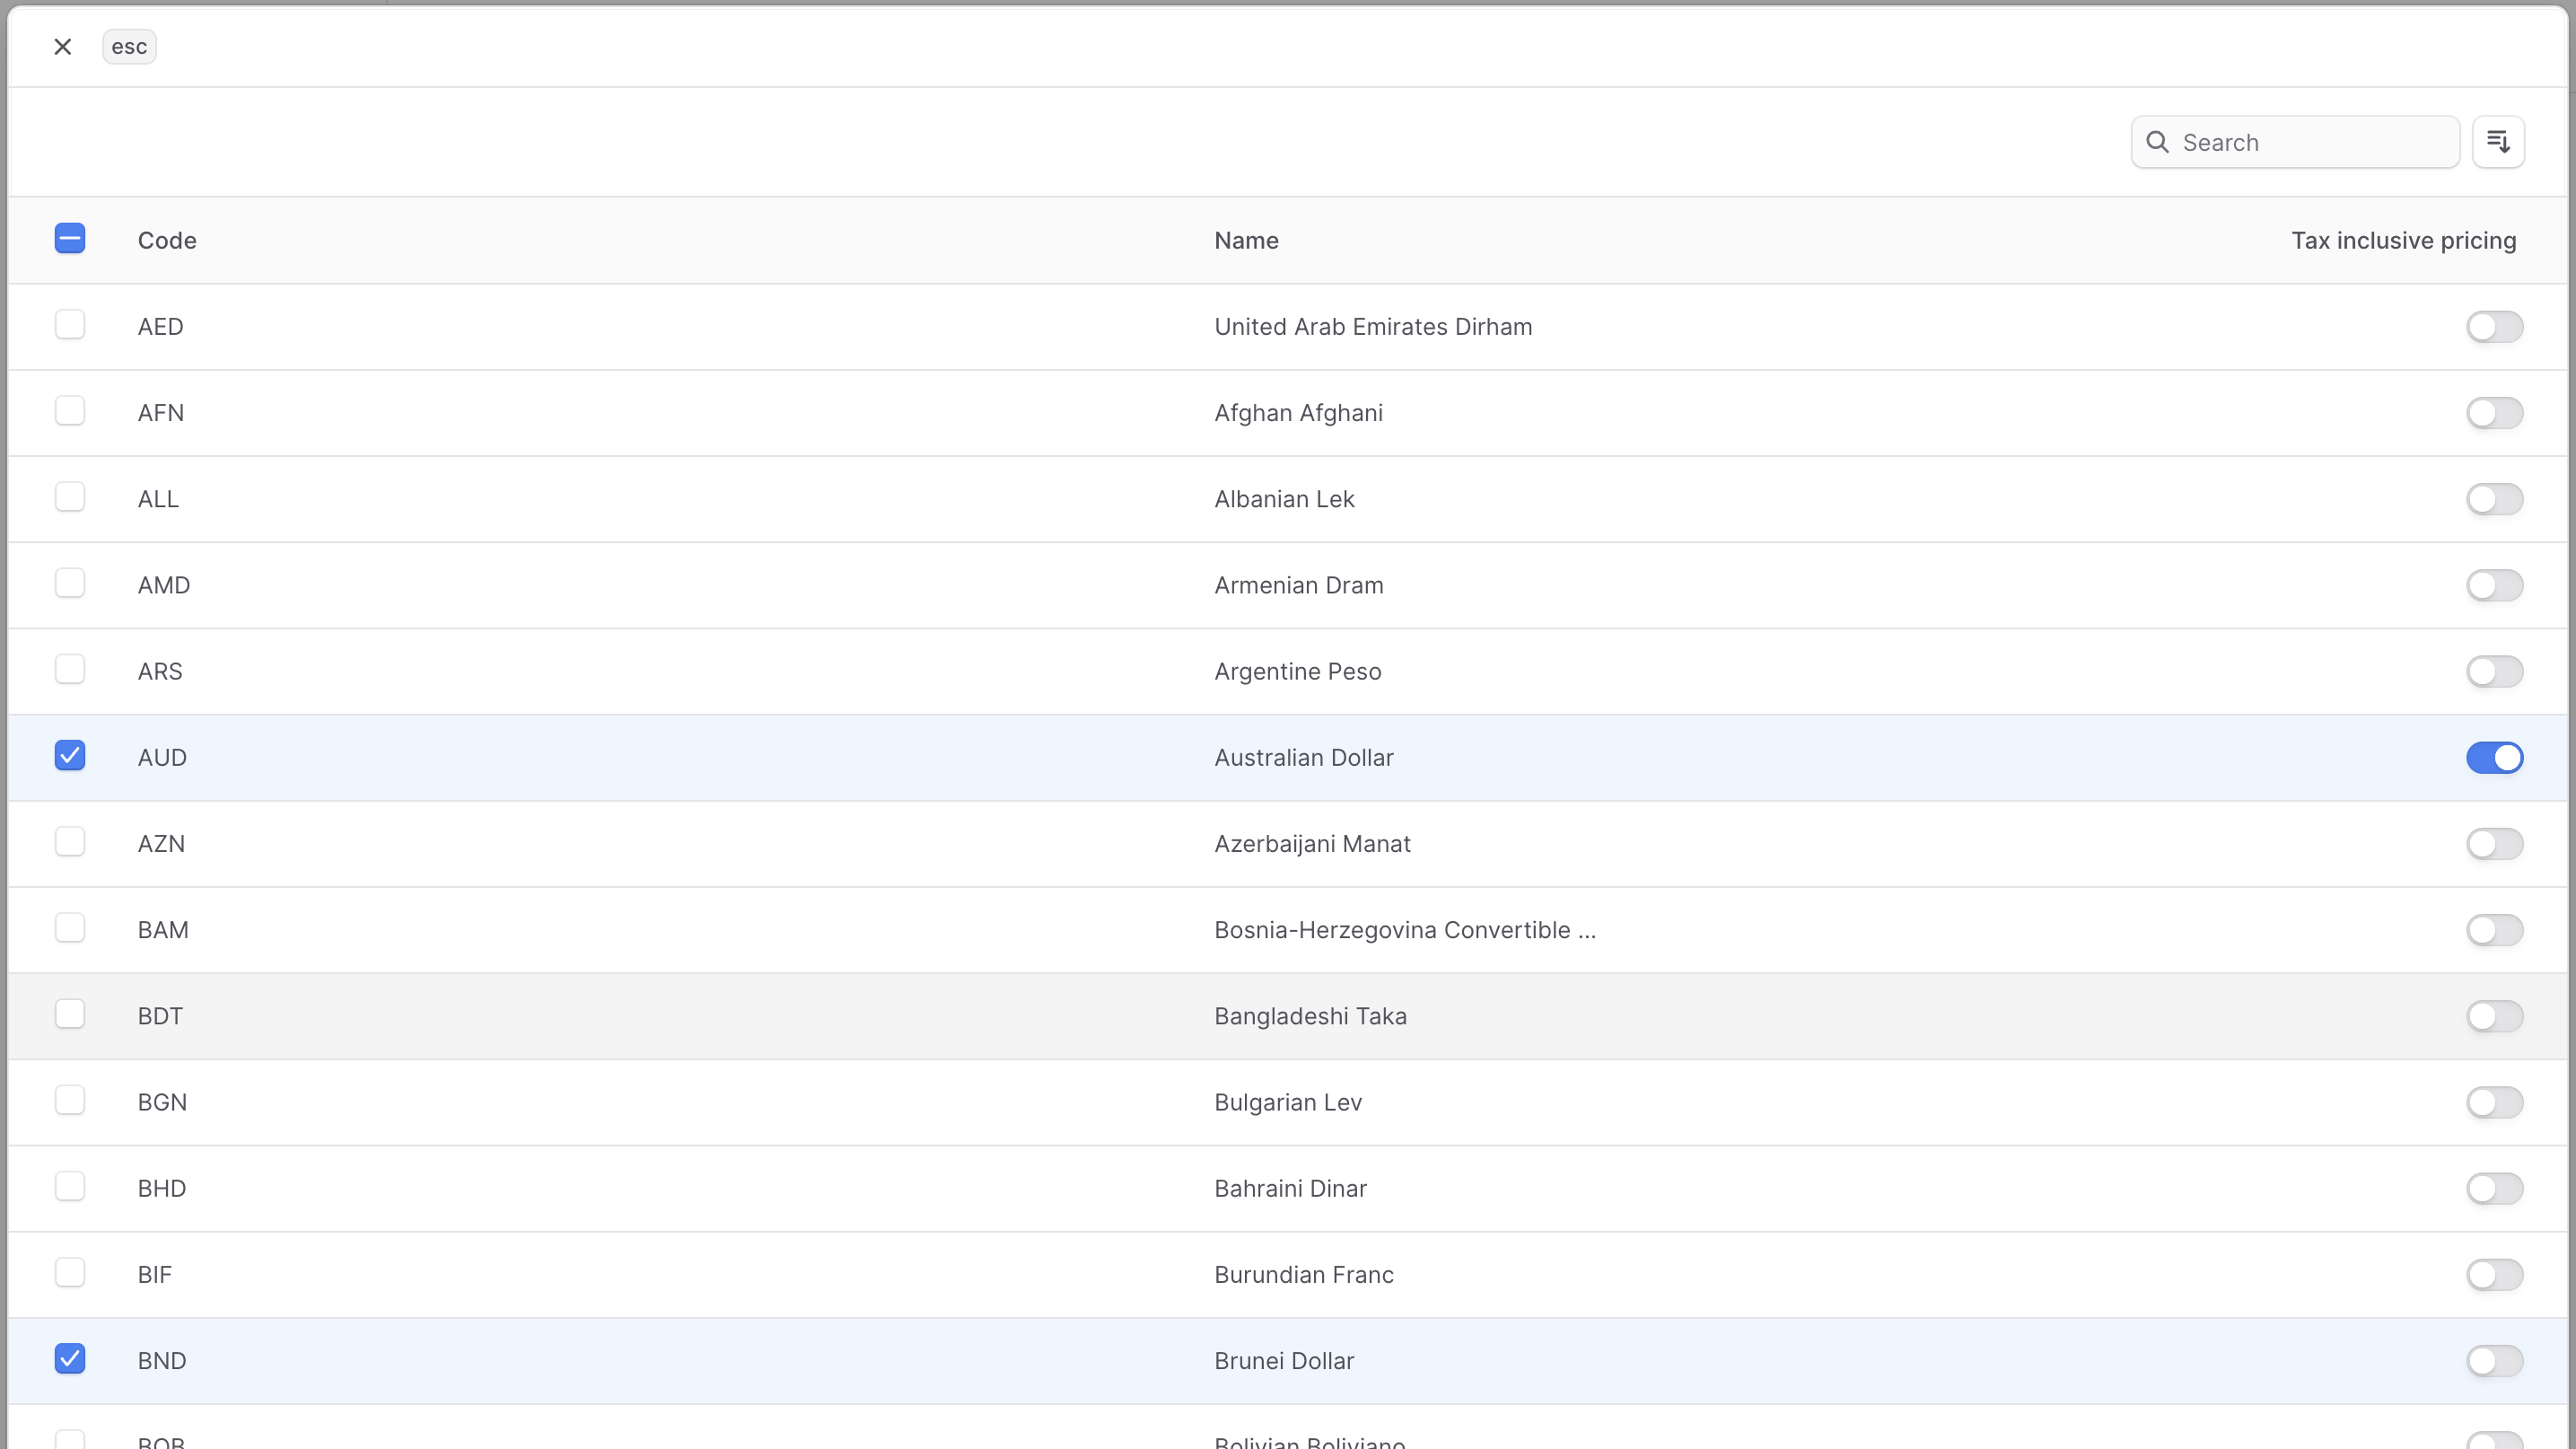
Add Currencies
To add currencies to your store:- Go to Settings → Store.
- Click the ⋯ icon at the top right of the “Currencies” section.
- Choose Add from the dropdown.
- In the list that opens, check the currencies you want to add to the store.
- To enable tax-inclusive pricing for a currency, enable the toggle at the currency’s right.
- Once you’re done, click the Save button.
Edit Tax-Inclusive Setting for Currency
BoxNCase provides flexible tax handling through currency-specific settings. Understanding tax-inclusive vs. tax-exclusive pricing is crucial for proper store configuration: Tax-Exclusive Pricing:- Taxes are calculated and added during checkout
- Common in B2B scenarios and regions like the US
- Displays base price + calculated tax separately
- Taxes are included in the displayed price
- Common in B2C scenarios and regions like the EU
- Simplifies pricing display for customers
- Go to Settings → Store.
- Click the ⋯ icon at the right of the currency you want to edit.
- Choose “Enable tax-inclusive pricing” or “Disable tax-inclusive pricing” from the dropdown, depending on the current setting.
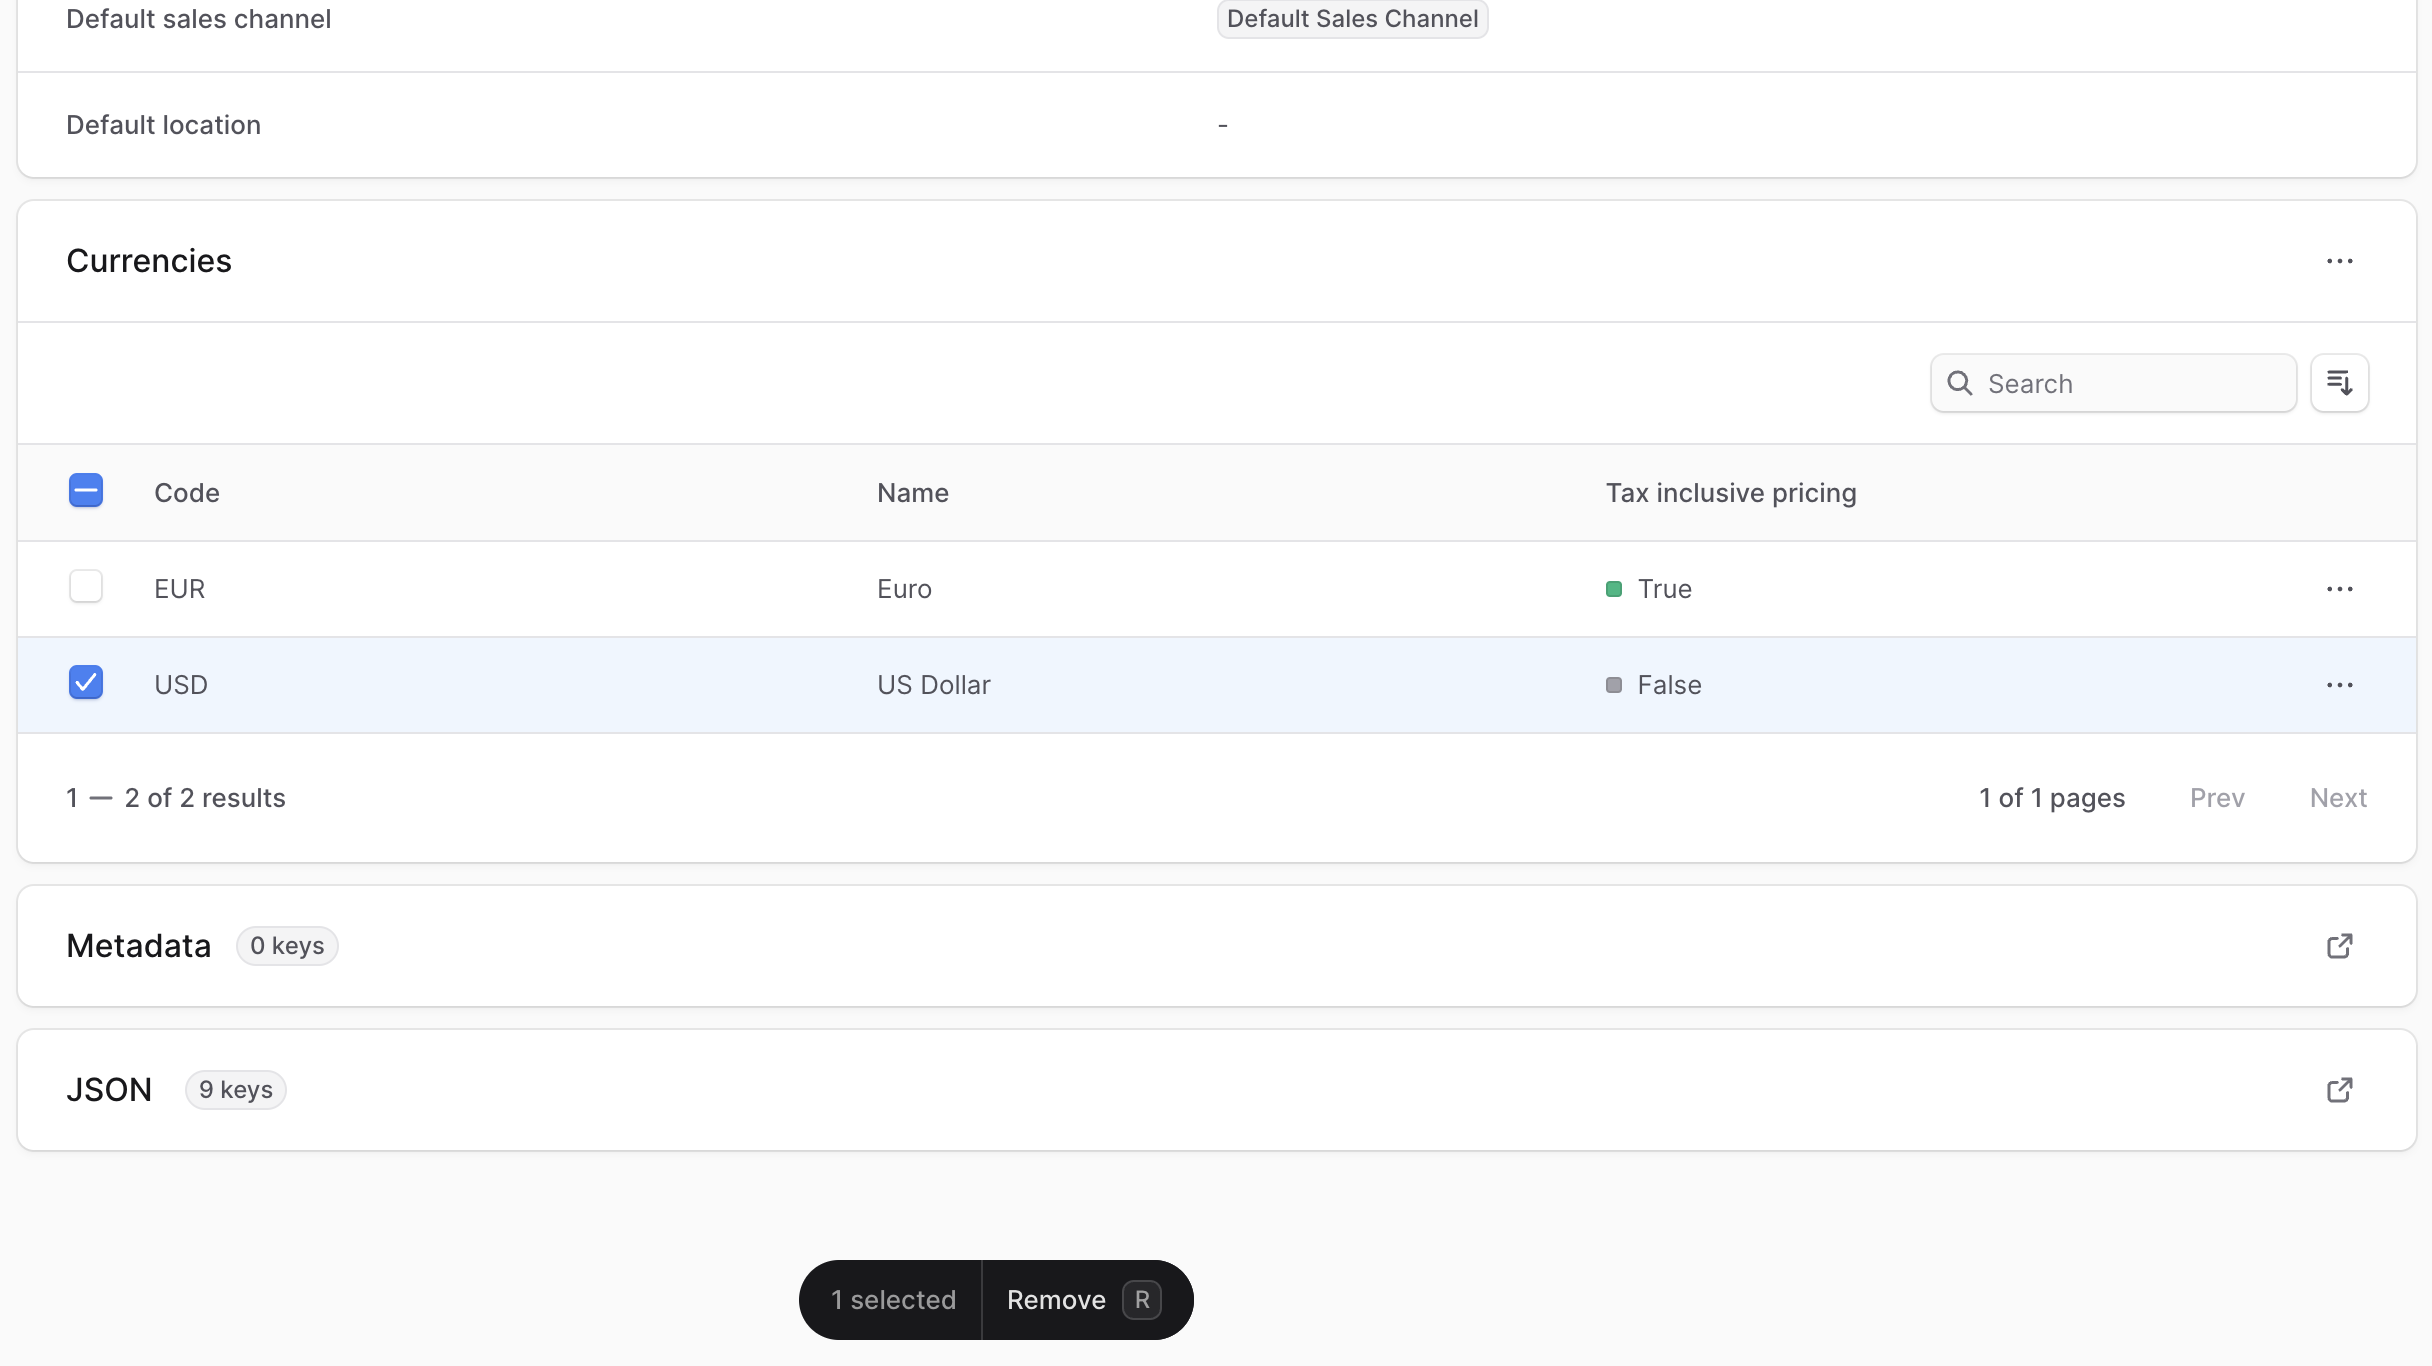
Remove Currencies
You can remove any currency from your store that isn’t the default currency. You can add the currency again later if needed. To remove a currency:- Go to Settings in store.
- Under the Currencies section, check the checkbox next to the currencies you want to remove.
- Press
Ror click the Remove button at the bottom center of the page. - Confirm removing the currencies by clicking the Remove button in the pop-up.
Manage Store Metadata
Store metadata enables custom data storage in key-value pairs, providing flexibility for: Common Use Cases:- Custom integrations with third-party services
- Additional store configuration data
- Tracking codes and analytics settings
- Custom business logic parameters
- Integration with external systems
- Use descriptive keys for easy identification
- Keep sensitive data encrypted
- Document metadata usage for team reference
- Regular cleanup of unused metadata
- Click the ↗ icon at the right of the “Metadata” section.
- In the side window that opens:
- Manage the key-value pairs in the table.
- To add a new row of key-value pairs before or after a row:
- Hover over the row and click the ⋮ icon at its right.
- Choose “Insert row above” or “Insert row below” from the dropdown.
- To delete a row of key-value pairs:
- Hover over the row and click the ⋮ icon at its right.
- Choose “Delete row” from the dropdown.
- Once you’re done, click the Save button.