Regions Management in BoxNCase Admin
Configure geographical selling regions to optimize your BoxNCase store for international commerce. Manage currencies, payment providers, and fulfillment options specific to different geographic markets.What is a Region?
Regions in BoxNCase represent geographic market segments where your store operates. Each region can be configured with specific business rules and preferences tailored to local market requirements.What is a Region?
Region Flexibility:- Multi-country regions with shared settings
- Single-country regions with unique configurations
- Customizable business rules per region
- Location-based customer experiences
- Currency preferences and conversion rules
- Payment provider availability
- Fulfillment and shipping providers
- Tax calculation methods
- Pricing strategies and promotions
Tax-Inclusive Pricing for Regions
Tax-Inclusive Pricing Configuration: Regions support flexible tax handling to comply with local regulations and customer expectations: Tax-Exclusive Pricing (Common in B2B/US Markets):- Base price displayed + calculated tax at checkout
- Clear tax breakdown for business customers
- Simplified accounting for tax-exempt customers
- Transparency in tax calculations
- All-inclusive price display
- Simplified shopping experience
- Compliance with EU pricing regulations
- Reduced checkout friction
- Set during initial region creation
- Modify through region update process
- Apply changes across all regional products
- Consider customer communication for changes
View Regions
To view regions in your store, go to Settings → Regions. Here, you can see a list of all the regions you have set up in your store. You can also search, filter, and sort the regions to find the one you are looking for.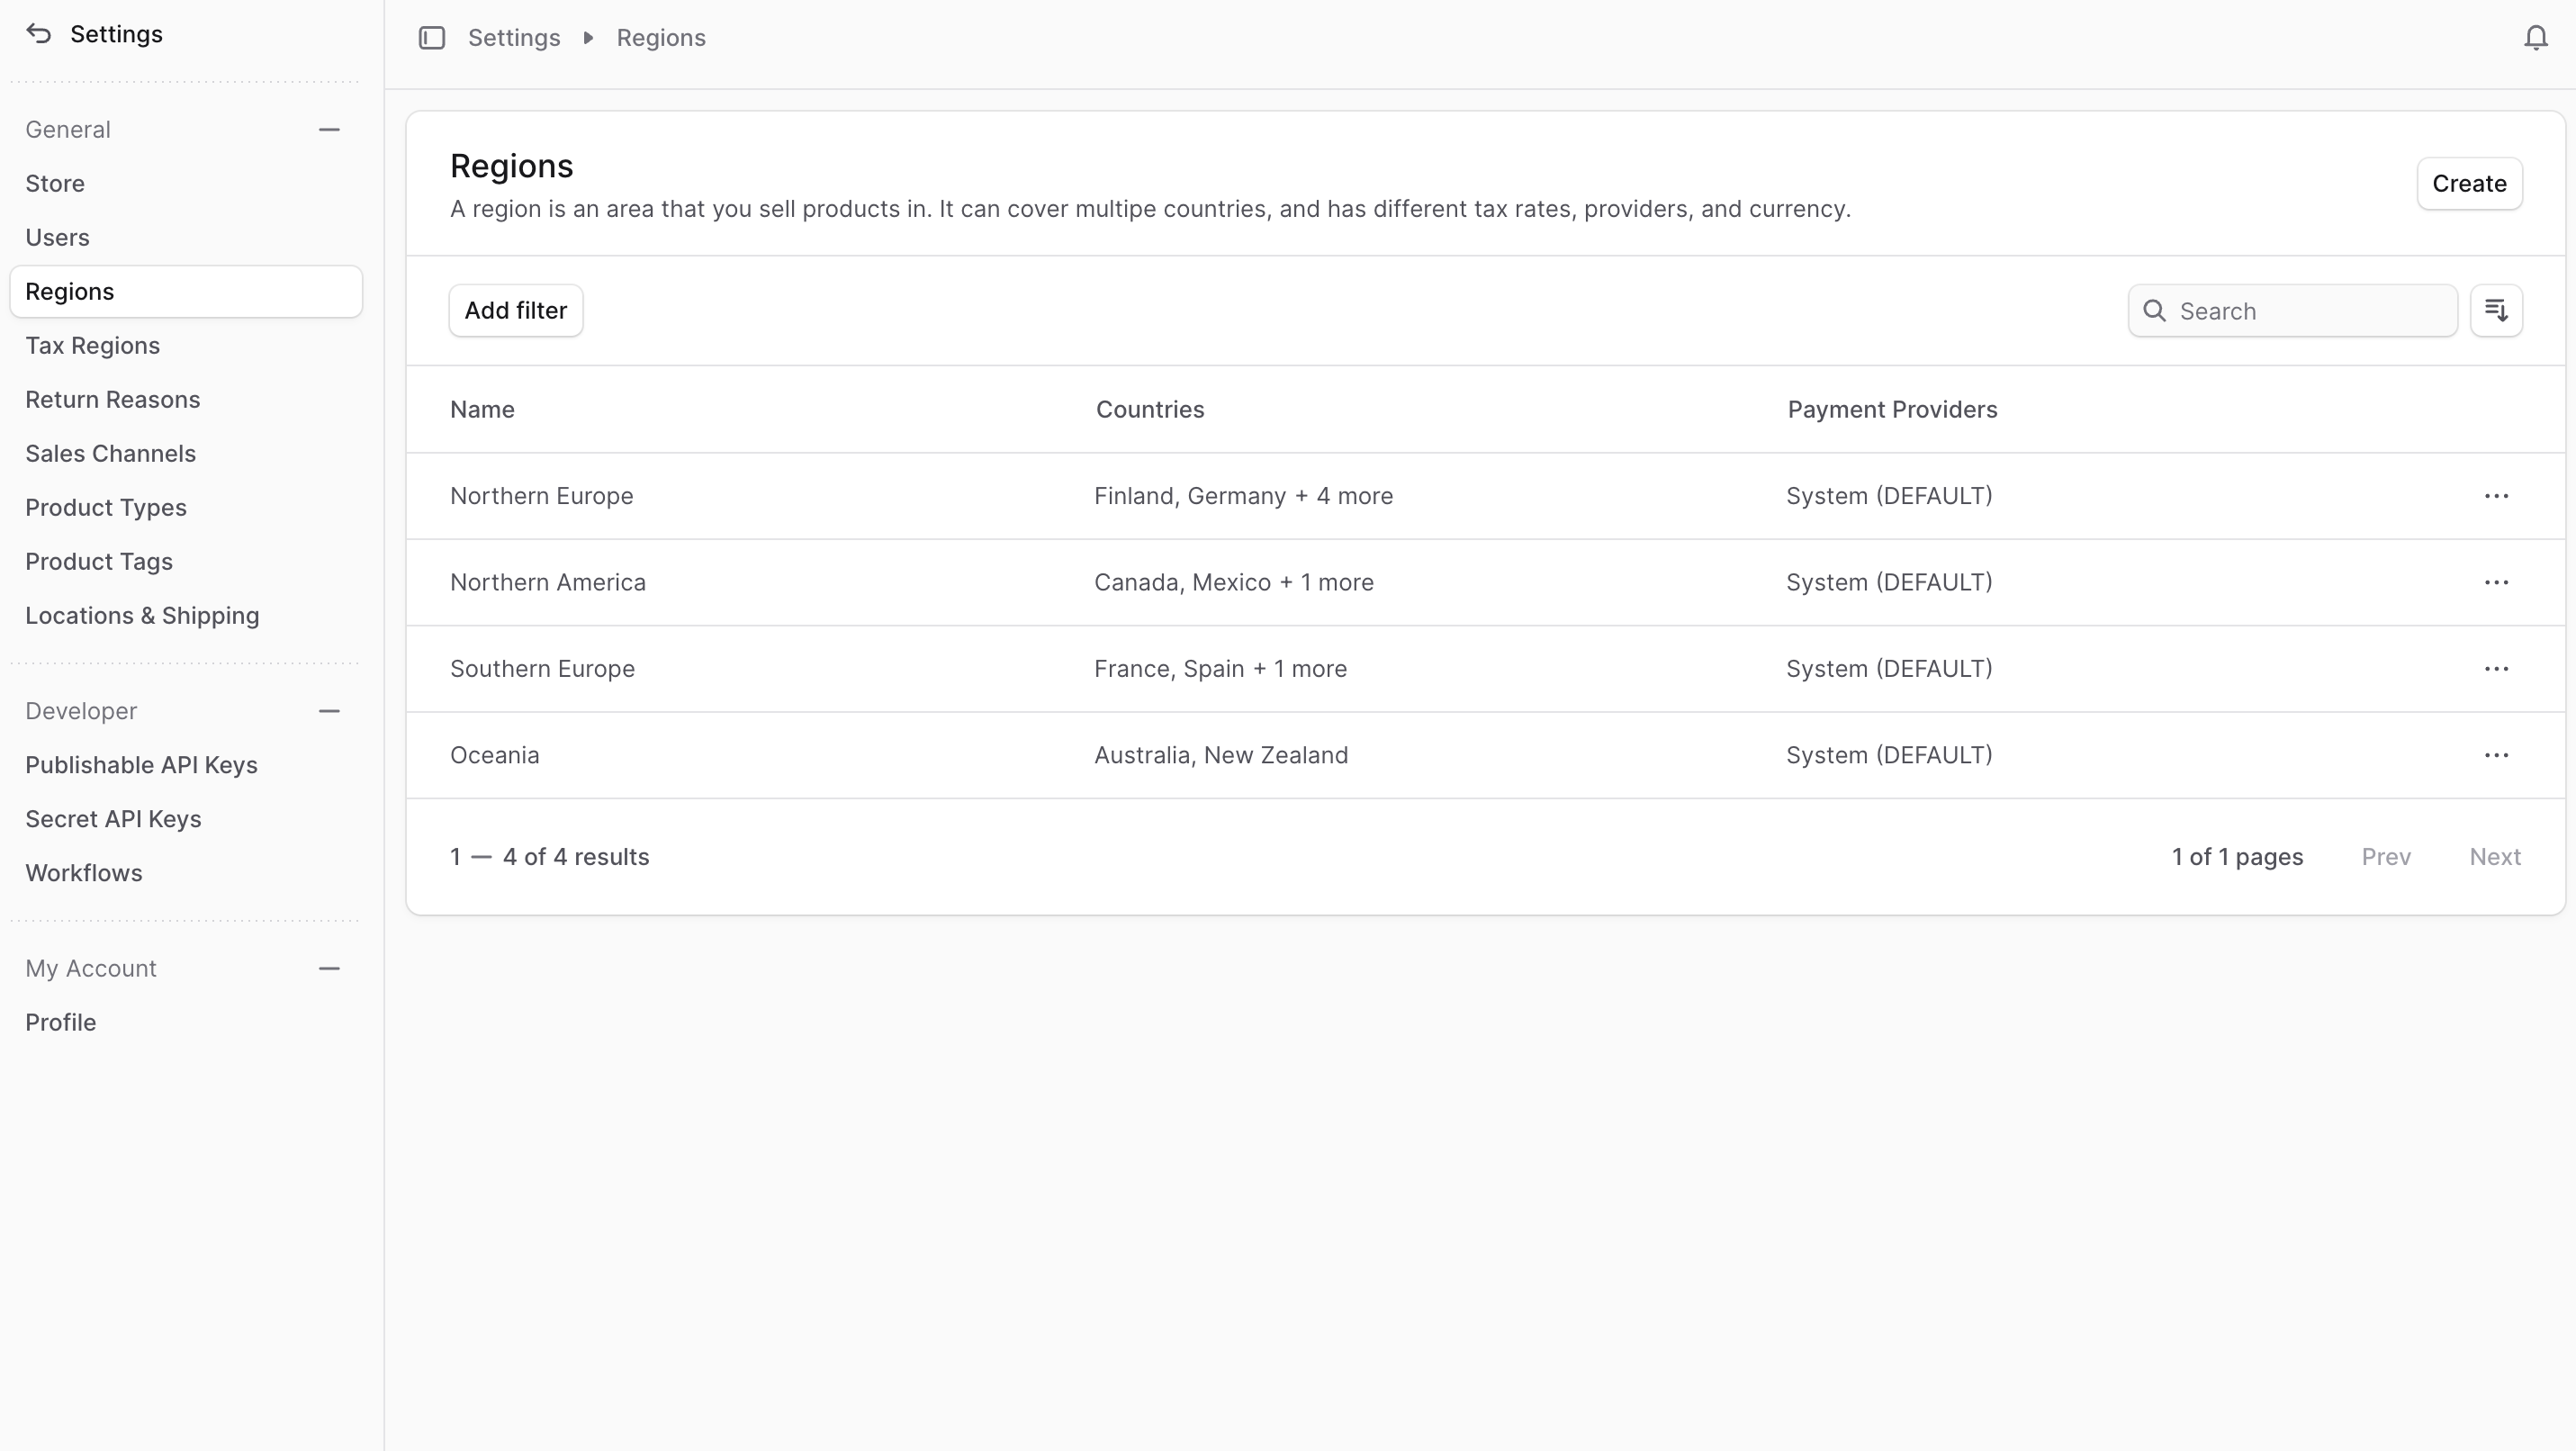
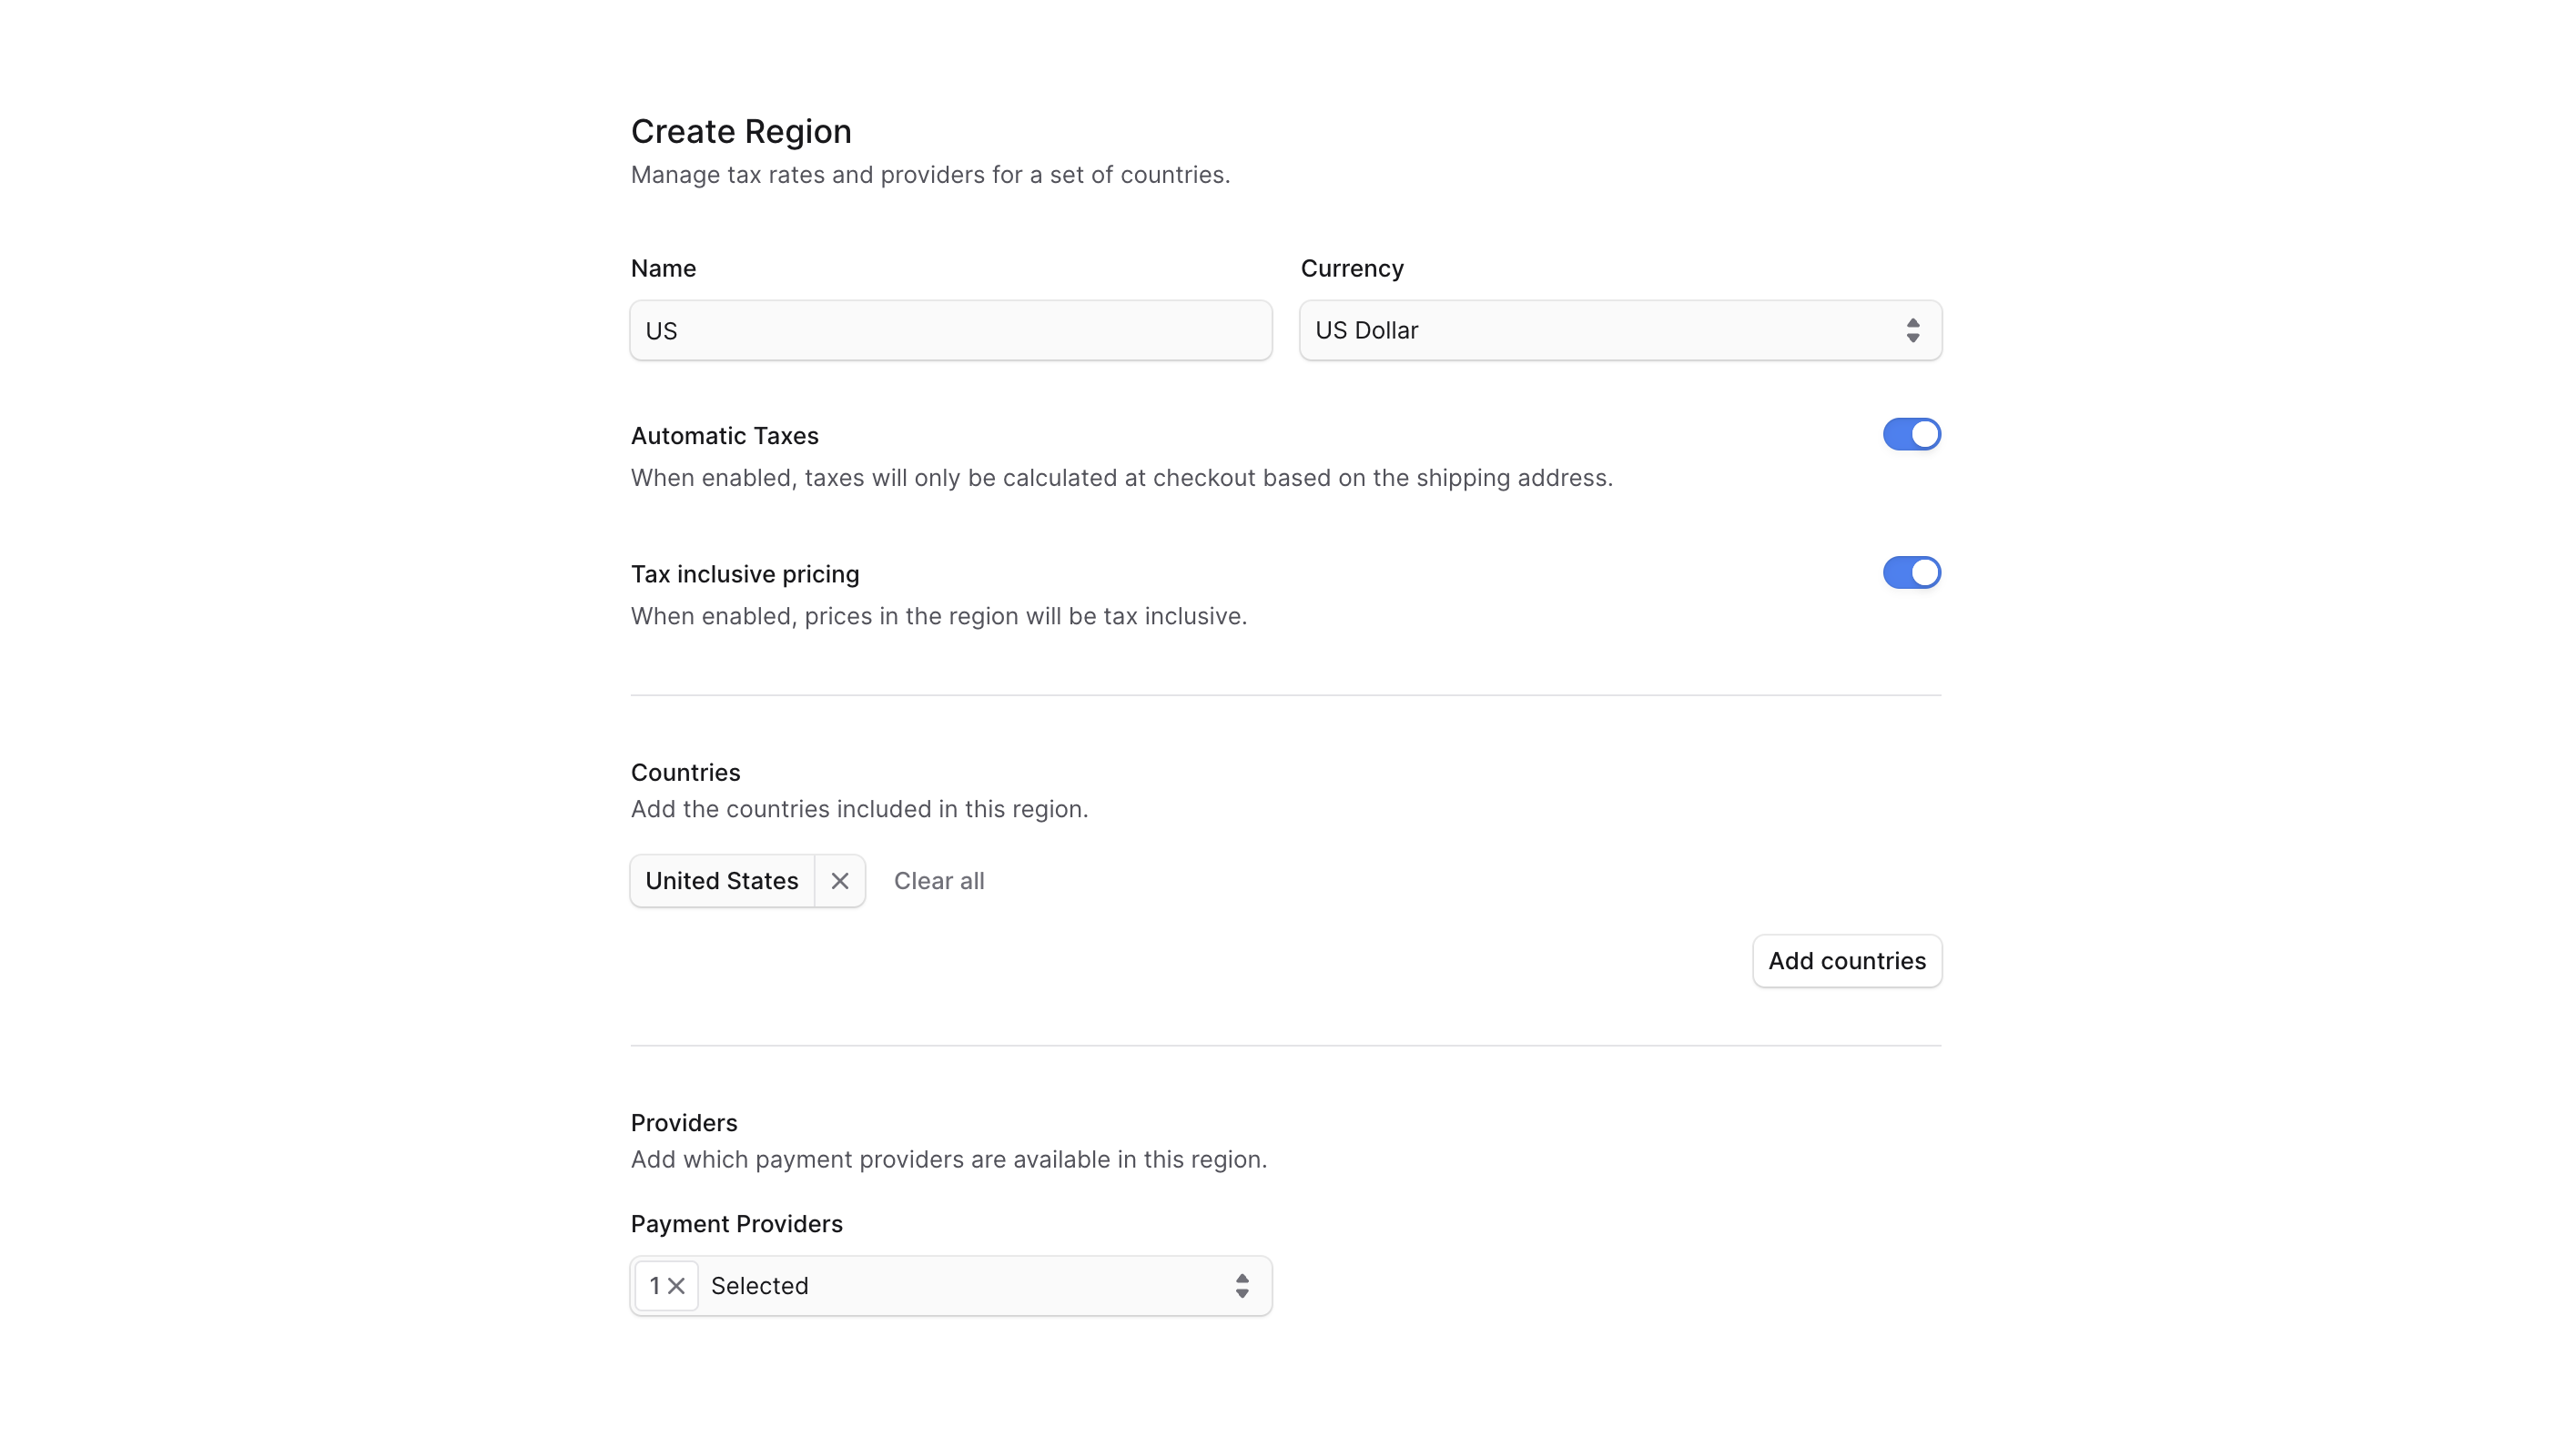
Create Region
To create a region:- Go to Settings ’ Regions.
- Click the Create button at the top right.
- In the form that opens:
- In the Name field, enter a name for the region. For example, “Europe”.
- In the Currency field, select the region’s currency. A region can only have one currency.
- If you don’t want taxes to be calculated automatically during checkout, you can disable the “Automatic Taxes” toggle. This input is mostly useful for developers and should be administered by your technical team.
- If you want to enable tax-inclusive pricing, toggle the “Tax inclusive pricing” setting.
- Under the Countries section, you can add the countries that are part of the region. To add countries:
- Click the “Add countries” button.
- Check the countries to add to the region.
- Click the Save button.
- In the Payment Providers field, choose the payment providers that customers in this region can use to pay for their orders.
- Once you’re done, click the Save button.
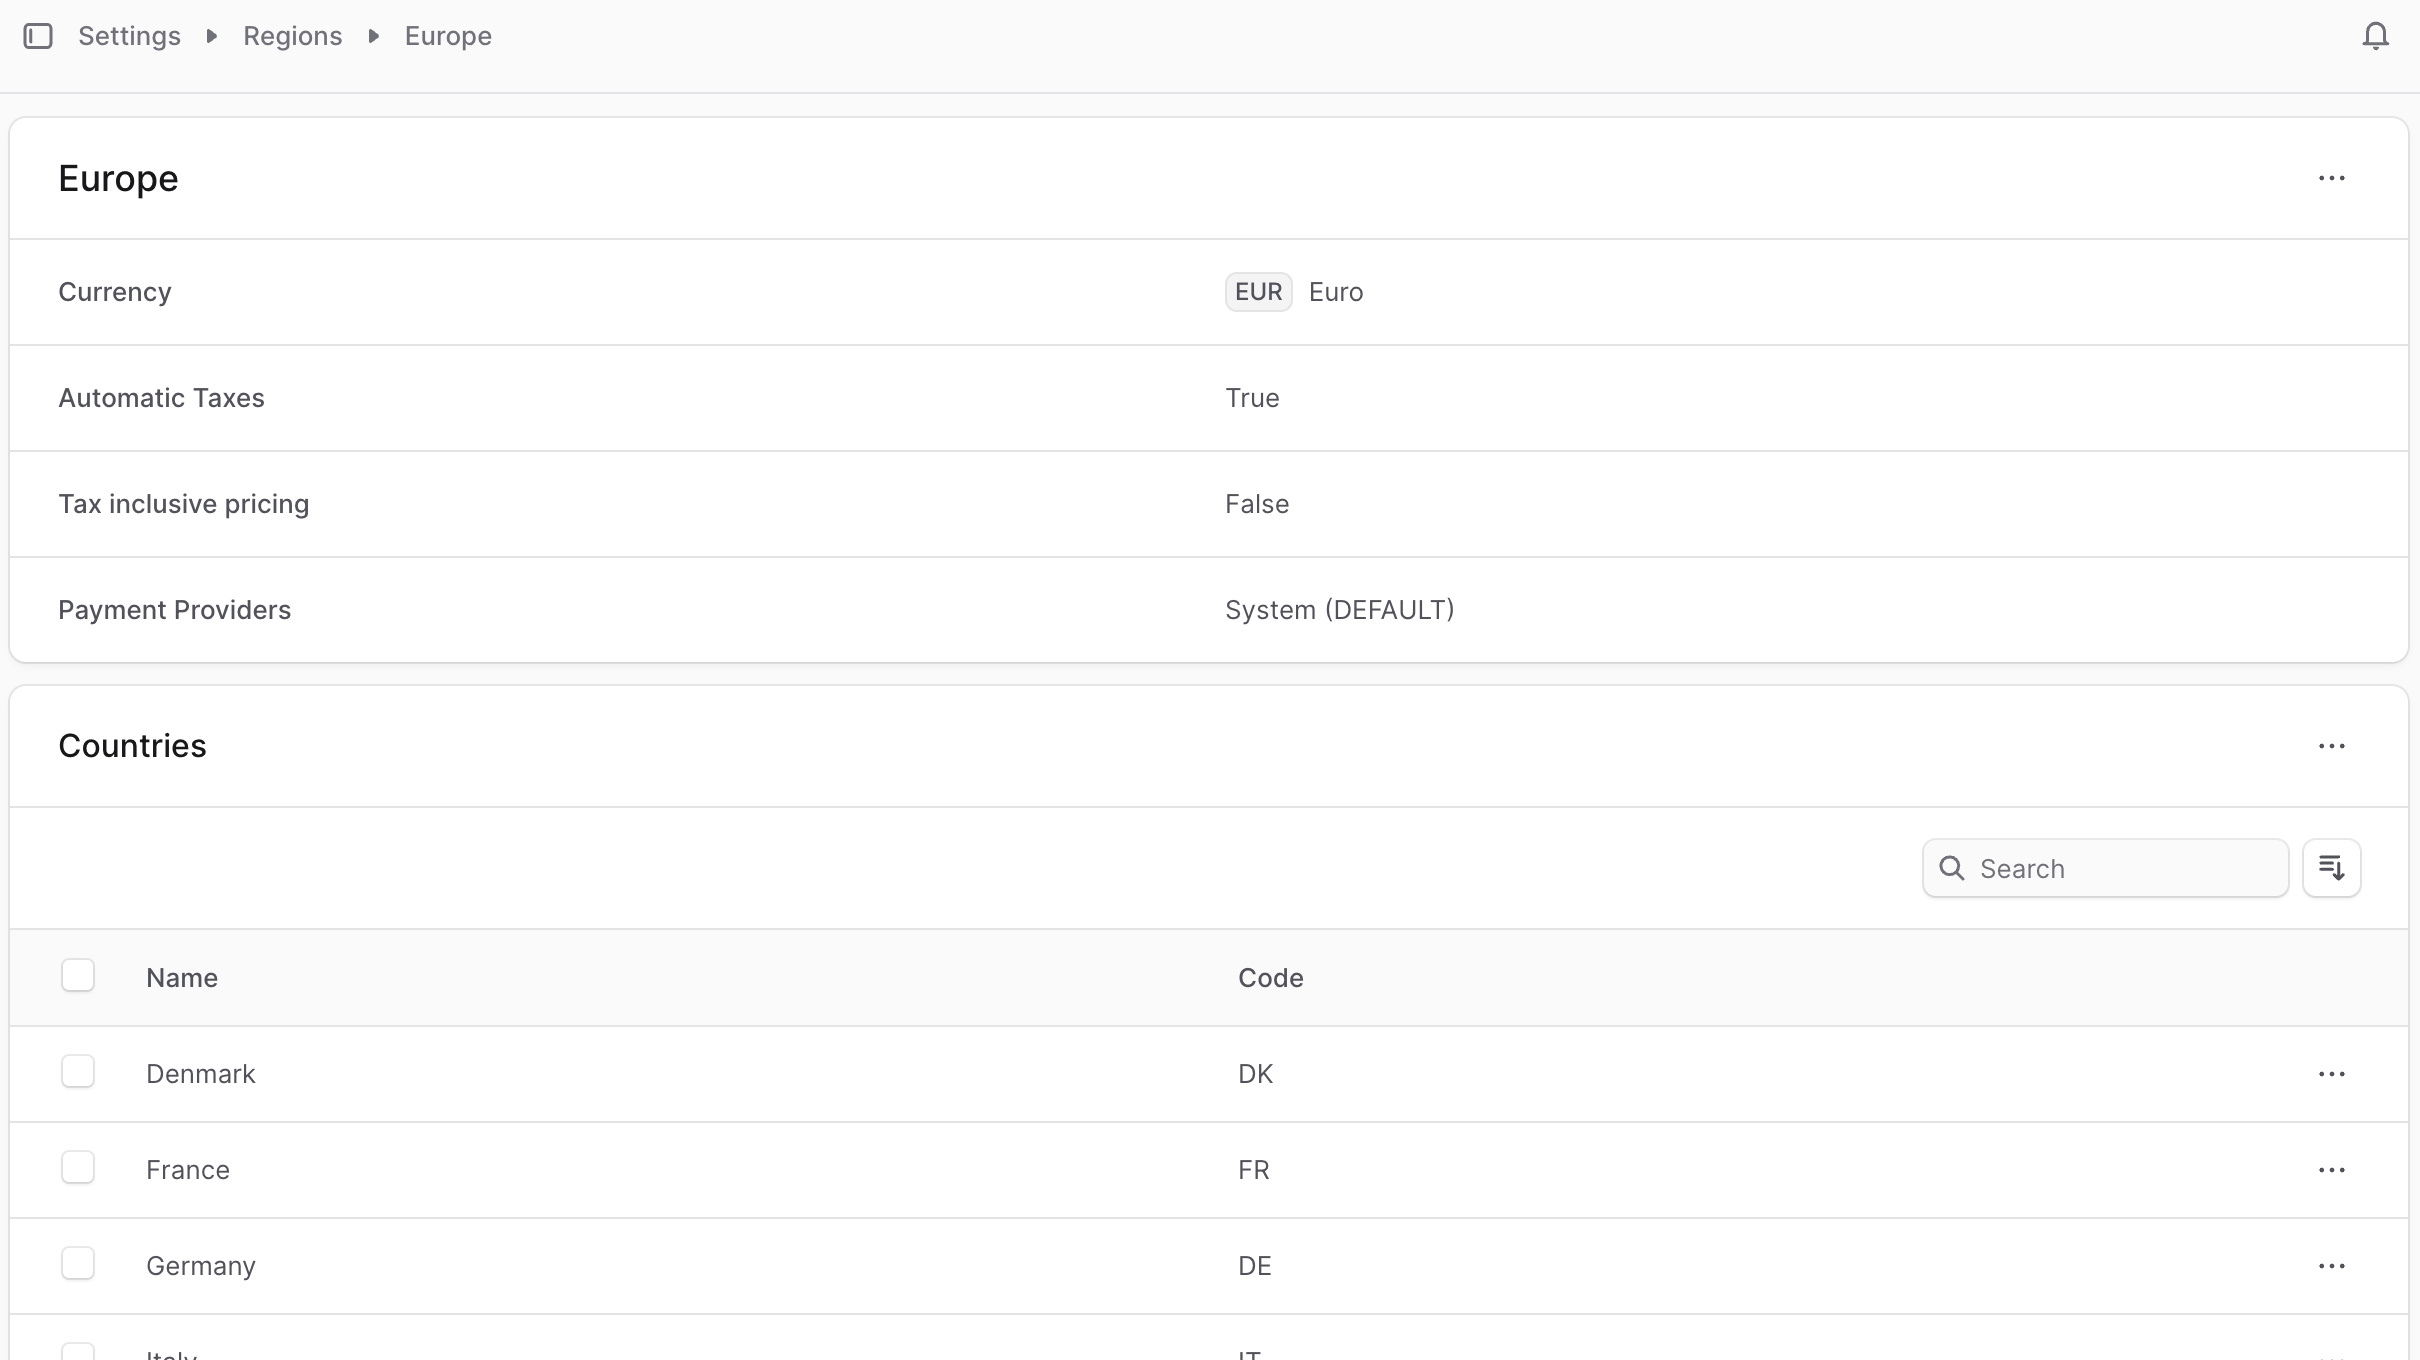
View Region Details
To view the details of a region:- Go to Settings ’ Regions.
- Click on the region you want to view.
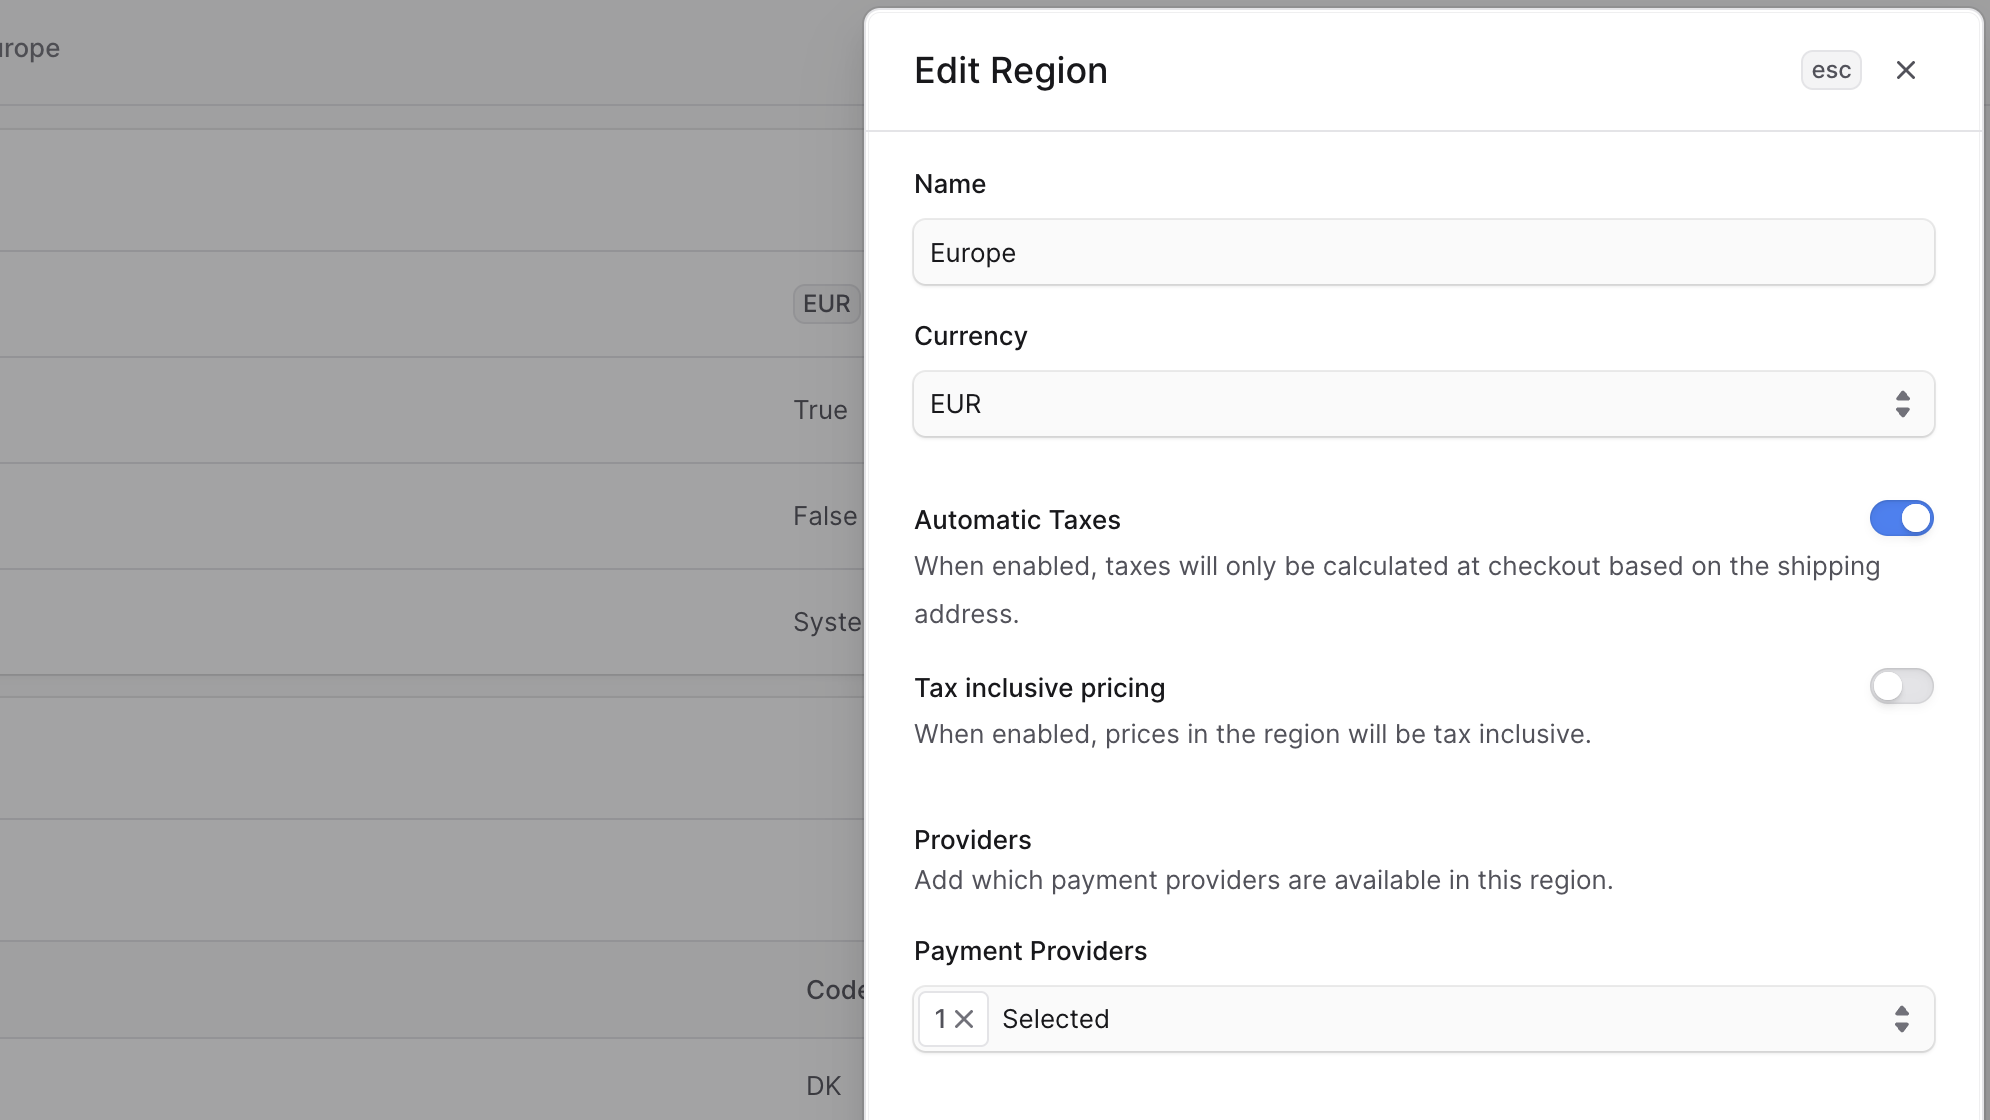
Edit Region Details
To edit a region’s details:- Go to the region’s details page.
- Click the ⋯ icon at the top right of the first section.
- Choose Edit from the dropdown.
- In the side window that opens, you can edit the region’s name, currency, payment providers, and settings for automatic taxes and tax-inclusive pricing.
- Once you’re done, click the Save button.
Manage Region’s Countries
You can manage a region’s countries to add or remove them from the region.Add Countries to Region
To add countries to a region:- Go to the region’s details page.
- Click the ⋯ icon at the top right of the “Countries” section.
- Choose “Add countries” from the dropdown.
- In the list that opens, check the countries you want to add to the region.
- Once you’re done, click the Add button.
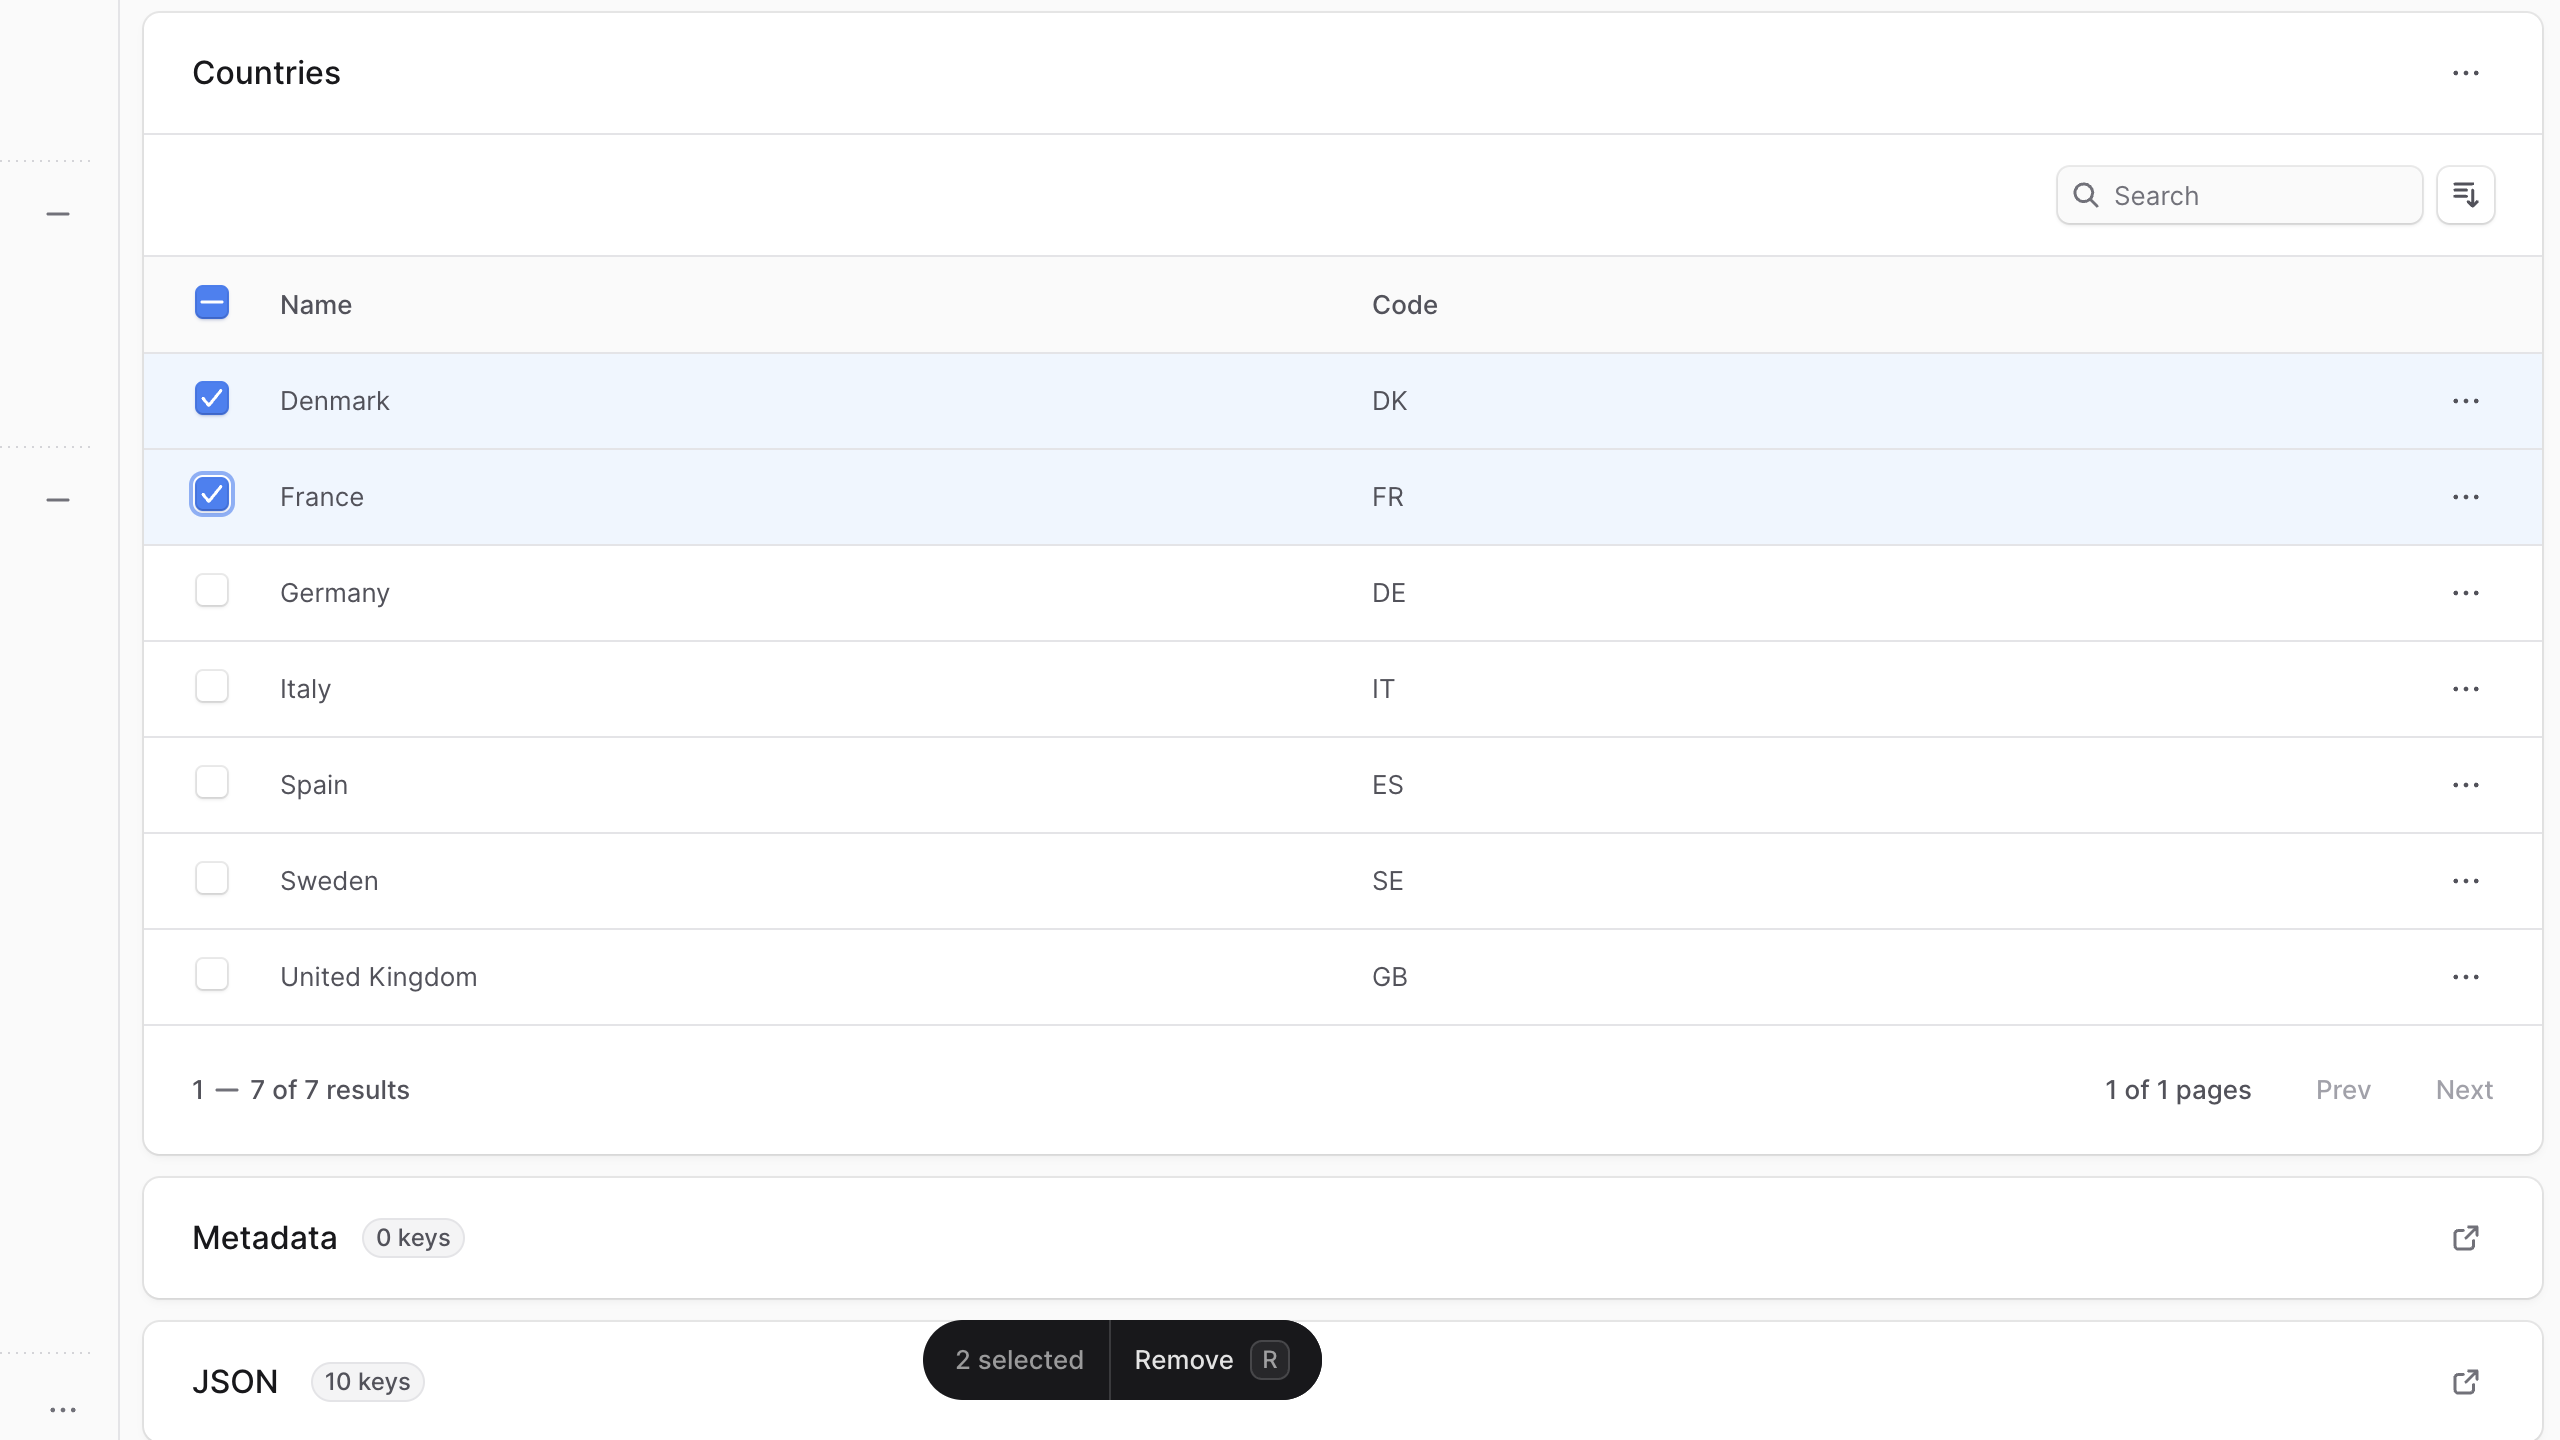
Remove Countries from Region
To remove countries from a region:- Go to the region’s details page.
- Under the “Countries” section, check the countries you want to remove from the region.
- Press
Ror click the Remove button at the bottom center of the page. - Confirm removing the country by typing “Remove” in the pop-up and clicking the Remove button.
Manage Region Metadata
Regional metadata enables custom data storage for advanced integrations: Common Use Cases:- Integration with regional logistics providers
- Custom business rules and workflows
- Regional compliance tracking
- Marketing automation tags
- Analytics and reporting parameters
- Use consistent naming conventions
- Document metadata purpose and usage
- Regular cleanup of unused metadata
- Security considerations for sensitive data
- Click the ↗ icon at the right of the “Metadata” section.
- In the side window that opens:
- Manage the key-value pairs in the table.
- To add a new row of key-value pairs before or after a row:
- Hover over the row and click the ⋮ icon at its right.
- Choose “Insert row above” or “Insert row below” from the dropdown.
- To delete a row of key-value pairs:
- Hover over the row and click the ⋮ icon at its right.
- Choose “Delete row” from the dropdown.
- Once you’re done, click the Save button.
Delete Region
Deleting a region is irreversible. To delete a region from your store:- Go to the region’s details page.
- Click the ⋯ icon at the top right of the first section.
- Choose Delete from the dropdown.
- Confirm deleting the region by typing the region’s name in the pop-up and clicking the Delete button.