Manage Order Returns in BoxNCase Admin
In this guide, you’ll learn about order returns and how to manage them using BoxNCase’s automated Return Merchandise Authorization (RMA) system.
Order Returns Overview
After items have been delivered to the customer, they can return the items for a refund. These items are added back to stock or marked as damaged.
 BoxNCase allows you to automate the Return Merchandise Authorization (RMA) process by supporting two ways of creating returns:
- Customer-Initiated Returns: Customers request returns through your storefront, which appear in the BoxNCase Admin for your review
- Admin-Created Returns: You create returns directly and notify customers about the process
As an admin user, you can then manage the return to either cancel it or mark the items as received and refund the customer.
Find Return Requests of an Order
To find return requests of an order:
- Open the order’s details page.
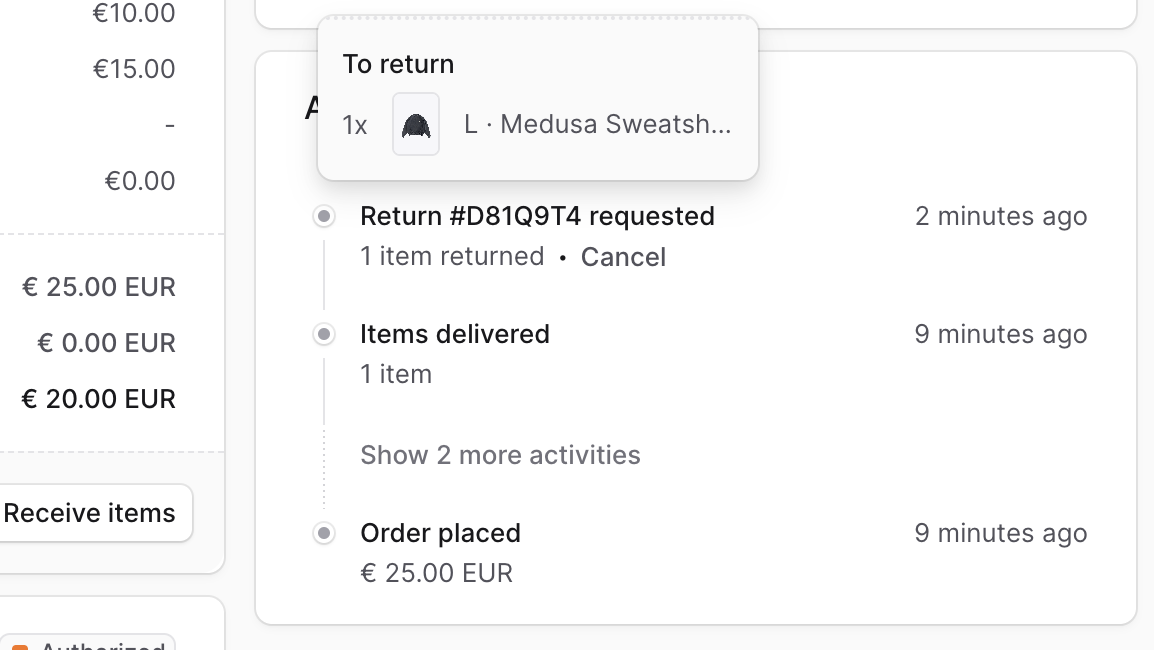
- In the Activity section, you’ll find that a return was requested, which you can manage.
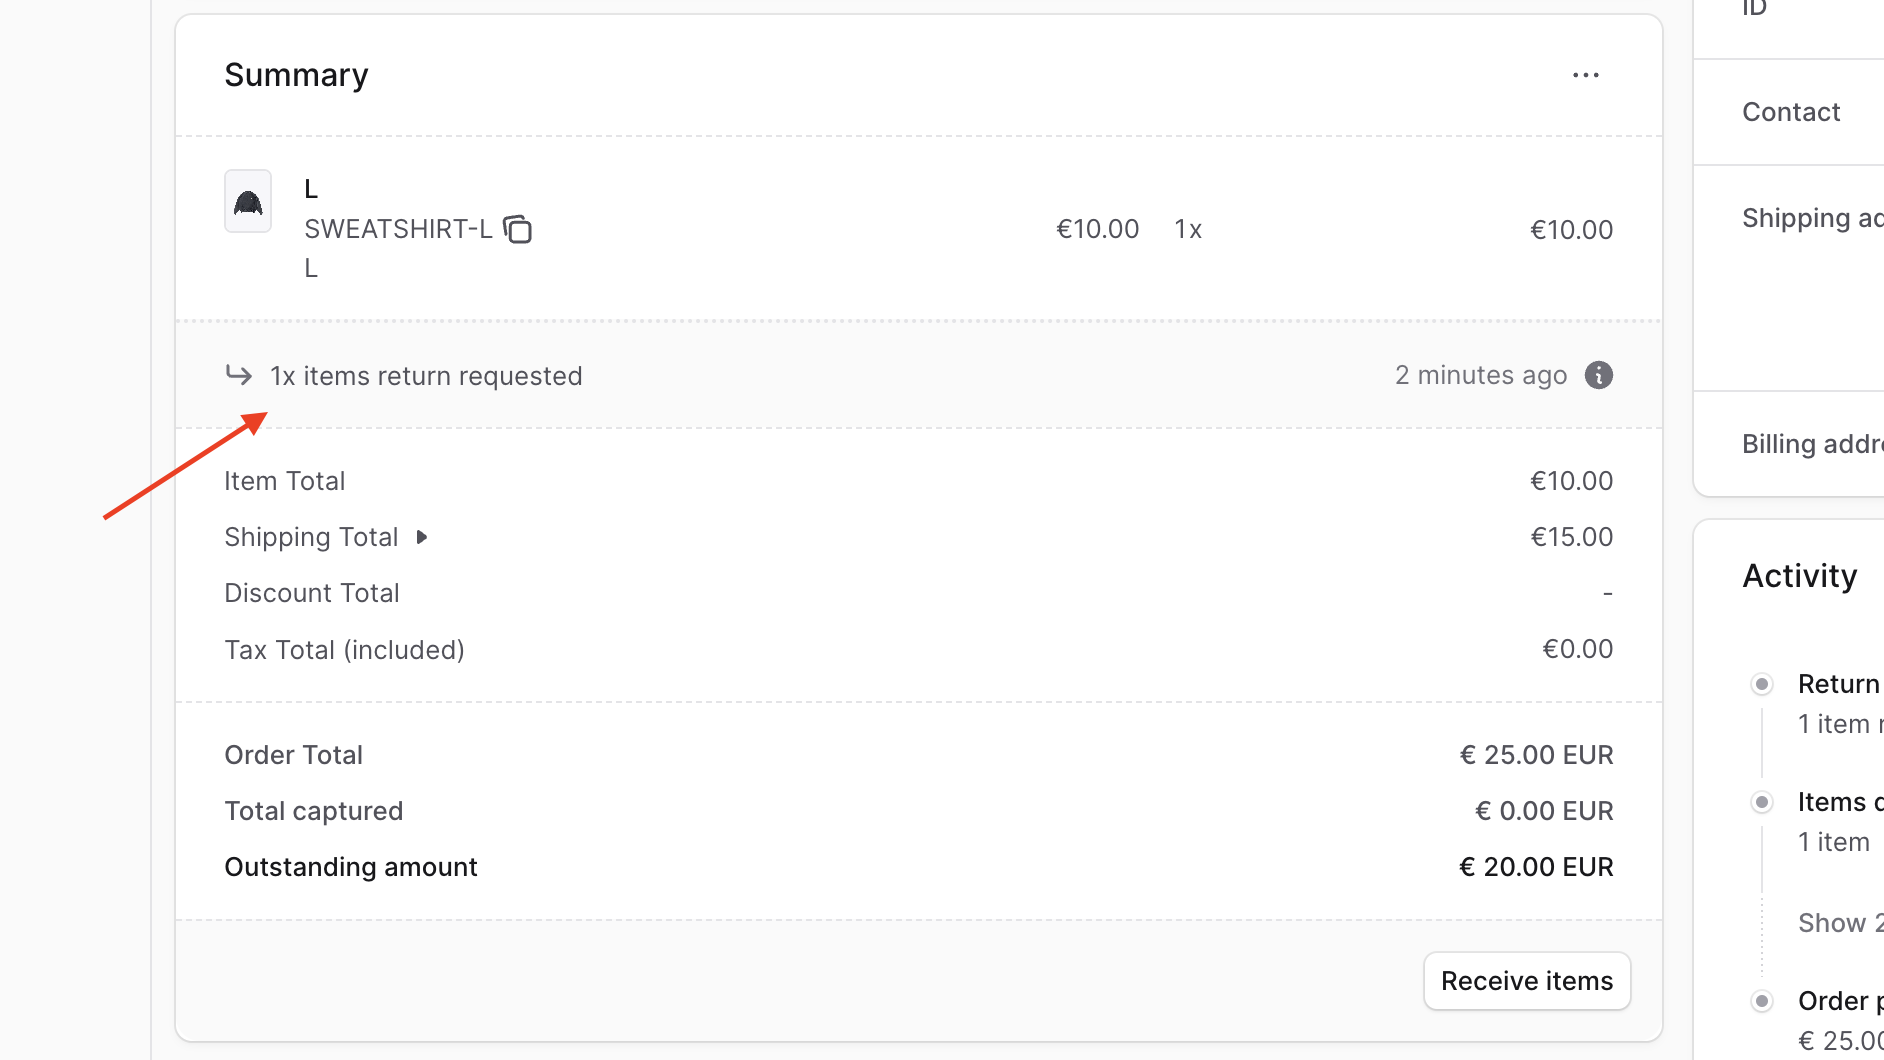
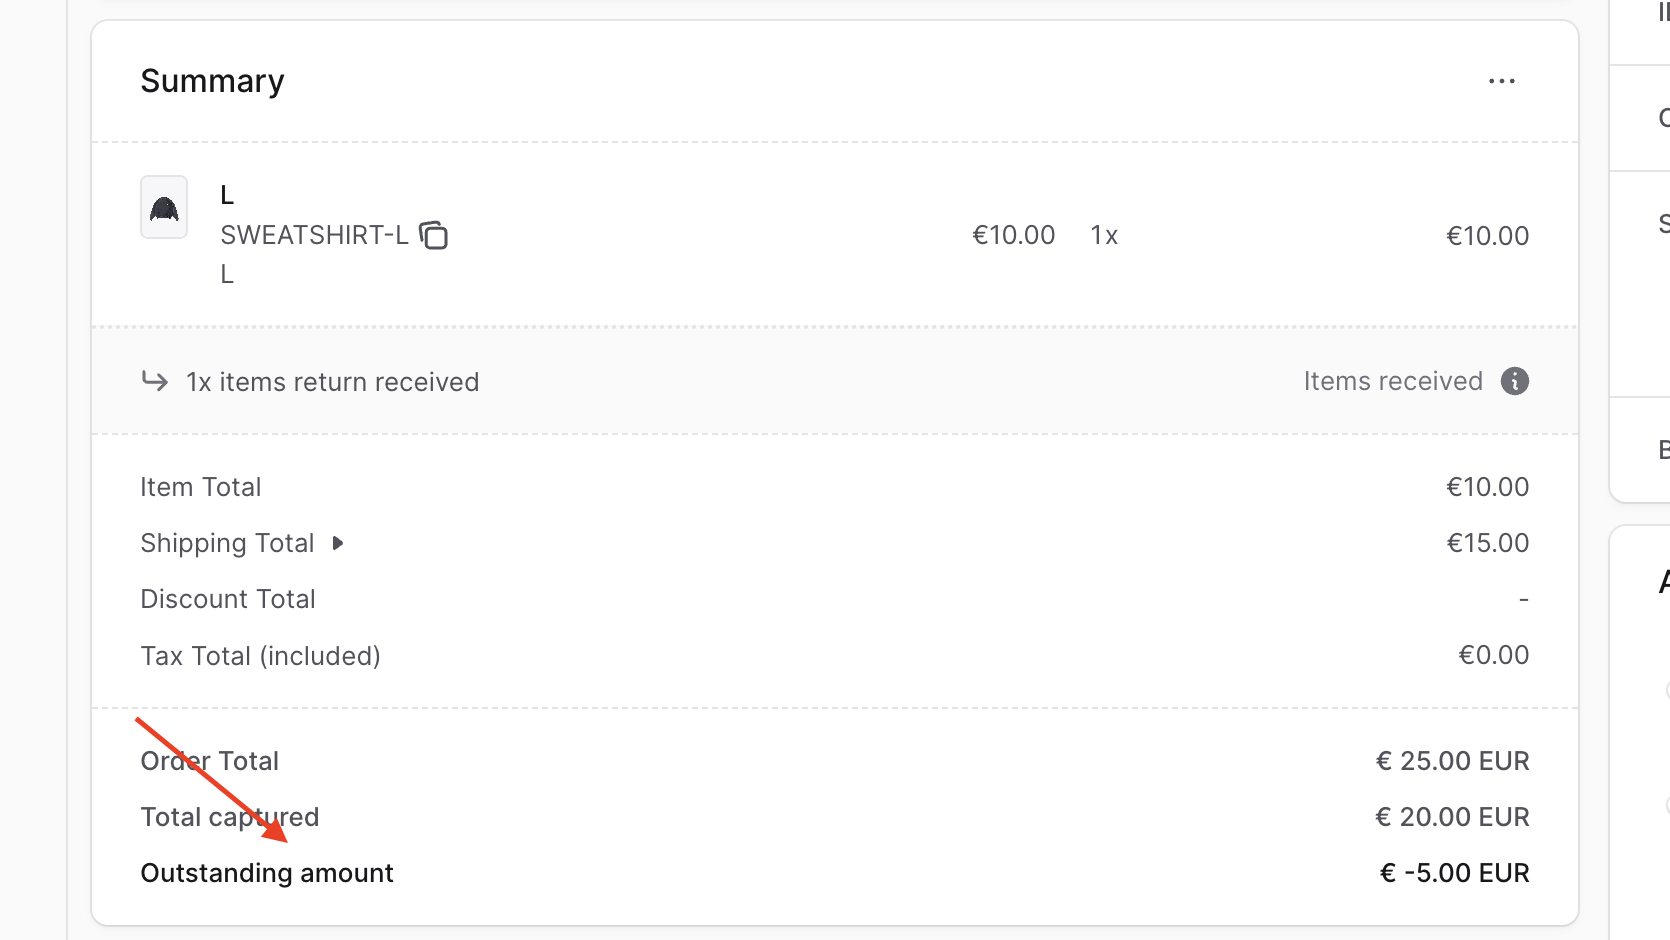
You’ll also find the items requested to be returned in the Summary section, with a note below the items to be returned.
Create an Order Return
You can create a return from the BoxNCase Partners Admin for delivered items in an order.
To create a return for an order:
- Open the order details page.
- In the Summary section, click on the
⋯ icon at the top right.
- Choose “Create Return” from the dropdown.
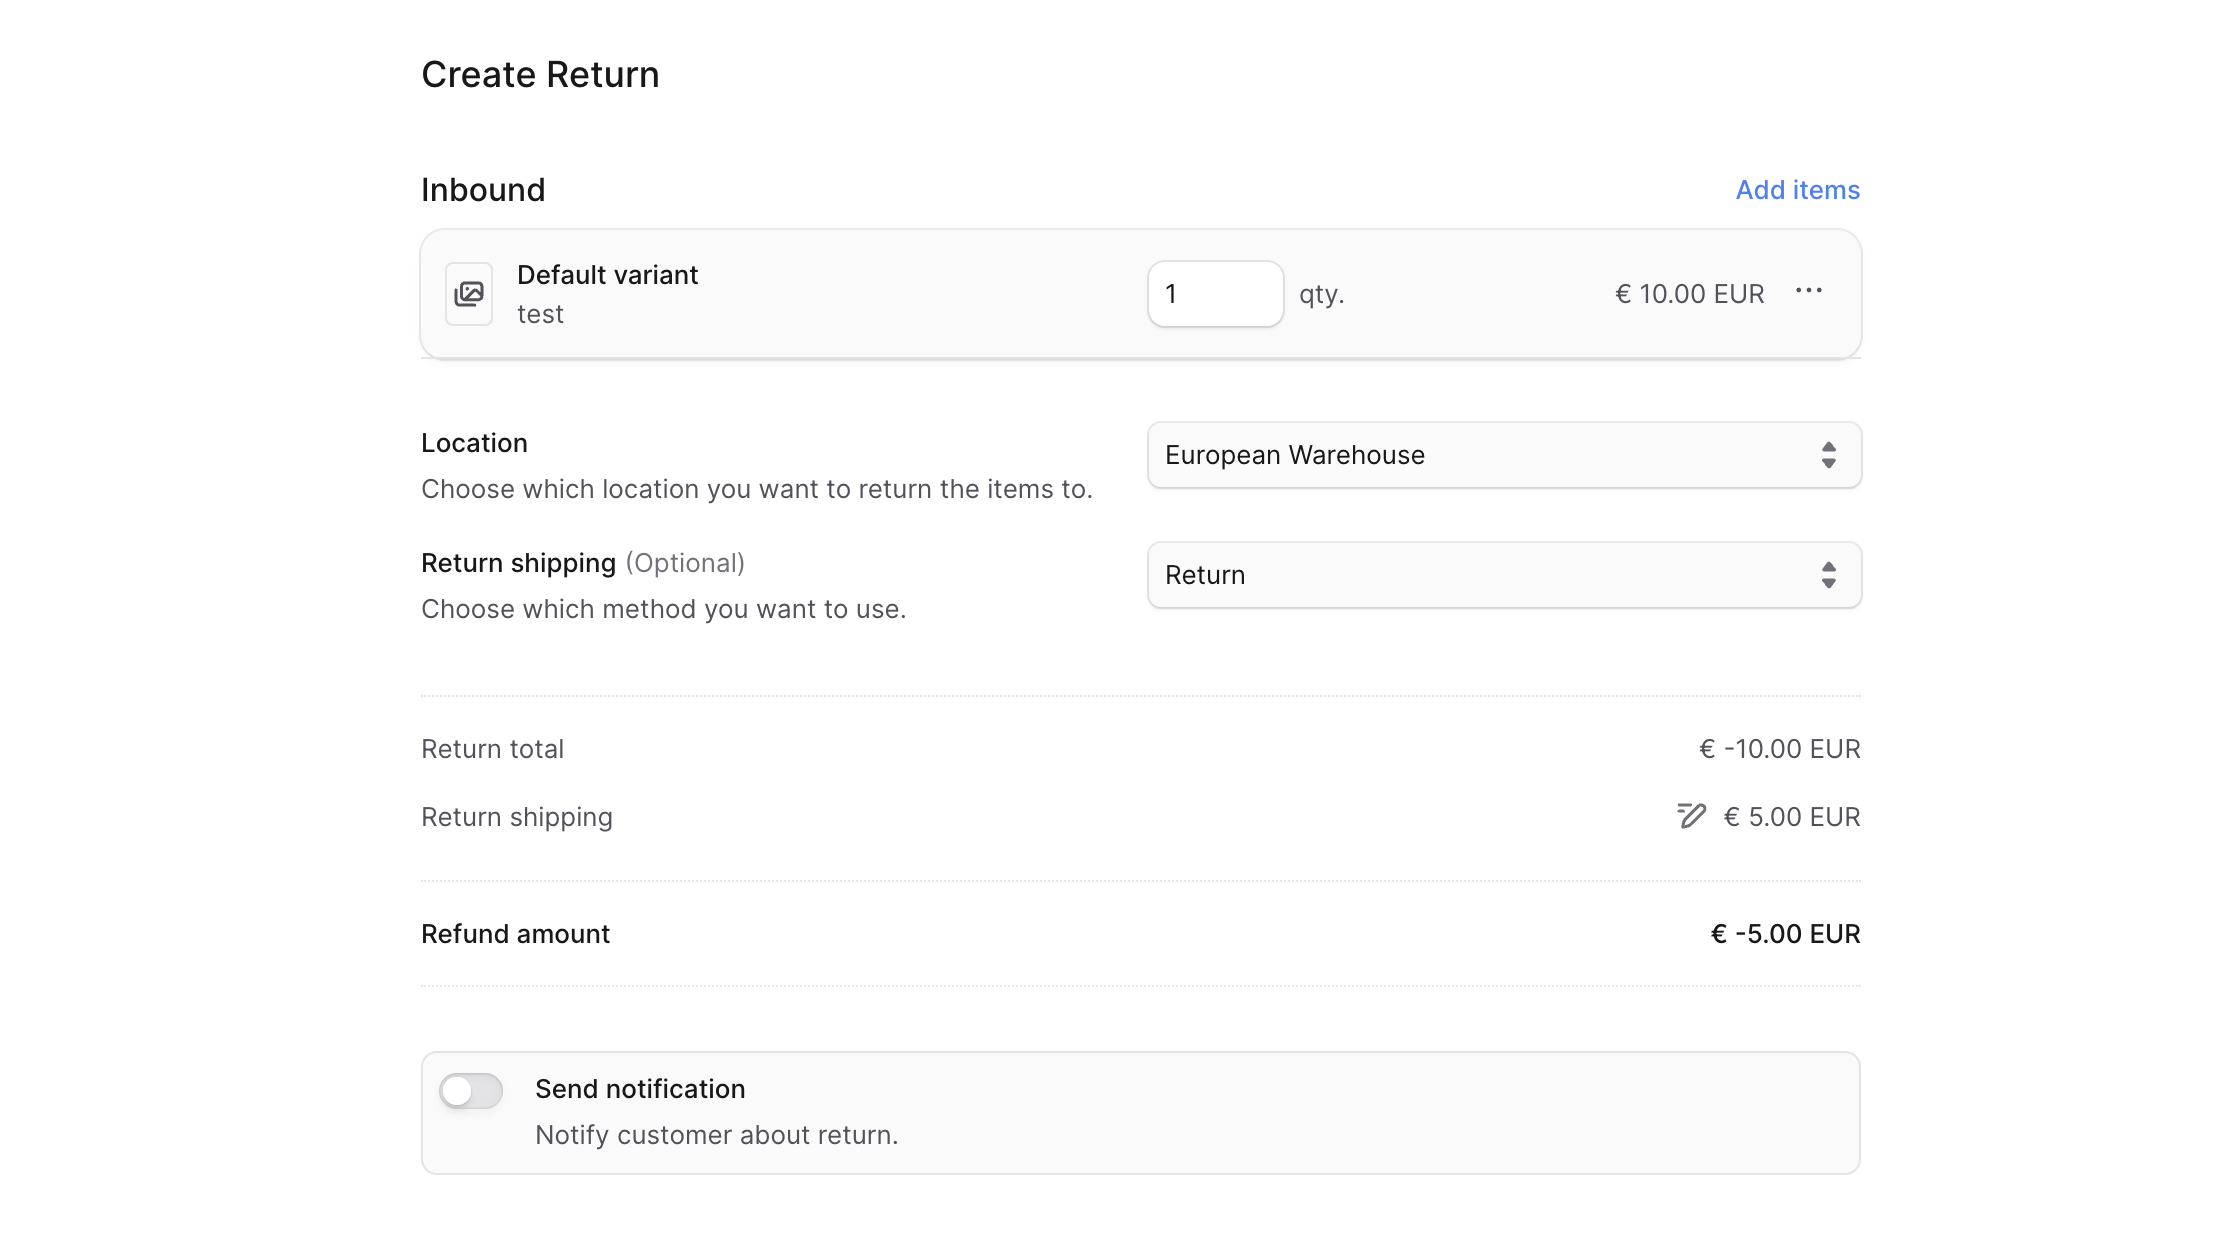
- In the form that opens:
- To add items to return:
- Click on “Add items” in the Inbound section.
- In the list that opens, select the items you want the customer to return.
- Click Save when done.
- To edit item quantity, adjust the input next to the item.
- To add a reason for a returned item:
- Click the three-dots icon next to the item.
- Choose “Add Reason”.
- Select a reason from the dropdown (configured in Settings).
- To add a note for a returned item:
- Click the three-dots icon next to the item.
- Choose “Add Note”.
- To remove an inbound item:
- Click the three-dots icon next to the item.
- Choose “Remove”.
- For the Location input, select the return destination.
- Note: You can’t receive items unless the variant has inventory configured at that location.
- For Return shipping, you may select a return shipping method.
- To modify the return shipping cost:
- Click the ✏️ icon next to Return Shipping total.
- Enter the new cost.
- If you don’t want the customer to receive a return notification, uncheck the Send notifications toggle.
- Click “Confirm Return”, then confirm by clicking “Continue” in the popup.
This creates the return, which is then visible in the Summary and Activity sections of the order.
Mark Return Items as Received
Once the customer returns the item, you can mark it as received. This refunds the customer and updates inventory for non-damaged items.
To mark return items as received:
- Open the order’s details page.
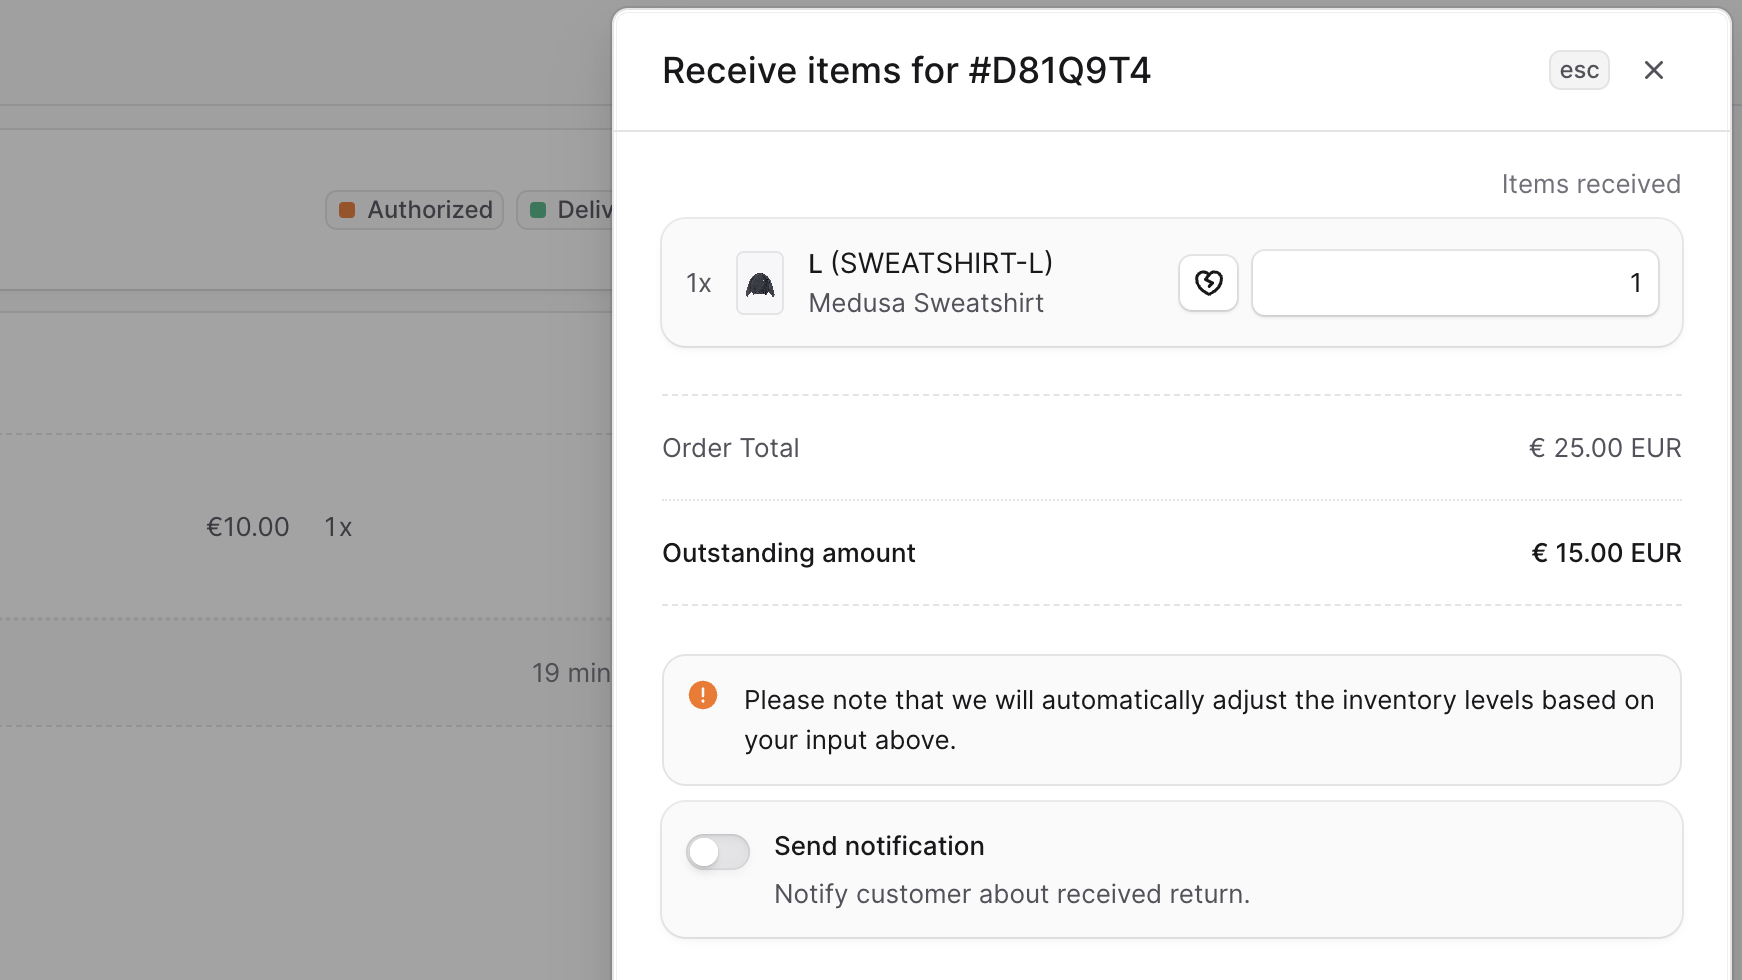
- In the Summary section, click “Receive items”.
- In the side window:
- For each returned item:
- Enter the non-damaged quantity.
- To mark items as damaged:
- Click the 💔 icon.
- Enter the damaged quantity.
- Check Send notifications if you want to notify the customer.
- Click Save.
Cancel Requested Return
You can cancel a return—whether requested by the customer or created manually.
⚠️ Canceling a return is irreversible. The customer must initiate a new return if needed.
To cancel a requested return:
- In the Activity section, click Cancel next to the Return Request.
- Confirm by clicking the Confirm button in the popup.
Refund Customer for a Return
If a return results in an outstanding amount, you’ll see it in the Summary section.
To refund the payment, follow the steps in the Payments guide.
Key Features
BoxNCase return management provides:
- Automated RMA Process: Streamlined workflow from request to completion
- Customer-Initiated Returns: Let customers request returns through your storefront
- Admin-Created Returns: Proactively create returns for customer service
- Flexible Return Reasons: Configure and track why items are being returned
- Location Management: Specify which warehouse receives returned items
- Inventory Integration: Automatically restore non-damaged items to stock
- Damage Tracking: Mark items as damaged to exclude from resaleable inventory
- Automated Refunds: Process refunds once items are received
- Customer Notifications: Keep customers informed throughout the return process
Return Workflow
The return process typically follows these steps:
- Return Request: Customer initiates return or admin creates one
- Return Creation: Select items, specify location, add shipping details
- Customer Ships Items: Customer sends items back to specified location
- Receive Items: Mark items as received and assess condition
- Process Refund: Issue refund for received items
- Update Inventory: Add non-damaged items back to stock
Return Status Management
Returns progress through several states:
- Requested: Return has been created but items not yet received
- Received: Items have been received and processed
- Canceled: Return was canceled before completion
Canceling a return is irreversible. Once canceled, customers must initiate a new return request if they still want to return items.
Handling Damaged Items
When receiving returned items:
- Inspect each item for damage or defects
- Mark non-damaged items to return to inventory
- Mark damaged items to exclude from resaleable stock
- Document damage for quality control and vendor claims
- Process refunds for all returned items regardless of condition
Inventory Impact
- Non-damaged items: Automatically added back to available inventory
- Damaged items: Removed from circulation, tracked separately
- Partial damage: Handle mixed quantities appropriately
Return Reasons and Tracking
Common return reasons include:
- Wrong item received
- Item damaged in shipping
- Item doesn’t match description
- Customer changed mind
- Defective product
- Wrong size/color ordered
Tracking return reasons helps:
- Identify product issues that need attention
- Improve product descriptions and photos
- Optimize packaging to reduce shipping damage
- Analyze customer satisfaction trends
- Work with suppliers on quality improvements
Return Shipping Considerations
Return Shipping Methods
- Configure available return shipping options
- Set costs for different return methods
- Offer prepaid return labels when appropriate
- Track return shipments for better customer service
Return Shipping Costs
- Customer pays: Add shipping cost to their responsibility
- Store covers: Absorb return shipping costs
- Conditional: Free returns over certain amounts or for defects
Best Practices
- Clear Return Policy: Establish and communicate return timeframes and conditions
- Quick Processing: Handle return requests promptly to maintain customer satisfaction
- Quality Inspection: Thoroughly inspect returned items before restocking
- Customer Communication: Keep customers informed about return status and refund timeline
- Documentation: Maintain detailed records of return reasons and item conditions
- Staff Training: Ensure team understands return procedures and policies
- Vendor Relations: Use return data to improve supplier relationships
Troubleshooting Common Issues
Can’t Create Return
- Verify items have been delivered
- Check if return window hasn’t expired
- Ensure items are returnable per your policy
Items Not Returning to Inventory
- Confirm items weren’t marked as damaged
- Verify inventory management is enabled for the variant
- Check stock location configuration
Refund Not Processing
- Ensure payment was previously captured
- Verify payment provider supports refunds
- Check for sufficient refund amount authorization