Edit an Order’s Items in BoxNCase Admin
In this guide, you’ll learn how to edit items in an order. This includes adding, updating, or deleting items.How Order Edits Work
Using the BoxNCase Admin, you can edit an order to:- Add new items to the order
- Update quantities of existing items
- Remove items from the order
- Duplicate items for easy quantity increases
 When you request an order edit, the changes aren’t saved on the order until the order edit is confirmed. There are two ways to confirm an order edit request:
- Customer Confirmation: The customer reviews and accepts the edit. If additional payment is required, they authorize it through your storefront
- Force Confirmation: You confirm the edit immediately, then handle any outstanding payment amounts manually
Only one order edit can be active at a time. To make additional changes, you must either cancel the current edit or confirm it first.
Request an Order Edit
You can only request one order edit at a time. If you need to make additional changes, you’ll have to cancel the current order edit and request a new one, or force-confirm the current order edit. To request an order edit:- Open the order details page.
- In the Summary section, click on the ⋯ icon.
- Choose “Edit Order” from the dropdown.
- In the form that opens:
- To add an item:
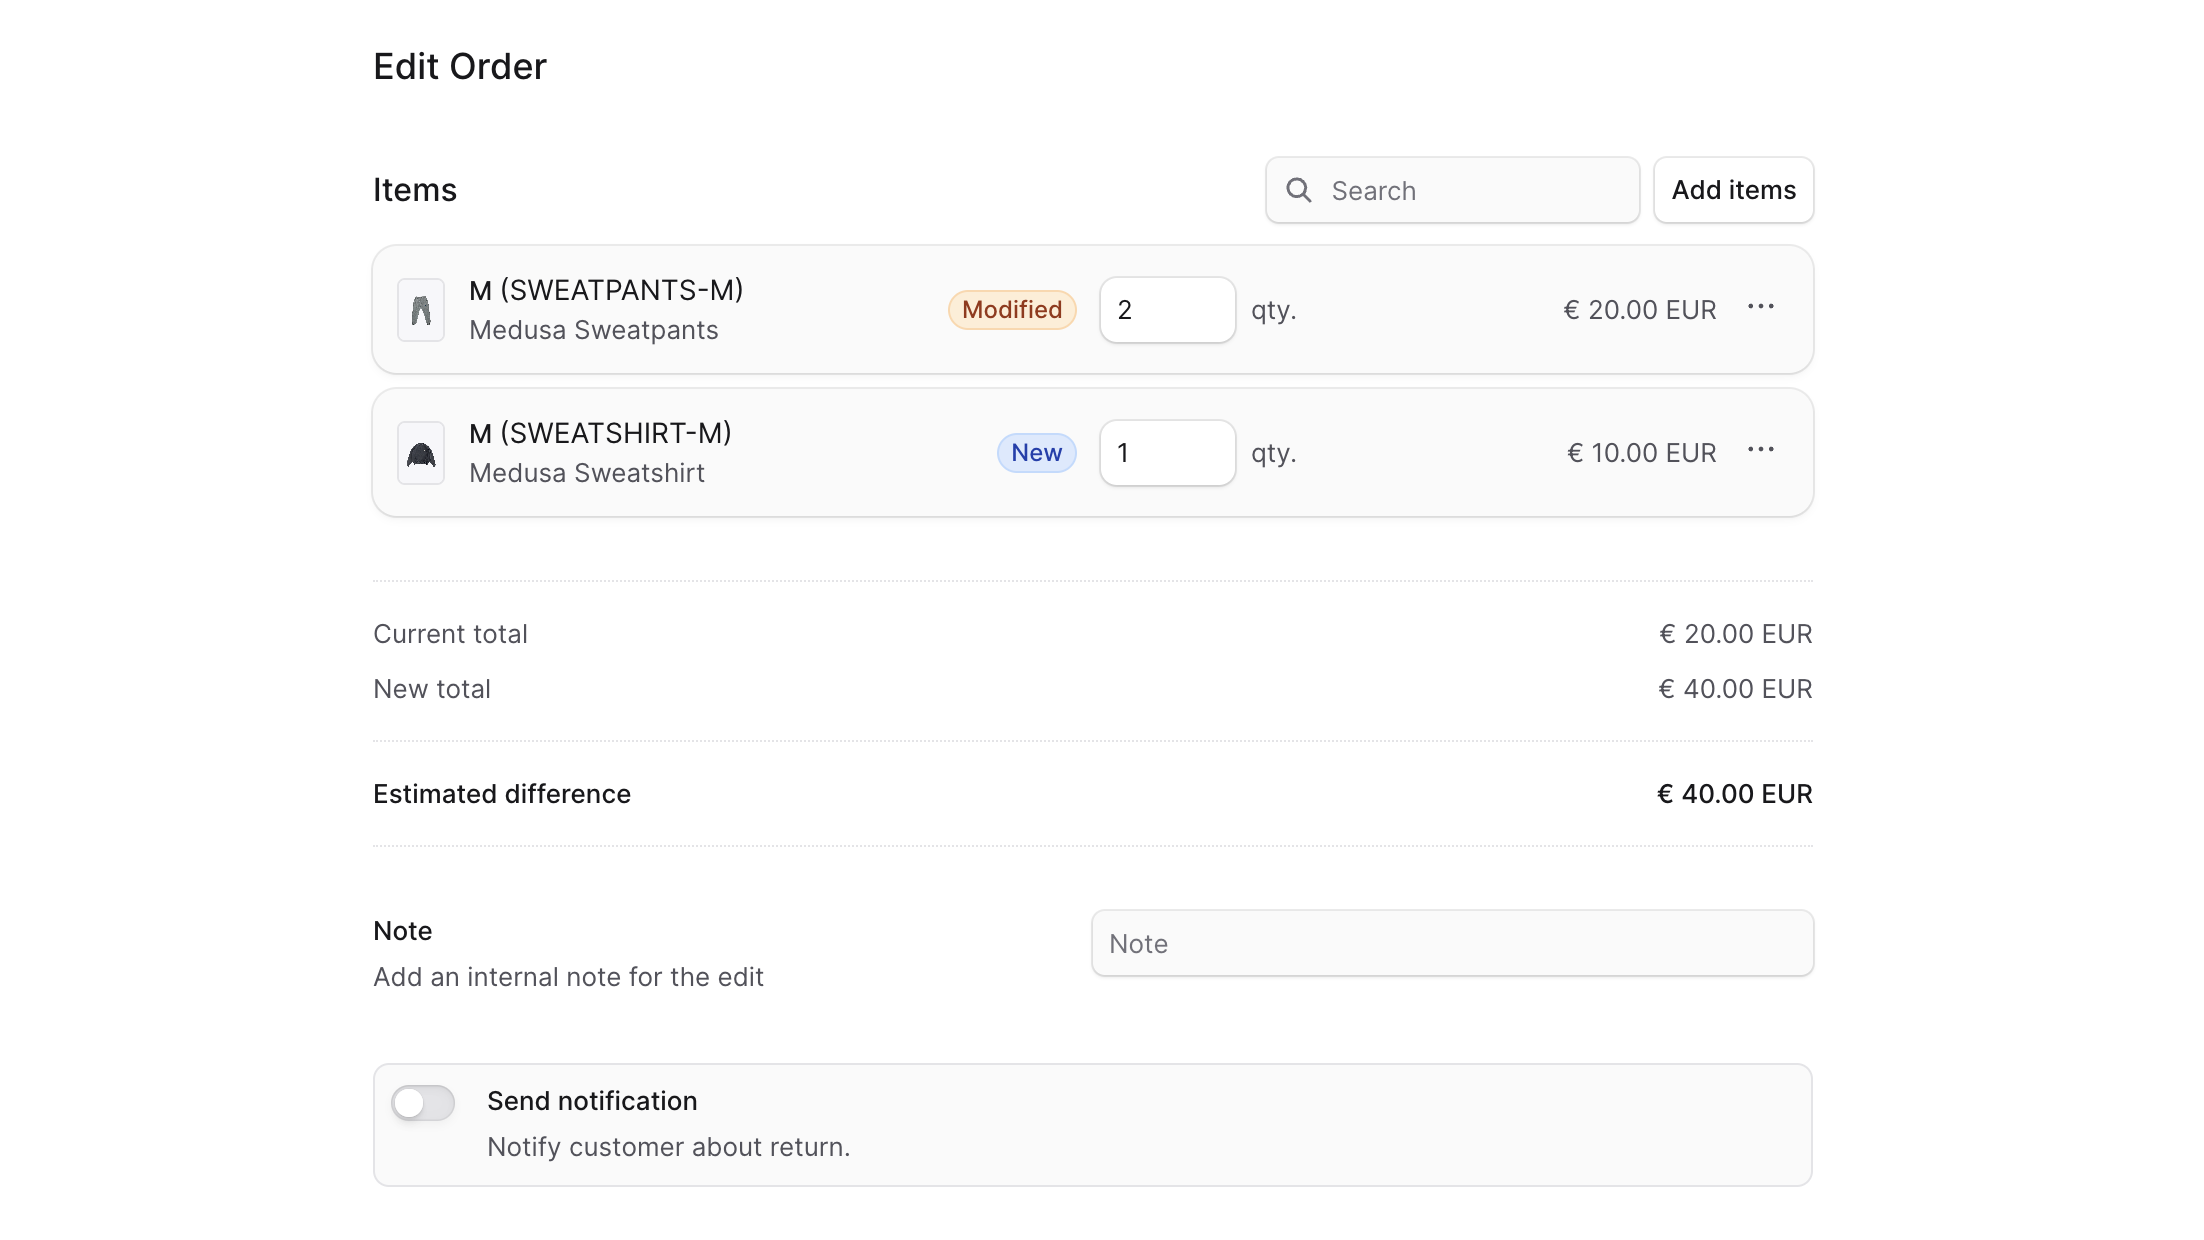
- Click on the Add items button.
- In the list that opens, click on the checkbox next to the items you want to add.
- Once done, click on the Save button. The item will be added under the Items section with the New badge. You can also update its quantity.
- To update an item’s quantity:
- Find the item under the Items section.
- Change the value for the qty input. This adds the Modified badge to the item.
- To duplicate an item:
- Find the item under the Items section.
- Click on the ⋯ icon.
- Choose Duplicate from the dropdown. A new item with the same details will be added under the Items section with the New badge.
- To delete an item:
- Find the item under the Items section.
- Click on the ⋯ icon.
- Choose Remove from the dropdown.
- If you remove a newly added item, the item will be removed from the list. Otherwise, the item will have a Removed badge and you can’t edit its quantity.
- To undo removing an item in the order, click on the same icon and choose Undo from the dropdown.
- Optionally enter a note for the customer to see in the Note field.
- If you want to send a notification to the customer about the order edit, check the Send notifications toggle.
- To add an item:
- Once done, click on the Confirm Edit button.
- Confirm requesting the order edit by clicking the Continue button in the pop-up.
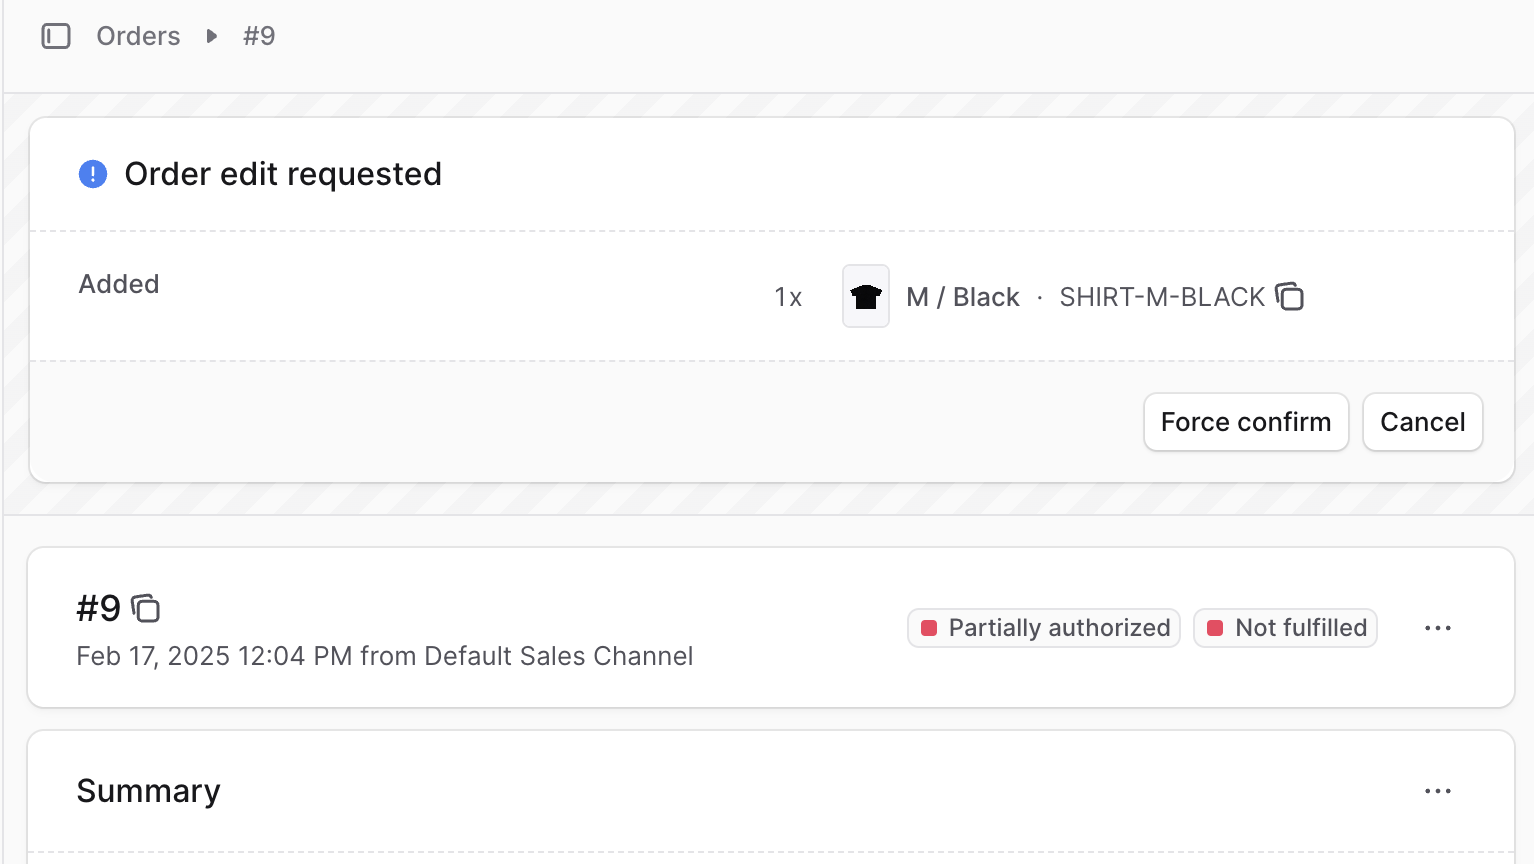
 Once requested, a new section Order edit requested will show at the top of the order’s details page with the edit’s details.
Force Confirm an Order Edit
As mentioned in the beginning of this guide, the customer must confirm the order edit for the changes to be saved on the order. However, you can force-confirm an order edit if you need to make the changes immediately, or if the customer delegates you to do so. ⚠️ Force-confirming an order edit makes irreversible changes to the order. To force confirm an order edit:- Open the order’s details page.
- Click the Force confirm button at the bottom right of the Order edit requested section.
Allocating New Items
For new items, you may see an Allocate Items button indicating that you need to allocate them manually from a stock location. Refer to this guide to learn how to do that.Handle Outstanding Amounts after Order Edit
After the order edit is confirmed, you can check if there are any outstanding amounts (to be captured from the customer or returned) in the Summary section. To handle outstanding amounts by refunding or capturing the payment, refer to the Payments guide.Fulfilling New Items
If the order edit added new items to the order, they’ll be shown in the Unfulfilled Items section after the order edit is confirmed. You can then fulfill them as explained in this guide.Cancel an Order Edit Request
If an order edit request hasn’t been confirmed yet, you can cancel it. To cancel an order edit request:- Open the order details page.
- Click the Cancel button at the bottom right of the Order edit requested section.
Key Features
Order editing in BoxNCase offers:- Real-time Updates: See changes reflected immediately in the interface
- Flexible Item Management: Add, modify, or remove any items
- Customer Communication: Send notifications about order changes
- Payment Integration: Handle additional payments or refunds automatically
- Inventory Management: Automatically allocate new items from stock
- Change Tracking: Full audit trail of all modifications
Important Considerations
Timing Restrictions
- Order edits are typically only available before fulfillment begins
- Some payment providers may restrict edits after authorization
- Check your business rules for edit policies
Payment Handling
- Additional payments required: Customer must authorize new charges
- Refunds due: Process automatically or handle manually
- Outstanding amounts: Must be resolved before order completion
Inventory Impact
- New items: Must be available in stock and allocated
- Removed items: Quantities returned to available inventory
- Modified quantities: Stock levels adjusted accordingly
Troubleshooting Common Issues
”Allocate Items” Button Appears
If you see an Allocate Items button after confirming an edit:- New items need manual allocation from a stock location
- Choose the appropriate warehouse/location
- Specify quantities to allocate
- Confirm the allocation
Outstanding Payment Amounts
After order edits, you may need to:- Capture additional payment for increased order value
- Process refunds for decreased order value
- Share payment links for customer to complete payment
New Items Need Fulfillment
Added items will appear in the Unfulfilled Items section and require fulfillment. See the Fulfillments guide for more information.Best Practices
- Communicate Changes: Always notify customers about significant order modifications
- Verify Inventory: Check stock availability before adding new items
- Handle Payments Promptly: Resolve outstanding amounts quickly
- Document Reasons: Include clear notes explaining why changes were made
- Monitor Status: Track edit confirmations and follow up as needed
- Train Staff: Ensure team understands edit workflows and limitations